
/pic2202239.png)
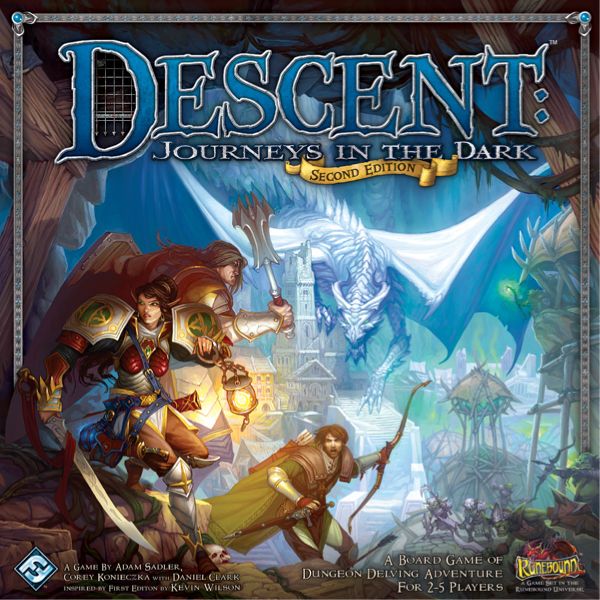
Qual é a sua dúvida sobre Descent: Journeys in the Dark (Second Edition) - Forgotten Souls?
Pergunte antes de baixar o manual: o assistente foi treinado neste arquivo e responde na hora, citando a página exata.
Tire dúvidas sobre o jogo
Pergunte qualquer coisa sobre Descent: Journeys in the Dark (Second Edition) - Forgotten Souls: regras, preparação, componentes, complexidade, preço ou se combina com seu grupo.
Escreva sua pergunta primeiro. Você criará sua conta grátis para ver a resposta — leva 20 segundos.
Manual completo
Navegue pelo manual ou baixe o PDF originalTexto completo do manual disponível para leitura Abrir texto
1
Game Overview
This cooperative adventure provides a new way to play Descent: Journeys in the Dark Second Edition by removing the overlord player and presenting a new quest for one to four hero players. Players should be familiar with the Descent: Journeys in the Dark Second Edition rulebook before reading these cooperative adventure rules.
TM
Activation Cards
Grab.
Engage the hero who has the highest Speed.
Engage the closest Diseased hero.
Attack an adjacent hero. Then, if that hero is Diseased, perform 1 additional attack targeting that hero.
Engage the closest hero.
Engage the hero who has the most damage tokens on his hero sheet.
Howl.
Engage the hero who is closest to an objective token.
Attack an adjacent hero.
If this monster performed an engage action, engage the same target again.
Engage the closest hero.
Spot the closest hero who has a Ranged weapon equipped.
Attack the closest hero in LOS who has a Ranged weapon equipped.
Spot the closest hero.
Attack the closest hero in LOS.
Attack an adjacent hero.
Engage the furthest hero.
Attack an adjacent hero.
If this monster performed an engage action, engage the same target again.
Each attack flesh moulders perform gains +2 Range.
Shadow Dragons
Flesh Moulders
Barghests
Zombies
1/10
10 Activation Cards
You turn a corner and see the massive Tharn disappearing into the distance. You push forward, but the dungeon’s halls are endless. It’s becoming harder and harder to breathe within the stone walls. Your fate may already be sealed...
Advance doom by 1.
1/10
10 Peril Cards
3
Room of Souls
A hero may spend 1 movement point while adjacent to the cauldron to pick it up. As an action, the hero carrying the cauldron may move 1 space. He cannot move or be moved through any other means.
As an action, or by suffering 2 damage and 2 fatigue, while adjacent to a pit space, the hero carrying the cauldron may destroy it. He cannot perform any actions other than those listed above.
If the hero carrying the cauldron suffers any amount of damage he tests willpower. If he fails, or is defeated, the cauldron cracks.
If a hero destroys the cauldron, discard it. That hero draws 1 search card, and each hero receives 2 XP. Then, refresh fate and discard this Exploration card.
If the cauldron cracks, advance doom by 1 and discard the cauldron. Each hero receives 1 XP. Then, discard this Exploration card.
Roll 1 gray defense die. Place 1 flesh moulder adjacent to the cauldron, or the hero carrying the cauldron, for each surge result, respecting group limits.
The cauldron cracks.
AFTER SETUP: Activate flesh moulders.
12 Exploration Cards
TM
a Game Set in the Runebound Universe. STOP!
In order to play this cooperative adventure, you will need to download and read the rules available at www.descenttheboardgame.com by clicking on the support page link.
Forgotten Souls
The small village of Summers Glade sits quietly in the shadow of a massive castle. You come upon the village in the hopes of replenishing your bodies and minds. Many dangerous encounters have left you tired and worn, but your resilience is unbroken.
To your surprise the town is devastated. Rooftops and walkways are covered in black ash. There is not an inhabitant in sight. Whatever flame consumed this town, it has taken all that lives.
Soon a shadow is cast upon you, and in front of the setting sun a young boy emerges. He slowly comes up to you, a glimmer of hope on his defeated face. “You came… too late…” The boy is weak and feeble. “The dragon lives… I will show you…” He slowly stumbles toward the castle entrance on the horizon. You follow.
Once inside the stone walls, the entrance seals behind you and the boy vanishes into the air, a grim smile spread across his face. There is no way out, your only choice is to delve deeper into the dungeon’s depths…
FORGOTTEN SOULS EXPANSION ICON
All the cards and sheets found in this expansion are marked with the Forgotten Souls expansion icon to distinguish these components from those found in the base game and other expansions.
Components
1 Title Sheet
1 Track Sheet
1 card
2 cards
3 cards
4 cards
5 cards
6 cards
7 cards
OVERLORD TRACK
LOOT TRACK
Turn Summary
1. Hero Phase
2. Overlord Phase
a. Overlord Effects
b. Fate (If there is no active Exploration card, advance fate by one and resolve one Peril card.)
c. Monster Activation
Monster Activation
1. Determine Monster Group
2. Note Active Effects
3. Choose a Monster
4. Perform Actions
5. Continue/Complete Activation
Monsters Spending
1. Hero Skills
2. Range
3. Special
4. Pierce
5. Damage
Quick Reference
The Golden Rules
• If the text on a card conflicts with the rules listed in this rulebook, the card takes precedence.
• If a game effect has multiple potential targets and the intended target is unclear, heroes choose the target of the effect from among the potential targets.
14+
1–4
2–3 Hrs.
Summary 1 Hero Phase 2 Overlord Phase a Overlord Effects b Fate If there is no active Exploration card advance fate by one and resolve one Peril card c Monster Activation Monster Activation 1 Determine Monster Group 2 Note Active Effects 3 Choose a Monster 4 Perform Actions 5 Continue Complete Activation Monsters Spending 1 Hero Skills 2 Range 3 Special 4 Pierce 5 Damage Quick Reference The Golden Rules If the text on a card conflicts with the rules listed in this rulebook the card takes precedence If a game effect has multiple potential targets and the intended target is unclear heroes choose the target of the effect from among the potential targets 14 1 4 2 3 Hrs
FANTASY FLIGHT GAMES
Descent: Journeys in the Dark Second Edition
Required to Play
© 2014 Fantasy Flight Publishing, Inc. No part of this product may be reproduced without specific permission. Descent: Journeys in the Dark, Runebound, and Fantasy Flight Supply are TM of Fantasy Flight Publishing, Inc. Fantasy Flight Games and the FFG logo are ® of Fantasy Flight Publishing, Inc. Fantasy Flight Games is located at 1995 West County Road B2, Roseville, Minnesota, 55113, USA, and can be reached by telephone at 651-639-1905. Retain this information for your records. Actual components may vary from those shown. Made in USA.
THIS PRODUCT IS NOT A TOY. NOT INTENDED FOR USE OF PERSONS 13 YEARS OF AGE OR YOUNGER.
Visit Us on the Web: www.FantasyFlightgames.com
The bloodthirsty dragon Tharn assimilates all he consumes into his ghastly army. Unfortunately for all who live, his appetite has proven insatiable.
Discover a new way to play Descent: Journeys in the Dark Second Edition with Forgotten Souls. This expansion removes the overlord player and allows 1 to 4 hero players to enjoy a fully cooperative adventure experience!
The heroes must explore a constantly expanding map while overcoming dangerous perils and completing diverse rooms, all before the forces of doom and fate bring about their untimely demise!
BEHIND EVERY DOOR LIES A DEADLY SURPRISE...
Forgotten Souls uDJ36
ISBN: 978-1-61661-928-2
9 781616 619282
EAN 13
1 Reference Sheet
---
GENERAL SETUP
Before playing this cooperative adventure, perform the following setup steps instead of those described in the base game.
1. Assemble the Exploration Deck: Take all Exploration cards and assemble the Exploration deck (see “Assembling the Exploration Deck” on page 4). Place it within easy reach of all players.
2. Prepare the Track Sheet: Place the TRACK SHEET within easy reach of all players. On the OVERLORD TRACK, place an orange hero token on the space that corresponds to the number of heroes playing; this is the DOOM TOKEN. Then, place a purple hero token on the upper space of the track; this is the FATE TOKEN. On the loot track, place a fatigue token on the lowest space of the track.
[Image: Track Sheet]
FATE TOKEN
DOOM TOKEN
FATIGUE TOKEN
3. Prepare Monsters: The monster groups required for this quest are listed on each Activation card. Take all Act I Monster cards and figures for the required monster groups and place them within easy reach of all players.
[Image: Activation Card]
4. Assemble the Activation Deck: Take all Activation cards and shuffle them together. This is the Activation deck. Place it facedown near the Exploration deck.
5. Assemble the Peril Deck: Take all Peril cards and shuffle them together. This is the Peril deck. Place it facedown near the overlord track.
[Image: Peril Card]
6. Assemble the Search and Shop Item Decks: Take all Search cards from the base game and shuffle them together; this is the Search deck. Place the Search deck facedown near the Track sheet. Separate the Act I and Act II Shop Item cards and shuffle them separately; these are the Act I and Act II Shop Item decks. Place the Act I Shop Item deck facedown near the loot track. Place the Act II Shop Item deck to the side for now.
7. Prepare the First Encounter: Place the Exploration card that represents the starting encounter (identified by the star in the upper-left corner) faceup on the table next to the Exploration deck. It is now the active Exploration card. Use the encounter guide at the back of this rulebook to set up the encounter (see “Exploration” on page 5).
[Image: "The Onset" Exploration Card]
[Image: "The Onset" Section of the Encounter Guide]
8. Prepare Tokens: Sort all damage, fatigue, hero, condition tokens and Condition cards into piles by type. Place each pile within easy reach of all players.
9. Hero Setup: The players follow the normal hero setup steps from the base game, with the following exceptions: If there is only one player, the lone hero player must control two heroes. If there are two or more players, each player controls one hero. A player makes independent decisions and takes separate turns for each hero he controls.
Note: Certain card and hero abilities from the base game and other expansions do not directly apply to cooperative play. If a player uses such a card or ability, he ignores any part of it that has no effect on the game (e.g., the Wildlander Class card “Danger Sense” causes the overlord to discard 1 Overlord card. This ability would be ignored in a cooperative adventure because there is no overlord and there are no Overlord cards).
10. Spend Experience Points: Each hero starts the game with 1 experience point that he can spend immediately on a Class card or save for future use.
2
---
3
1. Exploration Cards: The players assemble the Exploration deck and place it facedown.
2. Track Sheet: This sheet contains the overlord and loot tracks. The doom and fate tokens, as well as a fatigue token, are placed on their respective tracks.
3. Monster Cards: The monster cards corresponding to the monsters in this quest are placed in view of all players.
4. Activation Cards: The players shuffle the deck of Activation cards and place it facedown.
5. Peril Cards: The players shuffle the deck of Peril cards and place it facedown.
6. Shop Item Deck I: The Act I Shop Item deck is shuffled and placed facedown next to the loot track.
7. Shop Item Deck II: The Act II Shop Item deck is shuffled and placed facedown to the side.
8. Starting Encounter: This Exploration card is placed faceup on the table to indicate that it is active.
9. Starting Encounter Map: The starting encounter is set up as instructed by the encounter guide, leaving adequate space for expansion.
10. Class Card: Players may choose to spend the 1 experience they gain during "General Setup" on a Class card.
Setup Diagram (Three-player Game)
10
9
2
8
5
4
1
6
3
7
You are ill-prepared for the surprise attack. Zombies feast on your flesh while barghests gnaw at the bones underneath. This dungeon may be your grave.
Advance doom by 1. Then, discard this Exploration card.
The Onset
Each time a hero enters a space that is not adjacent to another hero, the hero who entered that space suffers 3 fatigue.
If there are no monsters on the map, discard this Exploration card.
1 card
2 cards
3 cards
4 cards
5 cards
6 cards
7 cards
OVERLORD TRACK
LOOT TRACK
2
---
ASSEMBLING THE
EXPLORATION DECK
1. Remove the starting encounter (identified by the star in the upper-left corner) from the other Exploration cards and set it aside. It is not used to assemble the Exploration deck.
2. Remove the three main encounters (identified by a number in the upper-left corner) from the other Exploration cards and set them aside.
3. Shuffle the remaining Exploration cards and deal them into three facedown stacks: two stacks of three cards and one stack of two cards.
4. Shuffle the #3 main encounter into the stack that only has two cards and place that stack facedown within easy reach of the players.
5. Shuffle the #2 main encounter into one of the other stacks and place that stack facedown on top of the previous stack.
6. Shuffle the #1 main encounter into the remaining stack and place that stack facedown on top of the other two stacks. The three combined stacks make up the Exploration deck.
PLAYING THE GAME
The game is played over a number of game rounds. A round consists of two phases, the Hero phase and the Overlord phase. Each hero takes one turn during the Hero phase, followed by monster activations and various game effects in the Overlord phase. Once the Overlord phase is complete, the round ends and a new round begins.
HERO PHASE
During the Hero phase, each hero takes one turn, following the normal steps of a hero turn in the base game. Each hero completes his entire turn before another hero begins his turn. At the start of each round, the players decide as a group the order in which each hero activates. This order may be different each round. If they cannot agree, they proceed clockwise, starting with a player determined at random. After all heroes have completed their turns, the Overlord phase begins.
OVERLORD PHASE
The Overlord phase occurs after all hero players have completed their turns. The Overlord phase is broken into three steps as follows:
1. Overlord Effects: Follow all effects printed in the red box of the active Exploration card (see "Overlord Effects" on page 6).
2. Fate: If there is no active Exploration card, advance fate by 1 and resolve one Peril card (see "The Overlord Track" below).
3. Monster Activation: Activate each monster on the map (see "Monster Activation" on page 7).
These steps are described in detail on pages 6-9. All rules regarding Overlord cards and the overlord player from the base game do not apply in cooperative adventures.
WINNING THE GAME
To win, the heroes must successfully complete the third main encounter of the quest (see "Main Encounters and Experience Points" on page 10). The heroes win or lose the game together.
THE OVERLORD TRACK
The doom (orange) and fate (purple) tokens advance toward each other on the overlord track as the heroes fail to complete encounters, move too slowly, or succumb to deadly perils. If the doom or fate tokens ever occupy the same space on the overlord track, the heroes immediately fail the quest and lose the game.
If a card or effect instructs players to advance fate, they move the fate token down the overlord track the required number of spaces. If a card or effect instructs players to advance doom, they move the doom token up the overlord track the required number of spaces.
If a card or effect instructs players to move fate backward, they move the fate token up the overlord track the required number of spaces. Players cannot move the doom token down the overlord track.
If a card or effect instructs players to refresh fate, they move the fate token to the top space of the overlord track.
1. DOOM
ADVANCES BY 1
2. FATE
ADVANCES BY 1
3. FATE MOVES
BACKWARD BY 1
4. FATE
REFRESHES
4
---
ADDITIONAL HERO RULES
In addition to the actions a hero can normally take during his turn, heroes now have the chance to explore and discover new encounters.
EXPLORATION
When a hero performs an open a door action, he follows the steps below:
1. Draw the top card of the Exploration deck and place it faceup on the table. That Exploration card is now ACTIVE. An active Exploration card defines an encounter's rules for as long as the card is active.
2. Locate the encounter in the encounter guide (found at the back of this rulebook) and set up the map as shown. Attach the map so that the entrance of the new encounter is connected to the exit of the previous encounter. Then, read aloud the italicized flavor text located under the encounter name. Finally, follow any text listed in the corresponding green box of the encounter guide, placing monsters and tokens as indicated.
3. Refer to the Exploration card for all rules regarding the encounter. Effects in the blue area of Exploration cards trigger from top to bottom. Any text that says "After Setup" occurs immediately after the encounter has been set up. Refer to "Monster Activation During a Hero Turn" on page 11 for Exploration cards that require monster activation after setup.
A hero cannot open a door if there is an active Exploration card. Doors cannot be closed.
EXPLORATION CARD ANATOMY
1. Encounter Icon: If this icon is present, it signifies that this encounter is a main encounter or the starting encounter.
2. Encounter Name: This area displays the name of the encounter.
3. Encounter Rules: These are the effects that occur while the Exploration card is active.
4. After Setup Rules: These effects occur immediately after the encounter is set up.
5. Flavor: This text describes what happens when the overlord effects occur.
6. Overlord Effects: These effects occur at the start of each Overlord phase.
EXPLORATION EXAMPLE
1. Tomble has opened the door and is therefore exploring. Players draw the "Fog-Filled Passage" encounter from the Exploration deck. This is now the active Exploration card.
2. Players locate the necessary tiles as indicated in the encounter guide and set up the map.
3. Players attach the entrance of the new encounter to the exit of the previous encounter.
4. Players read the setup text in the green box of the corresponding encounter guide and place the hybrid sentinels, objective tokens, and search token as indicated, based on the number of heroes.
5. Players now read the Exploration card for all rules regarding the encounter.
5
---
6
Loot
When a hero defeats a monster, he places a number of damage tokens on the loot track equal to the number of spaces the monster figure’s base occupied (e.g., if the hero defeats a barghest, he places two damage tokens on the loot track). Each time a hero places a damage token on the loot track, he places that token on the lowest empty space of the track.
If a hero defeats a master monster, he moves the fatigue token on the loot track up one space. This is done before he places any damage tokens on the loot track for defeating the monster. The fatigue token on the loot track cannot go past the highest space of the track.
The loot limit is influenced by the number of heroes playing and is represented on the loot track by gray silhouettes. When the number of damage tokens on the loot track equals the loot limit, the hero that last placed a damage token on the track draws a number of Shop Item cards from the current act's Shop Item deck equal to the number indicated by the fatigue token. He gives one of the Shop Item cards to any hero of his choice and places any remaining cards at the bottom of the Shop Item deck. Then, he removes all damage tokens from the loot track and moves the fatigue token back to its starting position.
Overlord Phase in Detail
The overlord phase occurs after all hero players have completed their turns. The players perform various steps that facilitate dangerous events and monster activity during the adventure.
1. Overlord Effects
Overlord effects are printed in the red boxes on the lower portion of Exploration cards (see “Exploration” on page 5). At the start of the Overlord phase, all Overlord effects on the active Exploration card trigger in order from top to bottom.
Some Overlord effects have a symbol. When one of these effects triggers, do not resolve the corresponding text. Instead, place one fatigue token next to the symbol. After placing a fatigue token, if the number of fatigue tokens matches the number associated with the symbol, the corresponding text triggers, and all tokens are removed. Continue placing one fatigue token during each Overlord phase for as long as the Exploration card remains active.
3
Threads of fungus, concealed by the dense fog, coil themselves around your legs, tightening their grip with every step. Zombies thrash at your sluggish bodies over and over, tearing your flesh clean off.
Fog-Filled Passage
Overlord Effects Section of an Exploration Card
2. Fate
If there is an active Exploration card, skip the Fate step. Otherwise, advance fate by one (see page 4) and resolve one Peril card.
PERIL CARDS
Each Peril card contains one or more effects that provide deadly surprises for the heroes. Players perform the following when they resolve a Peril card:
1. Draw 1 card.
2. If there are no monsters on the map, resolve the effect listed on the top half of the card.
3. If there are monsters on the map, resolve the effect listed on the bottom half of the card.
4. Discard the effect.
If the Peril deck runs out of cards, the discard pile is immediately shuffled to create a new Peril deck.
Peril effects do not apply to familiars, figures treated as heroes, and heroes who are not on the map.
Loot Track Anatomy
1. Loot Stack: Damage tokens will be placed in the spaces of this section, until the loot limit is reached.
2. Loot Limit: These spaces represent the loot limit depending on the number of heroes.
3. Loot Payout: The fatigue token will be moving up the spaces of this section, determining the number of cards drawn when the loot limit is reached.
2 Hero Loot Limit
3 Hero Loot Limit
4 Hero Loot Limit
Any tokens that would be placed above the loot limit as the result of an attack are ignored.
At any time during a hero’s turn, he may flip one of his hero’s faceup Search cards facedown, ignoring the effects of the card. If he does, he adds two damage tokens to the loot track.
Heroic Feats
Heroic feats do not refresh in cooperative play. Each hero may only use his heroic feat once per quest.
---
7
3. Monster Activation
If there are any monsters on the map during this step, draw one Activation card and perform the following:
1. Determine: The order that the monster groups activate is determined by their location on the Activation card, as shown below. Locate the first group (lowest number on the diagram) that is on the map and has not yet activated.
2. Note: Note any active effects for that group. Active effects are printed in italics directly under the name of each monster group.
3. Choose: If there are yellow and red boxes, minion (yellow box) and master monsters (red box) activate separately. The order in which monsters are activated is defined from top to bottom, with all monsters of the top box activating before any monsters of the bottom box. Choose one monster that has not activated from the top box. If all monsters of the top box have activated, choose one monster that has not activated from the bottom box.
If there are no yellow and red boxes, choose any monster of that group that has not activated.
4. Perform: Resolve all actions listed for that monster in order, from top to bottom, repeating the list of actions until that monster has performed two actions or follows the entire list and is unable to perform a listed action.
5. Continue/Complete Activation: If there are monsters of the activating group on the map that have not yet activated, repeat from step 3. If there are more monsters of a different group that have not yet activated, repeat from step 1. If all monster groups have been activated, discard the Activation card.
If an action has no effect, monsters do not perform that action. For example, if an action reads "attack an adjacent hero" and there is no hero adjacent to the active monster, then the monster does not perform that action. Always follow monster rules outlined in the base game (e.g., only one attack per turn, two actions per monster) unless specifically noted on the card.
If a monster has multiple potential targets during monster activation, the target closest to the activating monster is chosen.
If a monster has a condition that can be discarded by using an action, such as Stun, its first action must be to discard that condition. If a monster is in a pit space, its first action must be to exit the pit space and enter the adjacent space closest to the exit of the current encounter (see "Current Encounter" on page 10).
When an Activation card refers to a "hero," this includes figures treated as hero figures.
If the Activation deck runs out of cards, the discard pile is immediately shuffled to create a new Activation deck.
Peril Card Anatomy
1. Flavor: This italicized text describes the peril that has arisen.
2. Effect without Monsters: This effect is resolved if there are no monsters on the map.
3. Effect with Monsters: This effect is resolved if there are monsters on the map.
The monsters' eyes glow red with anger; a powerful energy drives them to action.
Draw 2 Activation cards instead of 1 during the next Monster Activation step of the Overlord phase and activate monsters once for each Activation card.
A fireball rushes at your group! Who will bear the brunt of this attack?
Roll 2 red power dice. The heroes must collectively suffer damage equal to the amount of damage rolled. Damage may be unevenly distributed among heroes.
Activation Card Anatomy
1. Monster Group Name: This area displays the name of the monster group.
2. Minion Activation: This section is yellow and specifies the actions for the minion monsters of the corresponding group.
3. Master Activation: This section is red and specifies the actions for the master monsters of the corresponding group.
4. Active Effects: These effects are active during the activation of the corresponding monster group.
5. General Activation: This section specifies the actions that all monsters of the specified group will take. The order in which monsters activate is decided by the players.
Barghests
- Engage the Target hero.
- Attack the Target hero.
- Engage the closest hero.
- Attack an adjacent hero.
- Engage the closest hero.
- Attack the adjacent hero who has the lowest remaining Health.
Choose a hero within 3 spaces of a Barghest. That hero is the Target.
Zombies
- Zombies reroll each X result until there are no X results remaining.
- Engage the closest hero.
- Attack an adjacent hero.
- Engage the furthest hero.
- Attack an adjacent hero.
- If this monster performed an engage action, engage the same target again.
Shadow Dragons
- Spot the furthest hero.
- Perform an attack targeting all hero figures in LOS, ignoring range requirements. Each figure rolls defense dice separately.
- Spot the closest hero.
- Attack the closest hero in LOS.
Barghests Engage the Target hero Attack the Target hero Engage the closest hero Attack an adjacent hero Engage the closest hero Attack the adjacent hero who has the lowest remaining Health Choose a hero within 3 spaces of a Barghest That hero is the Target Zombies Zombies reroll each X result until there are no X results remaining Engage the closest hero Attack an adjacent hero Engage the furthest hero Attack an adjacent hero If this monster performed an engage action engage the same target again Shadow Dragons Spot the furthest hero Perform an attack targeting all hero figures in LOS ignoring range requirements Each figure rolls defense dice separately Spot the closest hero Attack the closest hero in LOS
Flesh Moulders
- Grab.
- Engage the hero who has the highest Speed.
- Engage the closest Diseased hero.
- Attack an adjacent hero. Then, if that hero is Diseased, perform 1 additional attack targeting that hero.
- Engage the closest hero.
- Engage the hero who has the most damage tokens on his hero sheet.
- Howl.
- Engage the hero who is closest to an objective token.
- Attack an adjacent hero.
- If this monster performed an engage action, engage the same target again.
- Engage the closest hero.
- Spot the closest hero who has a Ranged weapon equipped.
- Attack the closest hero in LOS who has a Ranged weapon equipped.
- Spot the closest hero.
- Attack the closest hero in LOS.
- Attack an adjacent hero.
- Engage the furthest hero.
- Attack an adjacent hero.
- If this monster performed an engage action, engage the same target again.
Each attack flesh moulders perform gains +2 Range.
---
8
• Engage the Target hero.
• Attack the Target hero.
• Engage the closest hero.
• Attack an adjacent hero.
• Engage the closest hero.
• Attack the adjacent hero who has the lowest remaining Health.
Choose a hero within 3 spaces of a Barghest. That hero is the Target.
Zombies reroll each X result until there are no X results remaining.
• Engage the closest hero.
• Attack an adjacent hero.
• Engage the furthest hero.
• Attack an adjacent hero.
• If this monster performed an engage action, engage the same target again.
• Spot the furthest hero.
• Perform an attack targeting all hero figures in LOS, ignoring range requirements. Each figure rolls defense dice separately.
• Spot the closest hero.
• Attack the closest hero in LOS.
Shadow Dragons
Flesh Moulders
Barghests
Zombies
2/10
Monster Activation Example
1. During the Monster Activation step of the Overlord phase players draw one Activation card. There are flesh moulders and zombies on the map, so flesh moulders activate first followed by zombies.
2. The flesh moulder must move one space to spot (gain line of sight to - see page 9) Leoric of the Book, who is the closest hero to the flesh moulder's figure. Then, the minion attacks Leoric of the Book. Its activation is now complete.
3. Now the master flesh moulder must move two spaces to spot (gain line of sight to - see page 9) Widow Tarha, who is the furthest hero from the master flesh moulder's figure. Then, the master flesh moulder performs an attack that targets both Leoric of the Book and Widow Tarha. Its activation is now complete.
4. The master zombie moves three spaces to engage (attempt to move as close as possible to - see page 9) Widow Tarha, who is the closest hero to the master zombie's figure. Then, the master zombie attacks Widow Tarha since she is the only adjacent hero. Its activation is now complete.
5. Next, the minion zombie moves up to its Speed of 3 spaces to engage (attempt to move as close as possible to - see page 9) Widow Tarha, who is the closest hero to the minion zombies' figure. The minion zombie has a melee attack and is not adjacent to any hero so the attack action does not trigger. The list of actions repeats.
6. The Shambling ability prevents it from taking a second move action. The engage action does not trigger. The minion zombie is still not adjacent to any hero, so the attack action does not trigger. Since the players have gone through the entire list of actions and not triggered any of the actions, this monster’s activation is complete.
Zombie
Shambling • Disease
• +2 h
Shambling • Grab
• Disease • +2 h
3 5
3 9
---
9
COMBAT
When a monster performs an attack, the hero rolling defense dice also rolls the attack dice for that monster.
SURGES
When performing an attack, monsters sometimes gain one or more surges. When a monster has surges to spend, they should be spent in the priority listed below. If the monster spends a surge and still has additional surges to spend, follow the list again from the beginning. Continue doing this until the monster cannot spend any more surges or has no surges left to spend.
1. Hero Skills: A monster spends surges when certain hero skills, hero abilities, and heroic feats require the monster to spend surges to attack.
2. Range: A monster spends surges on additional range if the monster cannot hit all of its targets with the monster’s current range.
3. Special: A monster spends surges on special abilities only when it will have an effect on at least one of the monster’s targets (e.g., a monster will not Poison a hero who is already Poisoned). Special surge abilities include all abilities that are not Range, Pierce, or Damage.
4. Pierce: A monster spends surges on Pierce only when one or more shields have been rolled by at least one of the monster’s targets.
5. Damage: When monsters spend surges on damage, apply the surge with the highest damage bonus first.
SPECIAL MONSTER RULES
Shadow Dragons: The Fire Breath ability targets as many heroes as possible. The path cannot be traced through any monster figures.
Additional Rules
Movement
Monsters cannot enter terrain that causes them to suffer damage during movement.
MOVEMENT VOCABULARY
Activation cards use special vocabulary that is new to cooperative adventures. Players should familiarize themselves with the terms below.
Toward: When a figure moves toward a target, the figure moves into the target’s space if possible. Otherwise, the figure must end its movement in the closest possible space to the target following normal movement rules. The figure always takes the route that requires the fewest movement points.
Away: When a figure moves away from a target, the figure must increase the number of spaces between the figure and the target with each space moved. If a figure cannot increase the number of spaces between the figure and the target, the figure does not move.
Furthest: The target that is the greatest number of spaces away from the monster.
Closest: The target that is the fewest number of spaces away from the monster.
Engage: When an effect instructs a monster to engage a target, that monster performs a move action and moves toward the specified target. If a monster would not move when performing this action, this action is not performed.
Spot: When an effect instructs a monster to spot a target, that monster performs a move action and moves toward the closest space from which it would have line of sight to the specified target. If a monster already has line of sight to the target, that monster does not perform this action. If there is no space on the map from which the monster could have line of sight to the target, a different target is selected.
LOS: Some monster activation actions contain the acronym “LOS.” This acronym stands for “line of sight” and follows all of the rules for line of sight in the base game.
Spending Surges Example: Zombie
Shambling Disease +2 1
Shambling Disease +2 1
1. An hero player rolls all the dice in his defense pool, as well as the attack dice for the zombie.
2. The zombie has surge Disease, which is a special surge. However, the zombie cannot use surge Disease since it is not dealing damage, and thus the hero would not be Diseased. The hero player continues going down the list.
3. The zombie has surge +2 damage. Thus, the zombie spends his first surge on surge +2 damage.
4. Since the player goes to the top of the list again. This time the zombie spends its surge on surge Disease because it is now dealing damage and the hero will be Diseased.
---
SPOTTING EXAMPLE
1. The master flesh moulder is instructed to spot Syndrael. However, it already has line of sight to Syndrael, so it does not attempt to spot her.
2. The minion flesh moulder is instructed to spot Syndrael. It must move two spaces in order to gain line of sight to Syndrael. Once the flesh moulder has line of sight to Syndrael, it stops.
LARGE MONSTERS
When players determine movement for a large monster, they must choose one space that the monster occupies and count movement from the chosen space as if the figure occupied one space. When players move a large monster toward a target, they must choose the space occupied by the large monster that is closest to the target. After players move a large monster away from a target, they must choose the space occupied by the large monster that is furthest from the target. After players move a large monster toward or away from a target, players must place the monster as close to or as far away from the target as possible, respectively. Otherwise, large monsters follow the normal movement rules for large monsters.
ENCOUNTERS
Encounters in cooperative adventures are different from encounters in the base game and do not follow the same rules. An encounter consists of all map tiles shown under the corresponding section of the encounter guide and follows all rules in this section and on the respective Exploration card.
The rules of an encounter affect the whole map unless otherwise stated.
MAIN ENCOUNTERS AND EXPERIENCE POINTS
Main encounters are special encounters that are integral to each quest. Main encounters are labeled with a number on their Exploration card and corresponding section of the encounter guide. The outcome of one main encounter will affect the next main encounter, ultimately leading up to the final main encounter, or the Finale.
ROOM OF SOULS
Heroes gain experience points in the first two main encounters. When a hero gains experience points, he may immediately spend those experience points, along with any saved experience points from earlier in the quest, by acquiring new skill cards of his class. Players may save any unspent experience points for future use, but can only spend experience points immediately after gaining new experience points.
CURRENT ENCOUNTER
The current encounter is the encounter on the active Exploration card or the most recent active Exploration card.
ENTRANCES AND EXITS
Entrances and exits are defined spaces in each encounter. Refer to the encounter guide to locate an encounter's entrance and exit.
ENGAGING EXAMPLE
1. The minion barghest has a Speed of 4 and is instructed to engage Tomble.
2. The minion barghest is two spaces away from Tomble, but because it is a large monster it can be placed so that it is adjacent to Tomble.
OVERLAPPING MAP TILES
There are some situations in which players cannot set up an encounter because it would cause a map tile to overlap with an existing map tile. To solve this problem players must use END CAPS. An end cap is a two-square tile that is connected to other map tiles on only one side.
If map tiles overlap when placing a new encounter, use end caps to create a hidden passage instead. Connect one end cap to the exit of the previous encounter. Then, place the new encounter in an open space on the table and connect a second end cap to the entrance of the new encounter. The two end caps are considered linked.
If a figure is on a linked end cap, the figure may spend one movement point to move to the other linked end cap as if the spaces of both end caps were adjacent. If both spaces on the end cap a figure is moving to are occupied, the hero or monster places his figure in the closest empty space to that end cap.
Monsters and heroes cannot attack through nor draw line of sight through linked end caps.
10
---
11
Defeated Heroes
Each time a hero is defeated, advance fate by one.
Monster Activation During a Hero Turn
Some Exploration cards cause specific monster groups to activate after the corresponding encounter is set up, even though it is not the Overlord phase. To activate monsters during a hero’s turn, draw an Activation card and activate only the specified groups, then discard the Activation card. Monster activation is described in detail on page 7.
Transition to Act II
When an Exploration card instructs players to transition to Act II, they perform the following:
1. Place the Act II Shop Item deck next to the loot track. When drawing cards for loot, players will now draw from the Act II Shop Item deck.
2. Resolve any effects that trigger upon transitioning to Act II. These effects apply to monsters currently on the map as well as all future monsters.
Spawn and Place
If the encounter guide instructs players to spawn monsters, the players place monsters on the map based on the number of heroes as indicated in the encounter guide. If there are two heroes, place monsters on the spaces marked “2.” If there are three heroes, place monsters on the spaces marked “2” and “3.” If there are four heroes, place monsters on the spaces marked “2,” “3,” and “4.”
If players cannot spawn a monster because the required figure is already on the map, remove that figure from the map, recover all damage and remove any conditions on that monster, and place it as directed. When players have to remove figures from the map in order to spawn monsters for an encounter, those figures cannot come from that encounter.
If a peril effect or overlord effect instructs players to place new monsters on the map and there are not enough figures to place, place as many figures as possible. When players are instructed to place monsters on the map, they place master monsters first, respecting group limits.
The Golden Rules
There are two very important rules that players should keep in mind when playing cooperative adventures. These rules are below:
• If the text on a card conflicts with the rules listed in this rulebook, the card takes precedence.
• If a game effect has multiple potential targets and the intended target is unclear, heroes choose the target of the effect from among the potential targets.
Overlapping Map Tiles Example
1. The players attempt to place the “Room of Souls” from the Exploration deck. However, they cannot place the “Room of Souls” because it would intersect with the existing “Deadly Kennel.”
2. The players must choose a different exit from the tile they are exiting, which is the “Treasure Vault.”
3. The players place the next encounter, which is “The Room of Souls.” This end cap is linked to the one on the “Treasure Vault.”
[Diagram labels: Treasure Vault, Room of Souls, Deadly Kennel, 1, 2, 3]
---
12
The Onset
As you make your journey into the dungeon, corpses that lined the floor begin to writhe with life. Behind you, near the sealed entrance, monsters appear from the shadows!
You must stand together!
Treasure Vault
The room glows a magnificent golden hue. Riches from the rich, forgotten valuables from the poor.
Shiny Corridor
You catch a glint of something shiny in the corner of your eye, but as you move forward it begins to vanish!
Hall of Riddles
A lengthy riddle is inscribed onto the door at the far end of the hall. The markings are handmade; the deep crevices hollowed by unknown hands.
Tunnel’s End
There is a ghastly pounding coming from the other side of the door. “Quick, quick, come my heroes, shhh, quick, stop it, come, now!” The voices fade and the pounding stops. The locked door will require the force of two heroes.
Encounter Guide
19B Entrance
8B Exit
30B Encounter Key
29B Covered
28B Treasure
Zombies
Barghests
Flesh Moulders
Shadow Dragons
---
13
26B
20B
Lengthy Sewers
Water drips from the ceiling as a cool breeze sweeps through the putrid air. A burst of concentrated energy flies overhead, just missing you!
Fog-Filled Passage
A green smog swirls from the door as you pull it open. Villagers of Summers Glade begin to move towards you with their hands outstretched. Once they get close you begin to realize something: they’re all dead.
Trash Heap
An unbelievable stench hangs in this dreary space. The aroma is intensified by an extreme heat coming from the far side of the room. These are more of Tharn’s followers, blocking the way to the locked exit. A magical key crafted from a dragon’s scale lies in a large mound of filth, but if the dragons are defeated too soon, the key will be lost with them.
Deadly Kennel
Deep breathing and muffled yelps come from a pile of resting barghests. The smell of rotting flesh still lingers between their teeth. You spot a trap lever in the corner held in place by a woven sack. You lean in forward to get a better look, but you trip and stumble into the room!
21B
2B
5B
---
14
Room of Souls
Servants of the mighty dragon stand guard in front of a large cauldron. Inside the stone container lies innocent souls, not yet lost to the dragon’s control. Releasing the souls into the pit may be their only chance of salvation. But you stand disturbed, your presence provokes a chilling moan in the chorus of souls.
The Lava Tomb
The spirits have lured a helpless farmer away from his family and chained him in this deathly tomb, doomed to suffer the same fate they had to bear. He struggles with his bonds, like a squirming rat in the eyes of a large serpent. He is the dragon’s next meal.
Throne of the Fallen
Tharn, the massive dragon who commands this dungeon, spots your band of heroes. With a thunderous roar he beckons the spirits to rise from the ground. Anger and hatred flare as the dead villagers of Summers Glade cast their eyes upon you. The only way out is a tunnel that’s been sealed shut. You must be quick and avoid any traps, or you too will become one of Tharn’s minions.
Cauldron
Farmer
Blocked Tunnel
Trap
4B 11B 27B 12B 18B 1B 17B
---
15
Credits
Cooperative Adventure Rules Design: Jonathan E. Bove
Special thanks to Nathan I. Hajek and Justin Kemppainen for their
extensive input throughout the design process.
Descent: Journeys in the Dark Second Edition Design: Adam Sadler and
Corey Konieczka with Daniel Lovat Clark
Producer: Jason Walden
Editing & Proofreading: Brendan Weiskotten
Graphic Design: Chris Beck
Graphic Design Manager: Brian Schomburg
Cover Art: Jesper Ejsing
Managing Art Director: Andrew Navaro
Production Manager: Eric Knight
Executive Game Designer: Corey Konieczka
Executive Game Producer: Michael Hurley
Publisher: Christian T. Petersen
Playtesters: Brad Andres, Jason Bailey, Reagan Bailey, Samuel Bailey,
Mark Bell, Dane Beltrami, David Bernier, Maxime Bernier, Frank Brooks,
Pippin Brown, Kalani Craig, Marcel Cwertetschka, Joshua Danish,
Christian Emminger, John Evans, Herbert Graf, Russell Hall, Michaël
Juneau, Jean-Philippe Leclerc, Lukas Litzsinger, Isabella Mattasits, Aaron
Myers, Sarah Smith-Robbins, Peter Schober, John Taillon, Richard Wappel
© 2014 Fantasy Flight Publishing, Inc. No part of this product may be reproduced
without specific permission. Descent: Journeys in the Dark, Runebound, and Fantasy
Flight Supply are TM of Fantasy Flight Publishing, Inc. Fantasy Flight Games and the
FFG logo are ® of Fantasy Flight Publishing, Inc. Fantasy Flight Games is located at
1995 West County Road B2, Roseville, Minnesota, 55113, USA, and can be reached by
telephone at 651-639-1905. Retain this information for your records. Actual components
may vary from those shown. Made in USA. THIS PRODUCT IS NOT A TOY. NOT
INTENDED FOR USE OF PERSONS 13 YEARS OF AGE OR YOUNGER.
Visit Us on the Web
www.FantasyFlightGames.com
Epilogue
If you successfully destroy the tunnel in the Throne of the Fallen, read the
following aloud:
With a mighty blow, the wooden barricade blocking the tunnel is smashed to pieces.
Seeing your escape, Tharn rises in a desperate rage, slamming his tail against the many
pillars of the great room. Piece by piece the dungeon's ceiling falls to the ground, collapsing
the enormous castle. Tharn accepts his fate, but he refuses to allow you to leave alive. You
make your way through the small corridor, spotting the light of day in the distance. An
explosion of fire is released behind you, filling the tunnel with a deadly heat. You make it
outside just before the flames overtake you! The tunnel walls cave in, and you hear a faint
roar in the distance. The dragon's fate is sealed.
The heroes win!
If the doom and fate counters occupy the same space, or all 8 villager
tokens are placed on the Throne of the Fallen, read the following aloud:
Tharn's spirits have grabbed hold of you. Your bodies slow, and your minds become faded.
The world around you changes into a warped dream. In the distance, Tharn approaches.
The beast takes great care with each step; his motions are calm. Then he is upon you. His
warm breath flows around you, yielding a strange sense of comfort. Tilting his head up,
Tharn samples the air, deciding whether his army of spirits will grow, or if his next meal
is prepared. Either way, your fate is sealed.
The heroes lose!
---
Turn Summary
1. Hero Phase
2. Overlord Phase
a. Overlord Effects
b. Fate: Exploration card, advance fate by one and resolve one Peril card.
c. Monster Activation
1. Determine Monster Group
2. Note Active Effects
3. Choose a Monster
4. Perform Actions
5. Continue/Complete Activation
Monsters Spending
1. Hero Skills
2. Range
3. Special
4. Pierce
5. Damage
Defeated Heroes
Each time a hero is defeated, advance fate by one.
Special Monster Rules
Shadow Dragons: The Fire Breath ability targets as many heroes as possible. The path cannot be traced through any monster figures.
Movement Vocabulary
Toward: When a figure moves toward a target, the figure moves into the target’s space if possible. Otherwise, the figure must end its movement in the closest possible space to the target following normal movement rules. The figure always takes the route that requires the fewest movement points.
Away: When a figure moves away from a target, the figure must increase the number of spaces between the figure and the target with each space moved. If a figure cannot increase the number of spaces between the figure and the target, the figure does not move.
Furthest: The target that is the greatest number of spaces away from the monster.
Closest: The target that is the fewest number of spaces away from the monster.
Engage: When an effect instructs a monster to engage a target, that monster performs a move action and moves toward the specified target. If a monster would not move when performing this action, this action is not performed.
Spot: When an effect instructs a monster to spot a target, that monster performs a move action and moves toward the closest space from which it would have line of sight to the specified target. If a monster already has line of sight to the target, that monster does not perform this action. If there is no space on the map from which the monster could have line of sight to the target, a different target is selected.
LOS: Some monster activation actions contain the acronym “LOS.” This acronym stands for “line of sight” and follows all of the rules for line of sight in the base game.
Quick Reference
The Golden Rules
• If the text on a card conflicts with the rules listed in this rulebook, the card takes precedence.
• If a game effect has multiple potential targets and the intended target is unclear, heroes choose the target of the effect from among the potential targets.
1. Doom Advances by 1
2. Fate Advances by 1
3. Fate Moves Backward by 1
4. Fate Refreshes Doom and Fate
---
Por que perguntar ao BoardGamesBot
Em vez de folhear o manual inteiro- Respostas precisas Baseadas exatamente neste manual, com a página de origem.
- Economize tempo Ache a regra em segundos, sem folhear 16 páginas.
- A qualquer hora Tire dúvidas no meio da partida, direto do celular.
- 100% grátis Crie sua conta grátis e comece a usar agora.
Como funciona
Três passos até a resposta- 1 Faça sua pergunta Digite sua dúvida sobre as regras deste jogo.
- 2 Crie sua conta grátis Leva 20 segundos — é só para guardar seu histórico.
- 3 Receba a resposta A IA encontra a regra exata e cita a página do manual.
Expansão de
Conteúdo adicional publicado
Manual publicado pela editora · uso para consulta de regras. Mais sobre o jogo em BoardGameGeek e Ludopedia .
