Qual é a sua dúvida sobre Petrichor: Collector's Pack?
Pergunte antes de baixar o manual: o assistente foi treinado neste arquivo e responde na hora, citando a página exata.
Tire dúvidas sobre o jogo
Pergunte qualquer coisa sobre Petrichor: Collector's Pack: regras, preparação, componentes, complexidade, preço ou se combina com seu grupo.
Escreva sua pergunta primeiro. Você criará sua conta grátis para ver a resposta — leva 20 segundos.
Manual completo
Navegue pelo manual ou baixe o PDF originalTexto completo do manual disponível para leitura Abrir texto
David Chircop’s
Petrichor
n. The pleasant earthy smell after rain
COLLECTOR’S EDITION
Rulebook Version 1.0
---
22
Table of Contents
Table of Contents .......................................................... 2
Collector's Edition Notes ................................................. 3
Expansion: Flowers ..................................................... 3
Expansion: Honeybee ................................................. 3
Expansion: Cows ......................................................... 3
Expansion: Promos ..................................................... 3
Game Overview ............................................................. 3
Base Game Components ................................................. 4
Flowers and Honeybee Components ............................. 5
Cows Components ......................................................... 6
Promo Components ....................................................... 7
Game Setup ................................................................... 8
Goal of the Game ........................................................ 10
Game Flow .................................................................. 10
Phase 1: Action Phase ................................................. 10
Playing Cards ............................................................... 10
Placing Votes ............................................................... 11
Bee Actions .................................................................. 11
Passing (3+ Players) ..................................................... 12
Passing (2 Players) ....................................................... 12
Hand Limit ................................................................... 12
Additional Concepts .................................................... 12
Merging and Overflowing ............................................ 12
Running Low on Components ..................................... 13
Card Actions ................................................................ 14
Frost Action .......................................................... 14
Sun Action ............................................................ 14
Wind Action .......................................................... 14
Rain Action ........................................................... 14
Grazing Action ...................................................... 14
Growing Crops ............................................................ 15
Methane ...................................................................... 15
Methane in the Clouds ............................................. 15
Spending Methane ................................................... 15
Methane in the Supply ............................................. 15
Phase 2a: Climate Phase ............................................. 16
Phase 2b: Weather Phase ............................................ 17
Resolving Weather Spaces ........................................... 17
Weather Effects ............................................................ 18
Frost Weather ...................................................... 18
Sun Weather ........................................................ 18
Wind Weather ...................................................... 18
Rain Weather ....................................................... 18
Extreme Weather Events .......................................... 18
Winning the Weather Vote .......................................... 19
Changing First Player (2 Players) ................................. 19
Phase 3: Harvest Phase ............................................... 20
Harvesting Crops ......................................................... 20
Breaking Ties ........................................................... 20
Cow Bonus ............................................................... 20
Fertilizer Bonus ........................................................ 20
Pollen Tokens ........................................................... 20
Phase 4: Cleanup Phase .............................................. 21
Game End & Victory ................................................... 21
Player Power Cards ..................................................... 22
Forecast Cards ............................................................ 22
Using Forecast Cards ................................................... 22
Southern Winds Solo Mode ........................................ 22
Game Setup ................................................................. 22
Game Flow .................................................................. 23
Neutral Player Turn ...................................................... 23
Climate Phase ............................................................. 24
Methane Limits ........................................................ 24
Weather Phase ............................................................ 24
Harvest Phase ............................................................. 25
Game End & Victory ................................................... 25
Increasing the Difficulty ............................................... 25
Appendix ..................................................................... 26
Crop Tiles .................................................................... 26
Mini-Expansions .......................................................... 32
Forecast Cards ............................................................ 36
Player Power Cards ..................................................... 37
Southern Winds Cards ................................................. 38
Drafting Variant ........................................................... 39
Credits ......................................................................... 40
---
33
If you’re a big fan of Petrichor, you know what to do here. If you’re new and just went all in, we should give you some tips on how to venture into the rain, as things can get quite stormy. First of all, for your first few games, play just the base game of Petrichor. The base game has a lot of variety by itself! Once you have experimented a bit with strategy for the different crop tiles, try one of the expansions.
Expansion: Flowers
Flowers is a rather lightweight expansion that adds a fifth player and a variety of new crops. Games with five players go longer, so we recommend playing the short game. You will also find new concepts in Flowers, like player powers, that will be expanded further in later expansions.
Expansion: Honeybee
Honeybee adds a full layer of strategy to Petrichor that we love as experts. We think the game is better with Honeybee included, but it does add to the brain burn. We encourage you to add Honeybee after several plays of the base game. Things are about to get really competitive!
Expansion: Cows
If a cute bee wasn’t enough to get everyone curious about your new game, how about two cute cows? Cows adds some really clever ways to mess with the contents of the clouds and fields. When Cows and Honeybee are combined together, the game becomes a beast of interlocking mechanisms. We love it, but take it easy before you try everything at once.
Expansion: Promos
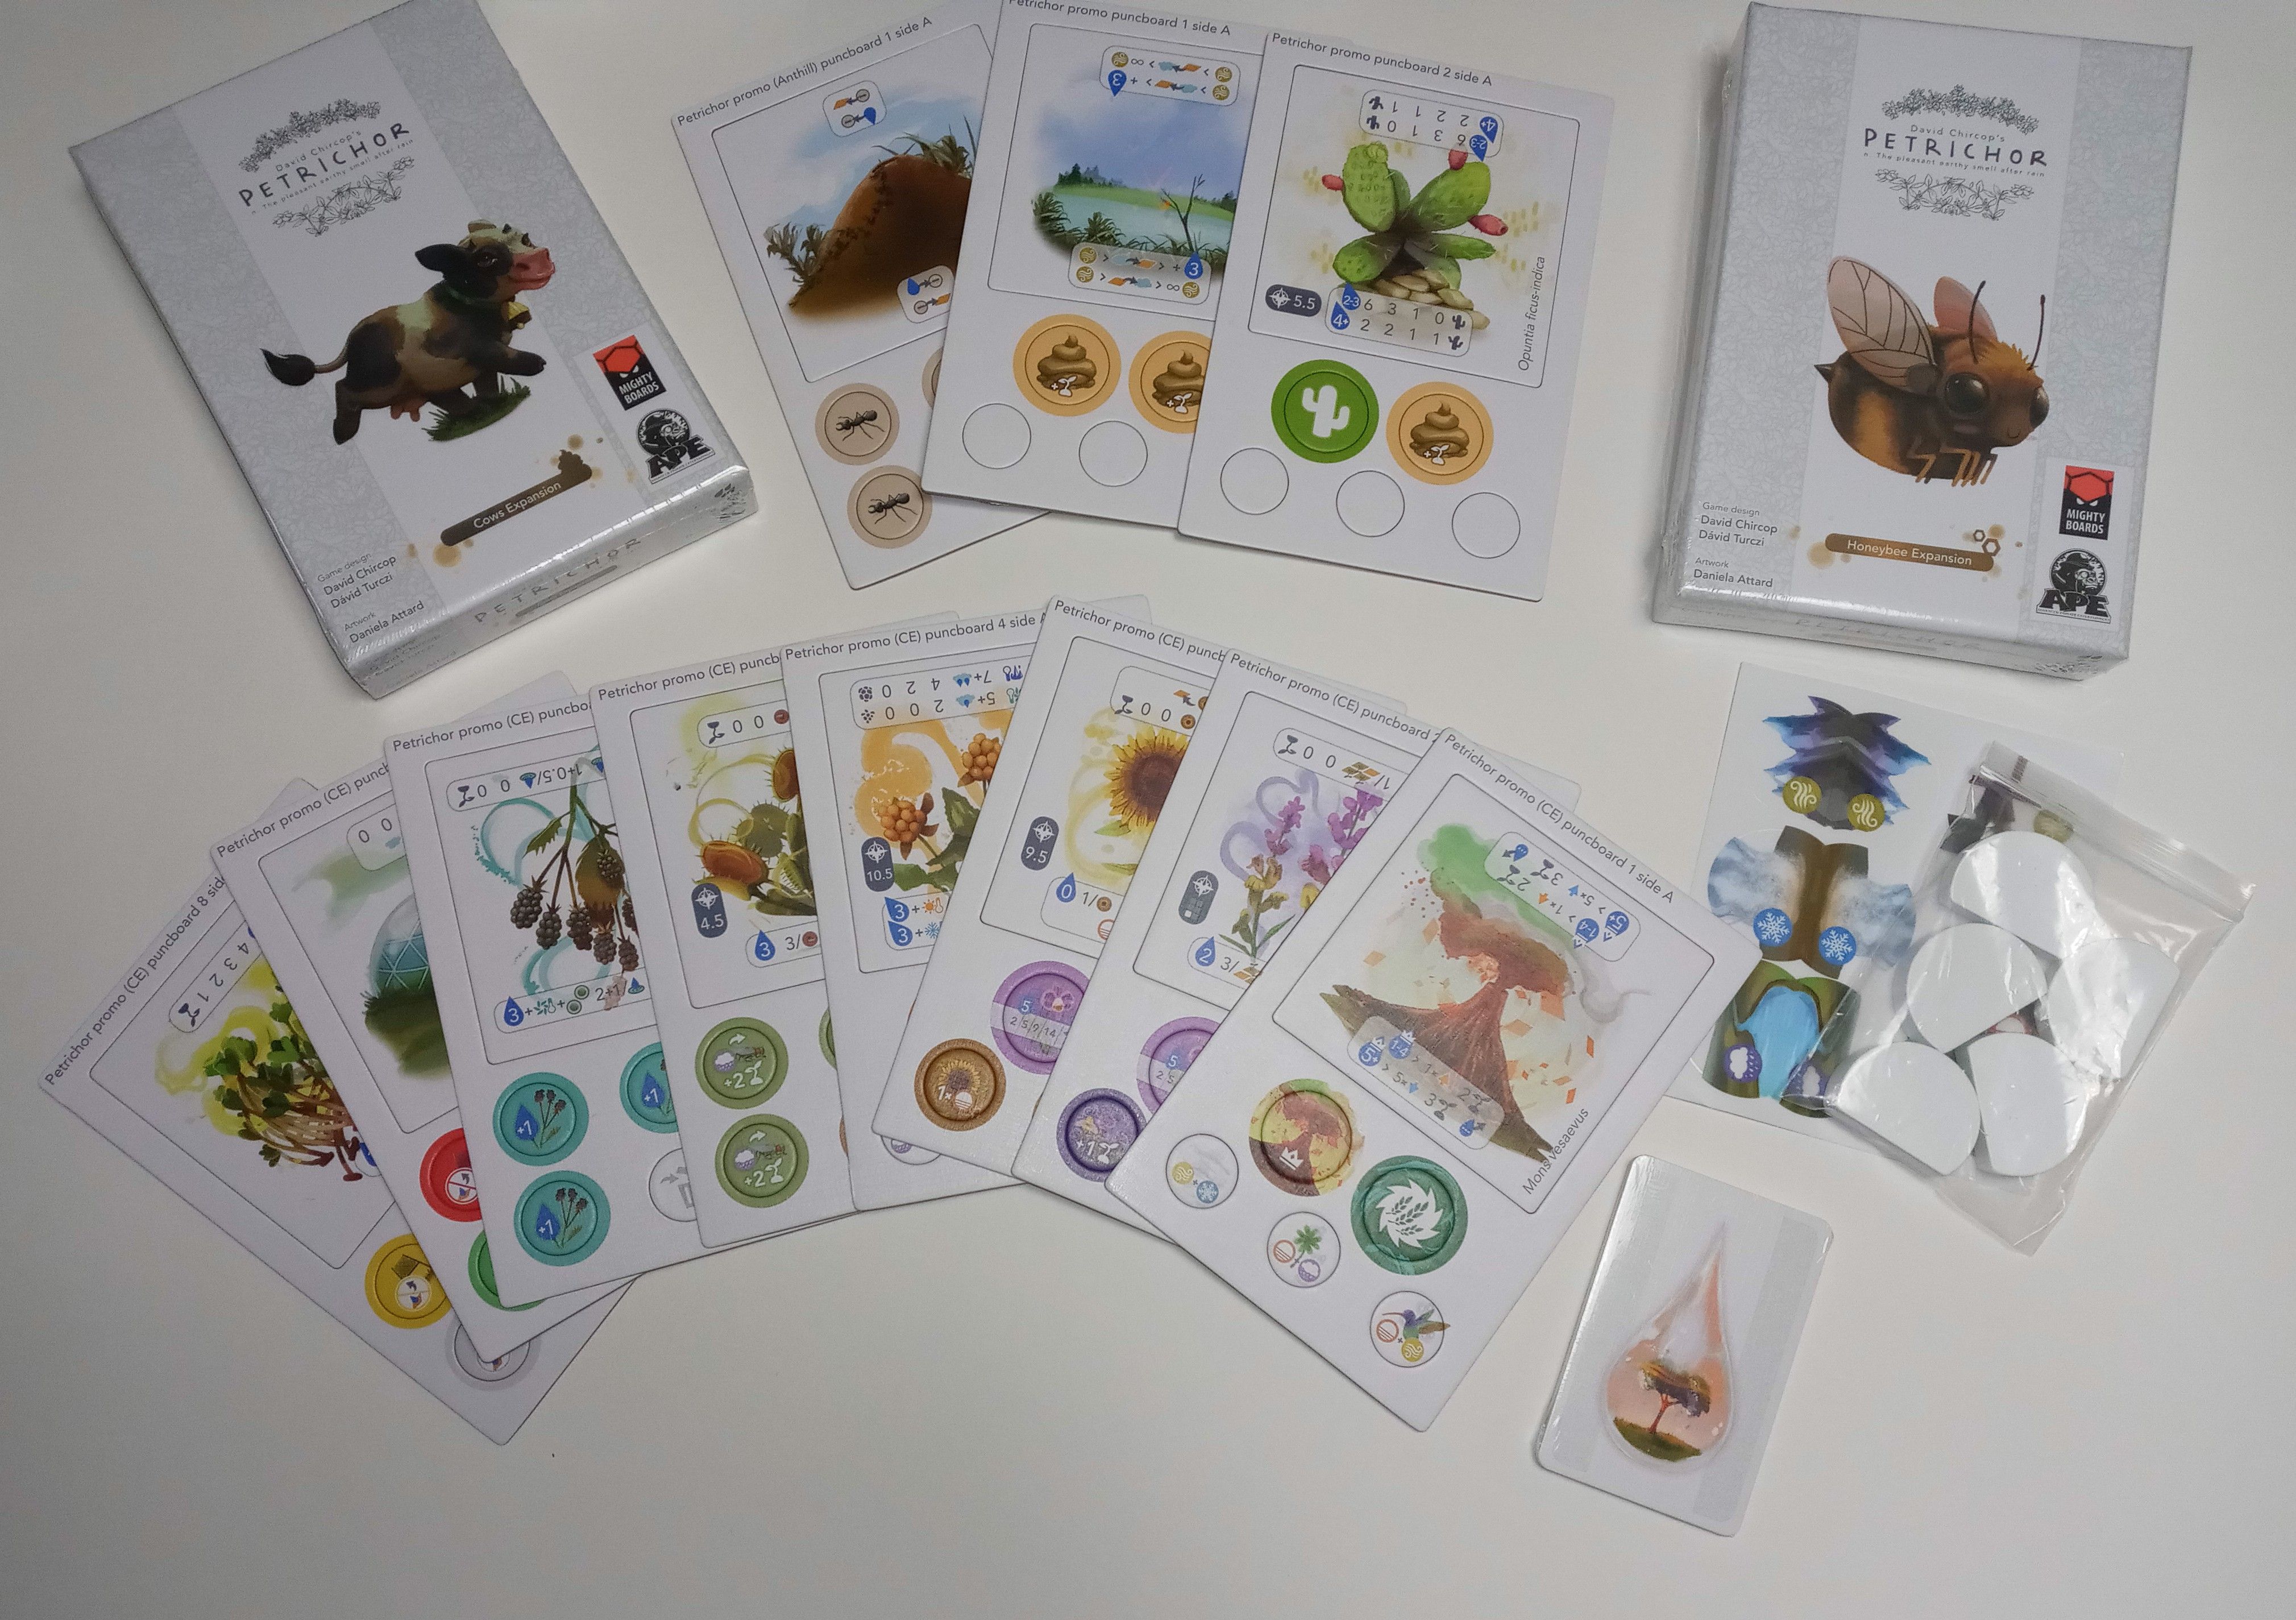
Okay, we let ourselves go a bit crazy here. I mean, since when is a volcano considered a “crop”? But some of the new tiles included here are really creative and inspire a variety of images, especially when you combine them with the floating clouds that come in this collector’s edition. After you learn the game, add one or two of these flexible promos to your plays. Or heck — add all of them for all we care. Experiment! Go wild! It’s not like you’re playing with nature...
Word Definition
petrichor /ˈpɛtrʌɪkɔː/ (noun) – a pleasant smell that frequently accompanies the first rain after a long period of warm, dry weather
Game Overview
In a game of Petrichor, the players use cards that represent four types of weather to manipulate clouds above the fields and influence the upcoming weather. Each player tries to ensure that their water drops are in the majority on the growing crops when the harvest arrives. Players score points by having the most water drops on individual crops and by having the most votes on the two selected weather effects each round.
Collector’s Edition Notes
---
Base Game Components
Cards
12 x Frost, Sun, Wind, Rain action cards
5 player aid cards
9 southern winds cards
Clouds
24 clouds (12 cardboard, 12 plastic) - Use one type or the other.
24 thundercloud tokens (12 cardboard, 12 resin) - Use one type or the other.
Tiles
16 crop tiles - These form the fields as the main area of play.
Cardboard Tokens
12 wheat tokens
16 growth tokens
5 +50/+100 point tokens - given to players who lap the score track
Wooden Markers
1 first player marker
5 x 20 water drops
5 x 12 vote markers
5 x 2 score markers
Custom Dice
3 harvest dice - Each side shows 1–4 votes or the harvest icon.
1 normal six-sided die
Solo Mode
1 round marker
1 game board
Pieces for the fifth player were released with Flowers.
Card Actions
- Create light cloud, place 1 of your drops in it and place it on a field without a cloud.
- Add 2 of your drops into a cloud you are present in.
- Move a cloud you are present in to an adjacent space.
- Rain any 1 drop from up to 2 clouds you are present in.
Weather Effects
- All light clouds become thunderclouds.
- In turn order, choose a cloud and double your presence. Coffee may develop.
- In reverse turn order, move any 1 drop from a field to an adjacent field.
- All thunderclouds rain. Rice may develop.
Game Flow
Players play a card on their turns to perform an action & vote or pass.
Optional: if no one has passed yet, you may additionally play 2 matching cards to perform a second action & vote.
Keep up to 4 cards.
3+ player game: If you pass first, discard all your cards. Take first player marker, or if you have it already, pass it to the left.
Actions
1. Action Phase
2. Weather Phase
3. Harvest Phase
4. Clean-up Phase
Passing
Voting
a. Matching weather icon
b. Clockwise next weather
c. Decrease a harvest die
---
Cards
Tiles
Wooden Tokens
Solo Mode
Cards
Cardboard Tokens
Wooden Piece
Cardboard Tokens
Tiles
55
5 player power cards
16 forecast cards
Dandelion
Primrose
Snowdrop
Apple
Blueberry
Passion Fruit
Watermelon
2 southern winds cards
1 player power card
2 forecast cards
5 player aid cards
24 pollen tokens
20 honey tokens
Component Limitations
All components except honey tokens and fertilizer tokens are intended to be limited, and the rules will mention what to do when they run out. If the honey or fertilizer runs out, use a suitable proxy as necessary.
1 wooden bee
8 dandelion tokens
5 primrose tokens
1 snowdrop token
Flowers and Honeybee Components
End Game
Honey Scoring
10
12
15
15
0
6
9
9
0
4
4
0
0
0
Moving the Bee
As a second action a player may discard any card to move the Bee to an adjacent tile.
Optional: spend 1 Honey to move anywhere instead (including leaving in place).
Once moved the player must perform one Bee action.
Bee actions (choose one)
• Collect all dormant pollens on the Bee’s tile.
• Spend 1 or 2 pollen to place 1 drop for each on the Bee’s tile (place germinated pollen if Honey tile).
• Collect Honey.
1. Action Phase
17
10
...
1
1
*
/
:
18
11
...
2
1/
1
:
1
3
3
=
...
special tile!
---
Cards
Tiles
Solo Mode
Plastic Tokens
Wooden Pieces
Cardboard Tokens
Board
Wooden Marker
66
Cows Components
10 Grazing action cards
1 player power card
2 forecast cards
5 player aid cards
Baobab
Date Palm
Norway Spruce
Sweet Chestnut
3 southern winds cards
12 fertilizer tokens
7 pasture tokens
1 spruce token
12 methane crystals
2 wooden cows
1 climate board
1 climate marker
Climate Events
Scorching
• Remove 1 methane whiff from a cloud.
• Remove 1 droplet from a cloud.
+ Warm climate event effects.
Warm
• Remove 1 methane whiff from a cloud.
• Remove 1 droplet from a tile.
Temperate
• Score 2.
Cold
• Add 1 methane whiff from the supply to a cloud.
• Add 1 own droplet on a tile.
Freezing
• Add 1 methane whiff from the supply to a cloud.
• Add 1 own droplet to a cloud.
+ Cold climate event effects.
12 13 14
...
2+
19
1. Action Phase
Cow (choose one)
Nature’s Call
• Place 2 Methane in a cloud at a cow’s location or adjacent to it (or create a cloud with 2 Methane in it).
• Place a fertilizer token in the cow’s location.
• Move the cow to an adjacent tile without a cow.
Time Heals
• Move all methane from a cloud you control to your personal reserve.
• Move 1 cow directly to that tile (unless a cow is already present).
Methane
When taking the Rain action, return 1 Methane to rain up to 2 drops (instead of 1) from up to 2 clouds.
When you would play more than 1 card, return 2 Methane to ignore the 2nd card.
11
22
20
---
Cards
Tiles
Tiles
Tiles
Cardboard Tokens
Cardboard Tokens
Wooden Pieces
77
Promo Components
Biodome Blackberry Cloudberry Lake
Maltese
Cactus Snapdragon Sunflower
1 Swarming action card
8 extreme weather event cards
1 player power card
1 player aid card
Alfalfa Anthill
Venus Flytrap Volcano
3 fertilizer tokens
1 cactus token
6 anthill tokens
1 volcano token
8 wonder tokens
3 bloom tokens
4 orchid tokens
5 sunflower tokens
1 cloudberry token
4 fly tokens
4 bramble tokens
10 fogcatcher tokens
1 crop rotation token
5 terrain objects
special tile!
special tile!
special tile!
special tile!
Extreme Weather Events
Blizzard
Thunderclouds form.
Clouds move.
Clouds gain drops.
Hailstorm
Thunderclouds rain.
Tiles gain drops.
Flood
Thunderclouds pour.
Tiles double drops.
Fewest drops scores.
Monsoon
Thunderclouds pour (even to nearby tiles).
Drought
Tiles lose half drops.
Fewest points draws forecast card.
Heatwave
Clouds double drops (even above 8+ drops).
Sandstorm
Drops move twice. Players lose half methane.
Tornado
Clouds move. Players lose half honey.
Terrain objects
Geyser
When you create a cloud nearby with a Frost action, add 1 drop to it and move a cloud on the other side of the Geyser away.
Treerow
When you add drops to a nearby cloud with a Sun action, only add 1. Nearby clouds with 6+ drops overflow.
Mountain
Before you move a cloud through with the Wind action, first rain any 1 drop from it and convert it into a thundercloud.
Windmill
Before you move a cloud through with a Wind action, you may first split the cloud and you must add an additional vote for harvest.
Canal
When you rain a drop on a nearby tile with a Rain action, add 1 drop on the other tile.
---
88
1. Prepare the tiles and form the fields.
• Separate the tiles into the following categories:
° Honey-producing tiles (). Shuffle together.
° Climate-sensitive tiles (, , , , ). Shuffle together.
° Special tiles (Anthill, Biodome, Lake, Volcano, Primrose). Include at most one per game. Some of these tiles require the use of an expansion.
° Normal tiles. Shuffle together. Some of these tiles cannot be used at low player counts (see Appendix on pages 26–39).
• Select a certain number of tiles from these categories, based on the player count and which expansions are being used for this particular game:
| player count | total number of tiles | how many honey-producing tiles to include | how many climate-sensitive tiles to include |
| :--- | :--- | :--- | :--- |
| 1 | 6 | 2 | 1 |
| 2 | 8 | 2 | 1 |
| 3 | 9 | 3 | 2 |
| 4 | 12 | 4 | 2 |
| 5 | 16 | 4 | 2 |
*For further rules about the solo mode, see page 22.
• Arrange these tiles face up in the indicated shape:
• Place one dormant pollen token on every non-special tile and place the bee in the indicated location:
• Place a pasture token on every Corn, Grass, and Wheat tile to mark them as pasture tiles. Return any extra pasture tokens to the box.
• Place cows and clouds in the indicated locations. Add 1 methane crystal to each cloud. Do this before the players place their starting clouds.
• For the terrain objects mini-expansion, randomly select 2/2/3/4 terrain objects (for 2/3/4/5 players) and place them between the indicated tiles:
Game Setup
---
2. Each player takes the following items:
• 20 water drops of their color
• 12 vote markers of their color
• 2 score markers of their color
• 1 player aid card
• 2 honey tokens
3. Set the game board next to the fields.
4. Set the climate board next to the game board. Place the climate marker in the center space of the climate track.
5. Decide as a group whether you will play the short game (4 rounds) or the long game (6 rounds). Flip the game board to the side showing that number of rounds.
6. Give the first player marker to the poor soul who was most recently caught in the rain. Alternatively, use a method of your choice to determine the first player.
7. Each player places one of their score markers on the “0” space of the score track and the other on the “0” space of the voting wins track.
8. Shuffle the action cards (Frost, Sun, Wind, Rain, Grazing) together. Deal a starting hand of cards to each player:
| Player count | Starting hand (first player) | Starting hand (other players) |
| :--- | :--- | :--- |
| 2 | 8 + 1 | 8 + 1 |
| 3 | 7 + 1 | 7 + 1 |
| 4 | 6 + 1 | 6 + 1 |
| 5 | 6 + 1 | 6 + 1 |
Note: If playing with the drafting variant, follow those rules for starting hands instead (see p. 39).
9. Place the rest of the action cards as a face-down deck. It will be needed again in the Cleanup Phase.
10. Create a general supply next to the fields with the clouds, thundercloud tokens, wheat tokens, growth tokens, and +50/+100 point tokens.
• Place all remaining honey tokens in the general supply.
• Place all remaining methane crystals and all fertilizer tokens in the general supply.
11. If playing with extreme weather events, shuffle the extreme weather event cards into a face-down deck. Reveal the top card and place it next to the game board.
12. Roll all three harvest dice and place them in the harvest area of the game board without changing the results.
13. Place the round marker on the “1” space of the round track. Return all unused tiles and other components, including those for solo mode only, to the box.
14. Starting with the player who is last in turn order and going counter-clockwise, each player takes a cloud from the supply, adds one of their water drops to it, and places it on an empty tile in the fields.
• Instead of placing their starting cloud, a player may add one of their water drops to a cloud containing a methane crystal (but no water drops).
15. Shuffle the player power cards together and lay out a number of cards equal to the player count plus one. Starting with the player who is first in turn order and going clockwise, each player chooses one of these player power cards and places it face up in front of themselves. Each player’s chosen player power is available to them throughout the entire game and can be used any number of times.
16. Shuffle the forecast cards together and deal three cards to each player. If playing without Honeybee and Cows, some forecast cards must first be removed from the deck.
• Deal only two forecast cards to any player who chooses the Meteorologist player power.
You are now ready to begin your new life as clouds!
Note: For games with five players, and for any game with multiple expansions, the short game is recommended.
---
Goal of the Game
In this game the players are trying to score the most points. Points are awarded for manipulating the harvest dice, for having water drops on crops during the harvest each round, and for voting wins and wheat tokens at the end of the game. These concepts are detailed throughout this rulebook.
When players score points during the game, they advance their score markers on the score track that runs around the outer edge of the game board. If players lap the score track, use the included +50/+100 point tokens to track their score.
The game has either four or six rounds, depending on whether you play the short or long game. We recommend the short game for the first few times you play, then the long game once you know how to plan effective long-term strategies. When these rules refers to the final round, this means the fourth or sixth round for the short or long game, respectively.
Game Flow
Each round has five consecutive phases:
1. Action Phase
2a. Climate Phase
2b. Weather Phase
3. Harvest Phase
4. Cleanup Phase
In the Action Phase, the players take turns until one player passes. When that happens, all other players take one more turn each and then the phase ends. Turns begin with the first player and proceed clockwise.
On your turn, you must choose one of these two options:
• Play cards
• Pass
Note: You may not pass on your first turn of the round.
Playing Cards
If you choose to play cards, you must carry out these steps:
1. Play one card from hand to your discard pile to...
a. Perform the card action.
-AND-
b. Place one vote.
2. If no players have passed yet, you may take a second action.
Play two matching cards from hand to your discard pile instead of only one card or play one card from hand and spend 2 methane from your personal reserve.
Then repeat step 1 above (both 1a and 1b).
-OR-
• Play one card from hand to move the bee to an adjacent tile. Then perform one Bee action (see next page).
-OR-
• Play one card from hand and spend 1 honey to move the bee to any tile or leave it on its current tile. Then perform one Bee action (see next page).
When you perform a card action, it must be resolved if possible. However, you are allowed to play a card whose action cannot be resolved. In that case, the card action is skipped. Placing votes is mandatory and cannot be skipped.
The effect of a terrain object are triggered when the indicated Weather action is performed on one of the two tiles the terrain object is adjacent to. For a list of these effects, see Appendix.
You may play any two cards as any one other card or play one card and spend 2 methane as any one other card.
For example, you could play a Sun card and a Frost card to perform the Rain action as your first action, or you could play a Sun card and any two other cards to perform the Sun action as your second action.
Your options for how to vote are always based on the action you actually performed, not the cards you played.
Note: Card actions are explained on page 14.
---
1111
Placing Votes
When you place a vote, you choose one of the following three options for how you would like to vote:
a. Place a vote on the weather space or extreme weather event card if it has a matching icon that corresponds to the card action you performed.
b. Place a vote on the weather space or extreme weather event card if it has a matching icon that is next in the clockwise weather sequence from the first option: Frost, Sun, Wind, Rain, Frost.
c. Decrease a harvest die by one vote and score 1 point. If the harvest die was already down to one vote, turn it to the harvest icon and score an additional 1 point (i.e., score 2 points total). If all three harvest dice show the harvest icon, this option is not available.
If you played Grazing as your card action, you must choose this option if available.
If you run out of votes in your personal supply and you need to place another one, you may remove one that is already in play and place it again.
Bee Actions
Choose one of the following three options:
• Collect all dormant pollen from the bee’s current tile and add it to your personal supply. You can have a maximum of four pollen. Excess pollen remains on the tile.
-OR-
• Spend up to two pollen from your personal supply, then carry out the following steps:
° For each pollen spent, place one water drop from your personal supply onto the bee’s current tile. If you run out of water drops in your personal reserve, you may remove them from another tile to place here instead.
° If the bee’s current tile is a honey-producing tile, and if it has less germinated pollen than its limit, place your spent pollen onto that tile germinated side up. Each tile’s limit indicates the maximum amount of pollen it can have. Excess pollen is discarded instead.
-OR-
• Collect honey from the general supply equal to the honey yield (i.e., the number printed next to the honey icon) of the bee’s current tile. This option is only available if the bee’s current tile is a honey-producing tile.
You cannot perform a Bee action as the first action of your turn or after another player passes (since you do not have a second action available after another player passes).
Note: While pollen is in your personal supply, it does not matter which side is up: dormant or germinated. We recommend for all players to store them dormant side up to avoid confusion. Pollen is dormant when collected, then it is placed as germinated pollen when spent on honey-producing tiles (or discarded to the general supply).
For honey-producing tiles, the limits for germinated pollen are as follows: Apple (1), Blueberry (1), Passion Fruit (2), Watermelon (4), Blackberry (2).
---
Passing (3+ Players)
In games with three or more players, the end of the Action Phase is triggered as soon as one player passes. When the first player passes, carry out the following steps:
1. The passing player discards all remaining cards from their hand.
2. The passing player takes the first player marker from whoever currently has it. However, if the passing player already had it, they must instead pass it counter-clockwise (i.e., to the player seated on their right). The corresponding change in first player privileges takes effect immediately for turn order and tiebreakers during the Weather Phase.
3. The other players each take one final turn. If they choose to play cards on this turn, they may not perform the optional second action.
If any of the other players choose to pass on their final turn, do not carry out the steps listed above. That player’s turn is simply skipped and nothing happens.
Passing (2 Players)
In games with two players, the end of the Action Phase is triggered as soon as one player passes.
However, unlike in games with three or more players, the passing player does not discard the remaining cards from their hand, and the first player marker does not change hands.
The other player then takes one final turn. If the other player chooses to play cards on this turn, they may not perform the optional second action.
Hand Limit
There is a hand limit of four cards that is enforced at the end of the Action Phase. If you have more than four cards in your hand when the phase ends, you must discard down to four cards before the next phase begins.
Merging and Overflowing
There are two types of clouds: light clouds and thunderclouds.
All clouds start out as light clouds. When a light cloud becomes a thundercloud, add a thundercloud token. Game effects that influence clouds affect clouds of both types.
The clouds will get blown around during the game and will occasionally collide with each other. If any two clouds are ever in the same location, no matter their type, those clouds merge to form a single thundercloud. Combine all water drops into one cloud, add a thundercloud token (if necessary), and return the other cloud back to the general supply.
Light clouds can become thunderclouds on their own, as the players add more water drops. If a light cloud ever contains four or more water drops, it grows into a thundercloud.
Note: If a thundercloud ever contains fewer than four water drops, it does not become a light cloud again!
Additional Concepts
---
13
If a thundercloud ever contains eight or more water drops, it overflows. Pour all water drops from the cloud onto the tile below, then return the emptied cloud back to the general supply. It is possible for an overflow to occur immediately after a merge. If two clouds merge and the resulting thundercloud contains eight or more water drops, it overflows as usual.
These checks for merging, growing, and overflowing are always performed after each effect unless specified otherwise. Each action counts as a separate effect, and so does each player turn during the resolution of Sun weather.
Example: If a single effect adds three water drops to a thundercloud that already contains seven water drops, the cloud only overflows after all three water drops have been added. All 10 water drops from the cloud are then poured onto the tile below the cloud.
Note: If a player performs two actions on their turn, those actions count as separate effects. Clouds will merge, grow, and overflow after each action if possible.
Empty clouds are always removed from the fields and returned to the general supply.
Running Low on Components
As mentioned wherever relevant, drops and votes are intended to be limited. If you run out of drops, you may pick them up from tiles - but strictly not from clouds - to reuse them elsewhere. Similarly, you may pick up a vote and place it elsewhere when you need to place one and none remains in your personal supply.
---
Card Actions
Frost Action
When you perform the Frost action, take a light cloud from the general supply, add one water drop to it from your personal supply, then place the new cloud on any tile that does not already have a cloud.
If all tiles already have clouds, the action has no effect (but you will still vote). If you have no water drops left in your personal supply, you may take back one water drop from a tile and add that one to the new cloud.
The number of clouds is limited. If all 12 clouds are already in play, you may instead add one water drop to an existing cloud that does not contain any of your water drops.
When you perform the Frost action, instead of creating a new cloud, you may add one water drop to an existing cloud that contains only methane.
Sun Action
When you perform the Sun action, take two water drops from your personal supply and add them to an existing cloud that already contains at least one of your water drops. This might cause the cloud to grow or overflow!
If there are no existing clouds that already contain at least one of your water drops, the action has no effect (but you will still vote).
If you do not have enough water drops left in your personal supply, you may take back water drops from tiles until you do.
You must add exactly two water drops to the cloud; you may not add only one water drop.
Wind Action
When you perform the Wind action, choose one cloud that contains at least one of your water drops, then move it from its current tile to an adjacent tile. This might cause it to merge with another cloud and even overflow!
If there are no clouds that contain at least one of your water drops, the action has no effect (but you will still vote).
Rain Action
When you perform the Rain action, choose one or two clouds that contain at least one of your water drops, then rain one water drop from each of those clouds onto the tile below. You do not have to choose your own water drops from those clouds.
You may spend 1 methane from your personal supply to rain a second water drop from one or both of those clouds.
If there are no clouds that contain at least one of your water drops, the action has no effect (but you will still vote). If a cloud is emptied as a result of the action, remove the empty cloud and return it to the general supply.
Grazing Action
Choose one of the following two options:
Nature’s Call
1. Choose a cow in the fields. Add 2 methane from the general supply to a cloud either on the cow’s current tile or on an adjacent tile.
- If there is not enough methane available, each player first discards 1 methane from their personal supply. If there is still not enough methane available after this, add as much as possible and ignore the rest.
- If there is no cloud on the chosen tile, create a cloud first, then add 2 methane to the new cloud.
2. Add one fertilizer from the general supply to the cow’s current tile. If the fertilizer runs out, use a suitable proxy.
3. Move that cow to an adjacent tile that does not already contain another cow if possible.
Time Heals
1. Choose a cloud that contains at least one of your water drops, then take all methane from that cloud and add it to your personal supply.
2. Move a cow to that cloud’s tile. If there is a cow there already, or if cows cannot be moved there, this step is skipped.
Note: Cows cannot be moved to special tiles.
---
15
Growing Crops
Each tile indicates the number of water drops required for it to grow. Once that has been met or exceeded, the tile counts as growing. Place a growth token on the tile to indicate this.
If the number of water drops ever falls below that number, that tile no longer counts as growing. Remove the growth token from the tile, no matter which side is showing.
Some tiles (Coffee, Rice, Apple, Date Palm) have two conditions: one to sprout and one to develop. For these tiles, place the token sprouting side up when the first condition is met, then flip it developed side up when the second condition is met. On all other tiles, use the developed side only.
Some tiles (Norway Spruce, Cloudberry, Maltese Cactus) can grow in two distinct conditions, and they have a special growth token to indicate which one is in effect.
Only tiles that are growing (whether sprouting or developed) are harvested during the Harvest Phase.
Methane
Methane in the Clouds
Methane never drops from the clouds to the fields. When a cloud that contains methane is emptied of all water drops, immediately create a new cloud where the previous cloud was. Add 1 methane from the previous cloud to the new cloud, then return the rest to the general supply.
Methane counts towards cloud size for the purposes of cloud growth and overflow. For example, a light cloud with three water drops and 1 methane will become a thundercloud, and a thundercloud with six water drops and 2 methane will overflow. However, for any other effects related to the water drops in a cloud, methane is ignored (and vice versa).
While a cloud contains only methane, the tile with that cloud is not considered to be a tile with a cloud (for Rain player power and forecast 10), nobody controls that cloud, and water drops can be added to that cloud using the Frost action (or forecast 4, 14, 16). Light clouds that contain only methane become thunderclouds during Frost weather.
Spending Methane
You may spend methane from your personal supply to perform special effects. You may only spend methane on your own turn and only once per turn for each of these two effects.
• When you take the Rain action, you may spend 1 methane to rain two water drops each from up to two different clouds (instead of one water drop each).
Note: If you have the Rain player power, you may instead add two water drops directly to a tile that does not have a cloud.
• When you would play multiple cards to take a single action, whether as the first or second action of your turn, you may spend 2 methane in place of one required card.
• Even though you have to use the second action of your turn to take a Bee action, you cannot spend methane in place of the required card, because the Bee action does not require multiple cards (unlike other second actions).
Methane in the Supply
If there is not enough methane available in the general supply when a game effect requires methane to be added to a cloud, each player first discards 1 methane from their personal supply. If there is still not enough methane available after this, add as much as possible and ignore the rest.
developed
2 drops needed to grow
Additional condition needed to develop
2 drops needed to sprout
developed
sprouting
---
16
Phase 2a: Climate Phase
In the Climate Phase, the climate is affected by how much methane is in the clouds, then an event is resolved based on new climate. Carry out the following steps:
1. Count the current total of methane in the clouds and adjust the climate marker accordingly. When there is lots of methane, the climate will become hotter. When there is very little methane, the climate will become cooler. If the climate marker would ever move beyond either end of the climate track, the excess movement is ignored.
Methane in the Clouds | Climate Adjustment
--- | ---
8 or more | increase by 3
7 | increase by 2
6 | increase by 1
5 | no change
4 | decrease by 1
3 | decrease by 2
2 or fewer | decrease by 3
2. Determine which player has the most methane in their personal reserve. That player is named this round’s climate leader. If there is a tie for most (even at zero), the current first player chooses a climate leader from among the tied players.
3. Based on the current position of the climate marker on the climate track, the climate leader resolves the climate event. All effects are mandatory (if possible).
Climate | Climate Event
--- | ---
Scorching | • Resolve all Warm climate effects (see section below).<br>• Remove 1 methane from a cloud of your choice.<br>• Remove one water drop (of any player) from a cloud of your choice.
Warm | • Remove 1 methane from a cloud of your choice.<br>• Remove one water drop (of any player) from a tile of your choice.
Temperate | • Score 2 points.
Cold | • Add 1 methane from the supply to a cloud of your choice.<br>• Add one of your water drops to a cloud of your choice.
Frozen | • Resolve all Cold climate effects (see section above).<br>• Add 1 methane from the supply to a cloud of your choice.<br>• Add one of your water drops to a tile of your choice.
• If removing methane or water drops from a cloud causes the cloud to be completely empty, remove the cloud, too.
• If there are no existing clouds when a climate effect requires you to add methane or water drops to a cloud, first create a new cloud on a tile of your choice.
---
Resolving Weather Spaces
The weather affects the state of the fields and affects all players, regardless of whether they voted for that weather or not.
The two weather spaces with the most total votes (between all players) are now resolved. The two selected weather spaces are resolved in clockwise order starting with Frost (i.e., Frost, Sun, Wind, Rain).
If two or more weather spaces received an equal amount of votes, the first player breaks the tie. In the extremely unlikely scenario that only one weather space receives votes, all other weather spaces are tied for second place.
Example: Sun received 7 votes, Frost and Rain received 5 votes each, and Wind received 4 votes. Sun will be resolved, as it has the most votes. The first player then decides whether Frost or Rain will also be resolved. If Frost is chosen, the order of resolution will be Frost then Sun. If Rain is chosen, the order of resolution will be Sun then Rain.
Example: Sun and Wind received 6 votes each, while Frost and Rain received 4 votes each. There is no need for the first player to decide, as Sun and Wind will be resolved (in that order).
Exception: In the final round, every weather space that received at least one vote is resolved.
An extreme weather event card behaves like a fifth weather space. It might be one of the two spaces resolved, if it receives the most or second-most votes. It resolves after the corresponding basic weather space, but before the next one (e.g., Drought resolves after Sun, but before Wind).
Phase 2b: Weather Phase
---
Weather Effects
Frost Weather
All light clouds immediately become thunderclouds, regardless of how many water drops they contain. Add a thundercloud token to each new thundercloud.
Frost weather might cause clouds to overflow. Check for these effects after the resolution of Frost weather.
Sun Weather
Starting with the first player and going clockwise, each player chooses one cloud where they have at least one water drop present and adds enough water drops to double their presence in the chosen cloud.
If a player has no presence in the clouds, they ignore Sun weather. Otherwise, Sun weather is mandatory and must be resolved fully; players may not add fewer water drops than required to double their presence in the chosen cloud.
If a player does not have enough water drops left in their personal supply, they must take back their water drops from tiles (but not from clouds) as necessary.
Sun weather might cause clouds to grow and overflow. Check for these effects after each player takes their turn during the resolution of Sun weather.
After the resolution of Sun weather, any sprouting Coffee tile or Apple immediately develops, even if that tile sprouted during this same Sun weather.
Wind Weather
Starting with the last player and going counter-clockwise (i.e., the opposite of normal turn order), each player chooses one water drop on a tile and moves it to an adjacent tile. If there are no water drops on tiles, ignore Wind weather.
Players can move water drops of any player, not just their own. They are not required to have one of their own water drops on the origin tile or destination tile. Water drop movement must be orthogonal; diagonal movement is not allowed.
Wind weather might cause crops to start growing or stop growing. Reevaluate the growth of all tiles after each player takes their turn during the resolution of Wind weather.
Rain Weather
All thunderclouds immediately pour. Pour all water drops from each thundercloud onto the tile below it, then return the empty thundercloud to the supply.
Rain weather might cause crops to start growing. Reevaluate the growth of all tiles after the resolution of Rain weather.
After the resolution of Rain weather, any sprouting Rice tile or Date Palm if the climate is Warm immediately develops, even if that tile sprouted during this same Rain weather.
Extreme Weather Events
There will be one extreme weather event in play at all times. You will find the complete descriptions of the extreme weather events and how to resolve their effects on pages 34–35.
---
1919
Winning the Weather Vote
Determine the winner of each of the resolved weather spaces separately. The player or players with the most votes on a resolved weather space is the winner of that vote. Each winner advances once on the voting wins track.
Exception: In the final round, all weather spaces with votes are resolved, but only the players who win the vote on the two weather spaces with the most votes get to advance on the voting wins track.
In games with two players, if there is a tie for most votes, neither player advances. In games with three or more players, if there is a tie for most votes, all tied players advance once.
It is possible for one player to advance twice on the voting wins track in the same Weather Phase if they win both weather votes.
Example: In this round, Sun and Wind weather will be resolved. Red, Yellow, and Green will each advance once on the voting wins track, as they each have the most (or tied for most) votes on one of the resolved weather spaces.
If Blue had one more vote on Sun, they would tie with Yellow and get to advance twice on the voting wins track.
Even though Red has the most votes on the Frost weather space, they do not get to advance twice on the voting wins track, because Frost weather is not resolved this round.
For games with five players, observe these changes:
• For each resolved weather space, the player with the most votes advances twice on the voting wins track, and the player with the second-most votes advances once.
• For each resolved weather space, if there is a tie for the most votes, all tied players advance once on the voting wins track, and the player with the second-most votes does not advance.
If one player has the most votes on an extreme weather event, they advance twice on the voting wins track — regardless of the player count. If there is a tie for most votes, all tied players advance once on the voting wins track. The changes described above for games with five players do not apply.
At the end of the game, the players will score points based on the position of their score marker on the voting wins track.
After a weather space is resolved, return the votes from that weather space to their owners. Leave all votes on weather spaces that were not resolved this round.
Changing First Player (2 Players)
In games with two players, the first player token does not change hands when passing. Instead, as the last step of the Weather Phase, compare the total votes remaining on all weather spaces including the extreme weather event:
• If the current first player has more votes on weather spaces than the other player does, they keep the first player marker.
• If the current first player has equal or fewer votes on weather spaces than the other player does, they must pass the first player marker to the other player.
---
2020
The Harvest Phase occurs if at least one of the following conditions is true:
• it is the final round of the game (i.e., round 4 for the short game, round 6 for the long game)
• all three harvest dice are showing the harvest icon
If neither condition is true, skip the Harvest Phase and proceed directly to the Cleanup Phase.
Harvesting Crops
When the Harvest Phase occurs, all growing tiles are harvested, in any order, and the players score points based on the number of their water drops present on those tiles.
When a tile is harvested, remove the growth token and all water drops from that tile, returning the water drops to their owners.
Do not remove water drops from tiles that are not harvested.
Note: Each tile only shows scores for four players, but fifth place scores the same as fourth place.
Each tile is scored differently, but most use simple majority rules to determine what each player scores. For the complete descriptions of all crop tiles, see pages 26–32.
Breaking Ties
If two or more players are tied for a given rank, those players and all players below them drop in rank accordingly.
Example: On this Grass tile, Green and Red are tied for first place, so during harvest they will each score 3 points and Yellow will score 2 points.
Example: On this Potato tile, Green has first place, but they will score 0 points during harvest because the tile is not growing and will not be harvested.
Cow Bonus
During harvest, for every cow on a growing pasture tile (i.e., Corn, Grass, or Wheat tile), the player with the most water drops on that tile scores a bonus of 2 points.
If there is a tie for most, no one scores the bonus.
Fertilizer Bonus
During harvest, for every fertilizer token on a growing tile, all players with water drops on that tile score a bonus of 1 point. At the end of harvest, remove all fertilizer tokens from tiles that were harvested.
Example: This Cotton tile with one fertilizer token will score 6 points for Blue and 2 points for Yellow.
Example: This Grass tile with a cow and two fertilizer tokens will score 8 points for Green and 4 points each for Red and Yellow, who are tied for second place.
Example: This Corn tile with a cow will score 10 points for Red and 8 points for Yellow.
Pollen Tokens
Honey-producing tiles require at least one germinated pollen token to count as growing.
These tiles can only be harvested once the required number of germinated pollen tokens and water drops are present.
At the end of harvest, remove all germinated pollen tokens from any honey-producing tiles that were harvested. Then place one dormant pollen token on each tile (except special tiles), including tiles with dormant or germinated pollen tokens.
If there are not enough pollen tokens in the general supply to place on all tiles, prioritise the honey-producing tiles first, then tiles with the fewest dormant pollen tokens, and finally the first player decides the priority if there is still a tie.
Phase 3: Harvest Phase
---
If this is the final round (i.e., round 4 for the short game or round 6 for the long game), skip the Cleanup Phase and proceed directly to game end. Otherwise, carry out the following steps before the next round begins:
1. Advance the round marker one space on the round track.
2. If there was a Harvest Phase this round, reroll all of the harvest dice. Otherwise, reroll only the harvest dice that are not showing the harvest icon.
Note: As a result of this reroll, some or all of the rerolled dice might show the harvest icon. That is allowed!
3. Deal a new hand of cards to each player:
• 4–5 players: deal 6 +1 cards to each player
• 2–3 players: deal 7 +1 cards to each player
• 1 player: deal 8 +1 cards to the only player
If any players have cards left in their hand from this round (up to the hand limit of four), they are dealt the new cards and add them to those still left in their hand.
If the deck of action cards is depleted when cards are being dealt out, gather the action cards from the discard pile and reshuffle them to form a new deck, then continue.
Game End & Victory
The game ends when the final round is over (i.e., round 4 for the short game or round 6 for the long game). When the game ends, carry out the following steps:
• Each player scores points as indicated on the space of the voting wins track occupied by their score marker.
• The player or players with the most wheat tokens score a bonus of 12 points. If there is a tie for most, the tied players each score the bonus.
Rank the players based on how much honey they have in their personal supply and award points accordingly.
| player count | 1st place | 2nd place | 3rd place | 4th place | 5th place |
| :--- | :--- | :--- | :--- | :--- | :--- |
| 1 | 0 | | | | |
| 2 | 10 | 0 | | | |
| 3 | 12 | 6 | 0 | | |
| 4 | 15 | 9 | 4 | 0 | |
| 5 | 15 | 9 | 4 | 0 | 0 |
If two or more players are tied for a given rank, those players and everyone below them drop in rank accordingly.
The player with the highest final score is the winner.
If there is a tie, the tied player who is further on the voting wins track is the winner. If there is still a tie, the first tied player to run to the nearest field and harvest a crop is the winner — or the tied players can just enjoy a shared victory.
---
Player Power Cards
Player power cards grant an asymmetric ability to each player, giving them an affinity for a certain type of weather or action.
See the setup instructions on page 9 to learn how to deal them to the players.
You will find the complete descriptions of the various player powers on pages 37–38.
Forecast Cards
The forecast cards add another layer of planning to the game, introducing the opportunity for players to make surprise moves.
See the setup instructions on page 9 to learn how to deal them to the players.
Using Forecast Cards
Some forecast cards show a timeline of the Weather Phase and the Harvest Phase. The dot on the timeline specifies when exactly the card can be played.
Cards without this timeline are “as your turn” cards. They can be played in the Action Phase instead of a normal turn.
If you play an “as your turn” card, you do not place a vote and cannot take further actions that turn.
Forecast cards 21, 22, 23, 24 have immediate effects. You may play them at any time during your turn in the Action Phase. They do not cost an action, and you may also play them at the very start of your turn.
Forecast cards do not count towards your hand limit, nor do they affect the number of action cards that you can keep for the next round. Forecast cards do not trigger player powers, terrain objects, or the Lake.
Forecast cards are discarded from the game once played.
You may never play the last forecast card from your hand.
Some effects may grant additional forecast cards.
You will find the complete descriptions of the various forecast cards on pages 36–37.
Southern Winds Solo Mode
In the solo game, the lone player will try to do the same as you would in a multiplayer game: water the fields and win votes. For simplicity, we will be referring to that player as “you.” But there is a strong southern wind coming, trying to push you away from the most valuable fields, while also depositing strange water from lands unknown – represented by neutral water drops.
Game Setup
Perform the same setup as in the multiplayer game with the following changes and additions:
1. Flip the game board to the side with four rounds.
2. Remove any tiles that do not have the southern winds icon in the corner. Shuffle the remaining tiles and select six at random. Include two honey-producing tiles and one climate-sensitive tile if using those expansions.
3. Lay out the chosen tiles in three rows of two tiles each, in ascending numeric order of their priority left to right, then top to bottom.
4. Roll the die twice (rerolling duplicates), then place a cloud with one neutral water drop in both of the rolled positions. For example, rolling “1” and “4” means positions P1 and P4.
---
5. Roll the die once and place a cloud with one of your water drops in the rolled position. If that position is taken, reroll until a valid position is rolled. This is instead of the normal cloud placement in step 12 of setup.
6. Shuffle the nine southern winds cards together to form a single face-down deck and place it next to the play area. Add cards 10 and 11 if playing with the Honeybee expansion. Add cards 12, 13, and 14 if playing with the Cows expansion.
7. Give the neutral player honey equal to the total honey production of the honey-producing tiles.
8. Give the neutral player 1 methane from the supply.
9. Shuffle the cards as normal, and deal yourself eight cards. Note: The first player marker is not used in the solo game, as the neutral player always starts a round, and you always break ties when deciding the weather.
Game Flow
In each round, the Action Phase is played as follows:
1. Resolve one neutral player turn (explained below).
2. Resolve one player turn (either playing cards, with the same rules and resolution as in the multiplayer game, or passing and discarding all of your cards).
3. If you did not pass, repeat these steps.
After the Action Phase, proceed to the Climate Phase, Weather Phase, Harvest Phase, and Cleanup Phase, just as you would in the multiplayer game (with a few differences noted below).
Note: Do not reshuffle the southern winds cards between rounds. Only do this when the “reshuffle” card is drawn.
Neutral Player Turn
Reveal the top card of the southern winds deck.
If it is the “reshuffle” card, shuffle all southern winds cards together (the discards, the deck, and the “reshuffle” card itself), then draw another card.
1. Perform the card’s action (see pages 38–39). Each action affects a tile in a particular position. Roll the die to select a tile to target. The target is valid if the result of the action causes anything to happen in the fields. If the selected tile is not a valid target for that action, check the tile in the next position, circling around if necessary, until a target is valid.
Example: If “4” is rolled with P2 and P3 as the only valid targets, check P4, P5, P6, P1, P2. P2 is the target.
If there are no valid targets, nothing happens in the fields and the neutral player scores 1 point instead. If an action requires the neutral player to place water drops when it has none remaining in its personal supply, then treat the action as if there are no valid targets.
2. Check the voting icons at the bottom of the southern winds card. The neutral player places that many neutral votes on the matching weather space. If the neutral player does not have enough votes in its personal supply, it places as many votes as possible, then scores 1 point per vote that it is unable to place.
If the icon is shown and there is at least one harvest die not showing that icon, the neutral player decreases a die by one vote and scores 1 point (or 2 points when rotating a to a). If there are multiple valid dice, the neutral player prioritises the die that it can decrease to the harvest icon. If that is not possible, the neutral player prioritises the die with the highest number of votes available.
If all harvest dice are already showing the harvest icon, this icon is ignored.
P1, P2, P3, P4, P5, P6
neutral votes
---
24
If the icon is shown, instead of voting, the neutral player gains 2 honey from the supply.
If the icon is shown, the neutral player votes for the weather with the fewest votes (ties are broken in clockwise order, starting with Frost).
If the icon is shown, the neutral player votes on harvest if possible (as described on the previous page). If that is not possible, the neutral player instead votes for the weather with the fewest votes (as described above).
When the neutral player would vote for a normal weather and a corresponding extreme weather event card is in play, it chooses via a die roll: on 1–3 it votes for the normal weather, on 4–6 it votes for the extreme weather.
Climate Phase
In the Climate Phase, the neutral player becomes the round’s climate leader if it has more methane in its personal reserve than you do. When this happens, the neutral player resolves the climate event with these changes:
• Scorching: Resolve all Warm climate effects first. Then roll the die to choose which cloud the second methane is removed from, then roll the die again to choose which cloud the water drop is removed from.
• Warm: Roll the die to choose which cloud the methane is removed from, then roll the die again to choose which tile the water drop is removed from.
• Temperate: The neutral player scores 2 points.
• Cold: Roll the die to choose which cloud the methane is added to, then roll the die again to choose which cloud the neutral player’s water drop is added to.
• Frozen: Resolve all Cold climate effects first. Then roll the die to choose which cloud the second methane is added to, then roll the die again to choose which tile the neutral player’s water drop is added to.
When removing water drops, the neutral player prioritises targets with your water drops first.
If there is ever a choice of whose water drop to remove from the target, the neutral player always removes yours.
Methane Limits
At the end of each round, the neutral player keeps up to 1 methane in its personal reserve, but must return any excess methane to the supply. If you wish to increase the difficulty, the neutral player scores 1 point per methane returned this way.
Weather Phase
You do the same things during the resolution of the weather spaces as in the multiplayer game. You break all ties when selecting which weather spaces to resolve. If there is a tie on who wins a specific vote, neither you nor the neutral player advances on the voting wins track.
Changes in the resolution of the different weather effects:
• Frost: There is no change, as all light clouds automatically become thunderclouds.
• Sun: The neutral player first doubles its presence in all clouds. Then you double your presence in one cloud. If the neutral player does not have enough water drops to double its presence in all clouds, it prioritises the clouds in higher-numbered positions (i.e., starting from P6 and working backwards).
• Wind: After resolving your Wind weather effect (i.e., moving any one water drop to an adjacent tile), check each of the tiles from P3 to P6, in order. On each of those tiles, if there is at least one of your water drops present, move one of your water drops from the tile to the adjacent tile to the north (e.g., a water drop on P3 would move to P1).
• Rain: There is no change, as all thunderclouds automatically pour onto the tiles below.
When playing with extreme weather events, the neutral player resolves some cards differently. See pages 34–35.
P1 P2 P3 P4 P5 P6
---
Harvest Phase
The Harvest Phase occurs if at least one of the following conditions is true:
• the three harvest dice all show the harvest icon
• it is the final round of the game
• the neutral player has no water drops left in its personal supply at the start of the Harvest Phase
Game End & Victory
After the final round of the game, score for voting wins, wheat tokens, and honey as in the multiplayer game. If the neutral player has a higher score, you lose. If you have a higher score, you win and the plants bloom happily.
Increasing the Difficulty
The solo mode can be made more difficult with these variants. Combine them to increase the difficulty even further!
• Double Card Variant: On the neutral player’s turn, draw and resolve one card (but ignore any voting icons). Then draw and resolve another card (and resolve any voting icons). We recommend you play with this variant once you know how to manage the neutral player’s turn.
• Non-Random Targeting Variant: When selecting a tile as the target of the neutral player’s action, instead of rolling the die, use the following three criteria:
° If the action moves or creates a cloud (4, 7, 8), pick the highest-numbered available target (i.e., check P6 first, then P5, etc.).
° If the action adds water drops to a cloud (5, 6), pick the highest-numbered target where the neutral player has fewer water drops than you, counting water drops both on the tile and in the cloud. If no targets qualify, simply pick the highest-numbered target.
Example: There are clouds on P5 and P6 but nowhere else. If the neutral player is ahead on P6, but behind on P5, pick P5. If the neutral player is ahead on both, pick P6.
° If the action affects the tile directly (1, 2, 3), pick the highest-numbered available target where the neutral player is not ahead of you by two or more water drops, counting only water drops on the tile.
° The non-random targeting variant does not affect the cow-related cards (12, 13, 14), as those always resolve using die rolls, as explained in the Appendix.
During climate event resolution (if the neutral player is the climate leader), the neutral player still adds and removes methane randomly via the die roll. But it adds its own water drops to the highest-numbered valid target, prioritising targets where it does not have the majority in total water drops first (counting the cloud and tile combined). When removing your water drops, the neutral player removes them from the highest-numbered valid target, prioritising targets where it does not have the majority by at least two water drops first.
• ”No More Tricks“ Variant: The neutral player fails to grasp the tricks for high scores with Potato and Wheat. If you do not want to exploit this fact, remove those tiles before randomly selecting tiles for the fields.
• ”One More Turn“ Variant: In each round, the neutral player takes one more turn after you pass.
• “Taste of Honey” Variant: When the neutral player plays cards 10 or 11 and targets a honey-producing tile, it also gains honey equal to the honey production of that tile.
---
Crop Tiles
On the following pages, you will find the descriptions of all crop tiles in the game, organized by expansion.
Coffee 1 – 5 players Coffea
Gameplay: Coffee is a plant and requires four water drops to sprout. While sprouting, Coffee requires Sun weather to develop. It is even possible for the Coffee tile to sprout and develop during the resolution of a single Sun weather effect!
Harvest: If the Coffee tile is only sprouting, the players score 5/3/2/1 points. If the Coffee tile is developed, the players score 10/5/2/1 points instead.
Example: Blue has 3 water drops in a cloud on a Coffee tile. This round’s weather is Sun and Rain. During the Sun weather, Blue adds 3 more water drops to the cloud, which becomes a thundercloud. During the Rain weather, all 6 water drops rain onto the Coffee tile, which then sprouts!
Although there was Sun weather this round, the Coffee tile did not sprout until the Rain weather, so it does not develop yet. Blue will score 5 points for this Coffee tile at harvest.
If Blue had 4 water drops in the cloud instead, they would have added 4 more during the Sun weather, which would have caused an immediate overflow. The Coffee tile would have sprouted and developed, and Blue would score 10 points instead.
Corn 3 – 5 players Zea mays
Setup: Place a pasture token on every Corn tile in play.
Gameplay: Corn is a plant and requires five water drops to grow.
Harvest: The players score points based on how many of them have at least one water drop on the Corn tile.
If there are 1/2/3/4+ players who have at least one water drop on the Corn tile, they each score 12/8/5/3 points.
Majority does not matter for Corn, except if a Cow is present.
Cotton 1 – 5 players Gossypium
Gameplay: Cotton is a plant and requires two water drops to grow.
Harvest: The players score 5/1/0/0 points for each Cotton tile.
Grass 1 – 5 players Poaceae
Setup: Place a pasture token on every Grass tile in play.
Gameplay: Grass is a plant and requires two water drops to grow.
Harvest: The players score 4/3/2/1 points for each Grass tile.
Potato 1 – 5 players Solanum tuberosum
Gameplay: Potato is a plant and requires three water drops to grow.
Harvest: The players score 3/7/3/2 points for each Potato tile.
Note that second place actually scores more than first place! This also means that, if two players are tied for first place, they each score 7 points.
Appendix
2 copies
3 copies
3 copies
2 copies
2 copies
---
27
Rice 1 – 5 players Oryza sativa
Gameplay: Rice is a plant and requires one water drop to sprout. While sprouting, Rice requires Rain weather to develop.
Harvest: If the Rice tile is only sprouting, the players score 0 points, but their water drops are still removed at the end of harvest.
If the Rice tile is developed, the players score 1 point for each of their own water drops on the Rice tile.
Wheat 1 – 5 players Triticum aestivum
Components: 12 wheat tokens
Setup: Place a pasture token on every Wheat tile in play.
Gameplay: Wheat is a plant and requires three water drops to grow.
Harvest: First place scores 2 points and gains one wheat token. Every other player who has at least one water drop on the Corn tile scores 3 points.
Game End: The player with the most wheat tokens at the end of the game scores 12 points. If there is a tie, the tied players each score 12 points.
Dandelion 3 – 5 players Taraxacum
Components: 8 pod tokens
Gameplay: Dandelion is a plant and requires one water drop to grow. If Dandelion is growing when Wind weather is resolved, in turn order, each player who has at least one water drop on Dandelion must place two pod tokens on two different tiles that do not have pod tokens. If all eight pod tokens are in play, no more are placed.
Example: There are only four pod tokens left, but three players with water drops on Dandelion. The first two players place two pod tokens each, and the third player places none.
Harvest: First place scores 1 point per pod token in play. Second place scores 0.5 points per pod tokens in play (rounded down).
For each tile with a pod token, the scores for all players are decreased by 1 point (to a minimum of zero).
At the end of harvest, remove all pod tokens from tiles and return them to the supply.
Notes: Pod tokens cannot be placed on Dandelion and other special tiles, or Snowdrop if it does not have the bloom token yet.
Primrose 3 – 5 players Primula vulgaris
Components: 4 bloom tokens and 1 control token
Setup: Place one bloom token on the Primrose tile.
Gameplay: Primrose is a plant but does not grow. The first player with one of their water drops on Primrose becomes the controlling player. They take the control token and score 2 points per bloom token on Primrose.
If another player passes the controlling player for the number of water drops on Primrose, they immediately carry out these steps:
1. Remove all of the controlling player’s water drops from Primrose and return them to their personal supply.
2. Take the control token from the controlling player.
3. Score 2 points per bloom token on Primrose.
It is possible for control of Primrose to change multiple times in a single round, and this can happen during the Action Phase, Climate Phase, or Weather Phase. Even if the controlling player is reduced to fewer drops, they only lose control when another player actually has more drops than them.
3 copies
special tile!
---
28
If multiple players simultaneously exceed the controlling player for the number of water drops on Primrose (for example, when Rain weather is resolved), the tie goes to the player who is earlier in the current turn order.
Harvest: The players do not score points for Primrose at harvest, and water drops are not removed from Primrose at the end of harvest. Another bloom token is placed on Primrose at the end of harvest if available.
Snowdrop 3 – 5 players Galanthus
Components: 1 bloom token
Gameplay: Snowdrop is a plant and requires the bloom token and two water drops to grow.
After Frost weather is resolved, place the bloom token on Snowdrop. Once the bloom token has been placed, Snowdrop grows when it has two water drops.
Water drops cannot be added to Snowdrop by any means before it has the bloom token. Any effects that would do so are ignored, and any actions that would do so (e.g., causing a cloud to overflow onto Primrose) are invalid.
Harvest: First place scores 6 points. Remove the bloom token from Snowdrop at the end of harvest. If there is one water drop on Snowdrop, that water drop stays.
Apple 1 – 5 players Malus
Gameplay: Apple is a plant and requires one germinated pollen and two water drops to sprout. While sprouting, Apple requires Sun weather to develop.
Apple produces 2 honey when you collect its yield with a Bee action. Apple has a limit of one germinated pollen.
Harvest: If Apple is only sprouting, each player with at least one water drop on Apple scores 1 point. If Apple is developed, the players score 8/6/4/2 points instead.
Blueberry 1 – 5 players Cyanococcus
Gameplay: Blueberry is a plant and requires one germinated pollen and two water drops to grow.
Blueberry produces 2 honey when you collect its yield with a Bee action. Blueberry has a limit of one germinated pollen.
Harvest: The players score 5/4/3/2 points and gain 3/2/1/0 honey.
Passion Fruit 1 – 5 players Passiflora edulis
Gameplay: Passion Fruit is a plant and requires two germinated pollen and four water drops to grow.
Passion Fruit produces 1 honey when you collect its yield with a Bee action. Passion Fruit has a limit of two germinated pollen.
Harvest: The players score 12/7/4/1 points.
Watermelon 1 – 5 players Citrullus lanatus
Gameplay: Watermelon is a plant and requires four water drops to grow. It can hold up to four germinated pollen, but does not require any to grow.
Watermelon produces 1 honey when you collect its yield with a Bee action. Watermelon has a limit of four germinated pollen.
Harvest: The players score points based on the amount of germinated pollen on Watermelon.
• 1st place scores 4 points per germinated pollen.
• 2nd place scores 2 points per germinated pollen.
• 3rd place scores 1 point per germinated pollen.
• 4th place scores 0 points.
If Harvested with no germinated pollen present, all players score 0 points, but their water drops are still removed at the end of harvest.
---
2929
Baobab 1 – 5 players
Adansonia grandidieri
Gameplay: Baobab is a plant and requires a Scorching climate and one water drop to grow. If the climate is no longer Scorching, Baobab stops growing.
Harvest: The players score 15/5/0/0 points.
Date Palm 1 – 5 players
Phoenix dactylifera
Gameplay: Date Palm is a plant and requires a Temperate or Warm climate and two water drops to grow.
While sprouting, Date Palm requires Rain weather during a Warm climate to develop. If the climate is no longer Temperate or Warm, Date Palm stops growing.
Harvest: If Date Palm is only sprouting, the players score 4/3/3/3 points. If Date Palm is developed, the players score 11/6/3/3 points instead.
Norway Spruce 1 – 5 players
Picea abies
Components: 1 growth token
Gameplay: Norway Spruce is a plant and requires a different number of water drops to grow in different climates.
In a Frozen or Temperate climate, Norway Spruce requires three water drops to grow. In a Cold climate, Norway Spruce requires five water drops to grow.
Use the special growth token to track which climate it grew in.
Reevaluate its growth each time the climate changes.
Harvest: In a Frozen or Temperate climate, the players score 6/3/1/0 points. In a Cold climate, the players score 13/8/4/2 points instead.
Sweet Chestnut 1 – 5 players
Castanea sativa
Gameplay: Sweet Chestnut is a plant and requires a Temperate climate and four water drops to grow. If the climate is no longer Temperate, the Chestnut stops growing.
Harvest: The players score 8/4/2/0 points.
Alfalfa 2 – 5 players
Medicago sativa
Gameplay: Alfalfa is a plant and requires three water drops to grow.
Harvest: The players score 4/3/2/1 points.
If there is a cow on Alfalfa at harvest, first place also gains two wheat tokens.
Notes: Requires the Cows expansion.
Anthill 2 – 5 players
Formicidae
Components: 6 ant tokens
Setup: Place the six ant tokens on the Anthill.
Gameplay: The Anthill is not a plant and does not grow.
When water drops are placed on the Anthill (due to cloud overflow, Rain weather, or any other game effect), each empty-handed ant token picks up one water drop. Excess water drops remain on the Anthill and will be picked up by empty-handed ant tokens later.
If necessary, the first player decides which water drops get picked up and which water drops remain on the Anthill as excess.
During your turn, you may move one ant token that has one of your water drops on it from its current tile to an adjacent tile. You may only move one ant token per turn at maximum.
separate promo tile released with Honeybee special tile!
---
3030
Water drops on ant tokens are immune to Wind weather effects
(i.e., they cannot be blown off their tile).
When a water drop is removed from an ant token (e.g., at the
end of harvest or when moving an ant token to the Lake tile),
the ant token returns to the Anthill and picks up an excess water
drop if available. If necessary, the first player decides which
water drop gets picked up.
Water drops on ant tokens count as being on the tiles where
those ant tokens are. Moving an ant token to a tile might cause
that tile to grow, and moving an ant token away from a tile might
cause that tile to stop growing.
Harvest: At the end of harvest, water drops on ant tokens that
are present on harvested tiles get removed, and those empty-
handed ant tokens return to the Anthill.
The Anthill is never harvested, so the players score no points for
their water drops present there and no water drops are removed
from the Anthill at the end of harvest.
Biodome 2 – 5 players
Conservatorium dome
Gameplay: The Biodome is not a plant and
does not grow. When you add methane to a
cloud, you may add one water drop (of any
player) from the Biodome instead.
Harvest: The players gain 3/1/0/0 methane into their private
supply. The methane that players gain this way must come from
the general supply and/or from clouds they control. Water drops
are not removed from the Biodome at the end of harvest.
Notes: Requires the Cows expansion. Neither the cows
nor the bee can be moved on the Biodome.
Blackberry 3 – 5 players
Rubus plicatus
Components: 4 bramble tokens
Setup: Place one bramble token on
every (non-special) plant tile that is
orthogonally adjacent to Blackberry.
Gameplay: Blackberry is a plant and requires a Temperate
climate, two germinated pollen, and three water drops to grow.
If the climate is no longer Temperate, it stops growing.
All tiles adjacent to Blackberry, which have bramble tokens,
require one additional water drop to grow.
Blackberry produces 1 honey when you collect its yield with a
Bee action. Blackberry has a limit of two germinated pollen.
Harvest: First place scores 2 points plus an additional
1 point per water drop on tiles with bramble tokens. Second
place scores 1 point plus an additional 0.5 points per water
drop on tiles with bramble tokens (rounded down).
Notes: Requires the Honeybee and Cows expansions. Counts
as both a honey-producing tile and a climate-sensitive tile.
Cloudberry 1 – 5 players
Rubus chamaemorus
Components: 1 growth token
Gameplay: Cloudberry is a plant and
requires any non-Scorching climate
and three water drops to grow.
Use the special growth token to track which climate it grew in.
Reevaluate its growth each time the climate changes.
Cloudberry produces 1 honey when you collect its yield
with a Bee action.
Harvest: If Cloudberry grew in a Warm or Temperate
climate, the players score 5/2/0/0 points and first place may
create a cloud with one water drop. If Cloudberry grew in a
Cold or Frozen climate, the players score 7/4/2/0 points
and first place may create a cloud with two water drops.
Solo: When the neutral player has first place on Cloudberry at
harvest, it creates a cloud with two water drops.
Notes: Counts as a climate-sensitive tile but not a honey-
producing tile. If playing without the Honeybee expansion,
ignore honey production. If playing without the Cows expansion,
treat Cloudberry as a standard tile, ignore all climate-related
effects, and score the lower values at harvest.
special tile!
---
31
Lake 3 – 5 players
Lacus ludus
Gameplay: The Lake is not a plant and does not grow. When water drops are placed on the Lake, they are immediately removed and returned to their owners’ personal supplies.
When a cloud is moved to the Lake with a Wind action, the player who performed the action must add three of their water drops to the cloud.
When a cloud is moved from the Lake with a Wind action, it can be moved any number of spaces, even changing directions. The cloud stops moving if it merges with another cloud. The cloud cannot be moved back to the Lake.
Maltese Cactus 1 – 5 players
Opuntia ficus-indica
Components: 1 growth token
Gameplay: Maltese Cactus is a plant and requires two water drops to grow. But if it ever has four or more water drops, it becomes over-watered. Use the special growth token to track when Maltese Cactus is growing normally and when it is over-watered.
Harvest: If Maltese Cactus is growing normally, the players score 6/3/1/0 points. If Maltese Cactus is over-watered, the players score 2/2/1/1 points instead.
Snapdragon 1 – 5 players
Antirrhinum majus
Components: 3 bloom tokens
Setup: Snapdragon must be placed as a corner tile. The surrounding tiles must not be special tiles. Place a bloom token on each of the tiles surrounding Snapdragon.
Gameplay: Snapdragon is a plant and requires two drops to grow. When you take a Bee action on a tile with a bloom token, score 1 point.
Harvest: First place scores 3 points per growing tile with a bloom token. Second place scores 1 point per growing tile with a bloom token.
Solo: Snapdragon must be placed as the bottom-left corner tile in the fields (P5). The neutral player also scores for Bee actions on a tile with a bloom token.
Sunflower 1 – 5 players
Helianthus annuus
Components: 5 sunshine tokens
Gameplay: Sunflower is a plant but requires zero water drops to grow. Use the sunshine tokens to indicate the growth level of Sunflower. When any player takes the Sun action, the growth level of Sunflower increases by one.
Harvest: First place scores 1 point per growth level of Sunflower. Second place scores 0.5 points per growth level of Sunflower (rounded down). At the end of harvest, the growth level of Sunflower resets to zero.
Solo: When the neutral player plays 5 or 6, the growth level of Sunflower increases by one.
Venus Flytrap 1 – 5 players
Dionaea muscipula
Components: 4 fly tokens
Setup: Place the four fly tokens, live side up, on the four corner tiles. (For a two-player game, place them on the four tiles that are not in the middle column.)
If the Venus Flytrap is one of the tiles with a fly token, flip the fly token on that tile to the dead side.
Gameplay: The Venus Flytrap is a plant and requires three water drops to grow.
(separate promo tile released with the base game)
(special tile!)
---
32
When you take the Rain action on a tile with at least one live fly token, score 2 points per live fly token on that tile, then move those fly tokens to an adjacent tile that is closer to the Venus Flytrap. When a live fly token reaches the Venus Flytrap, flip it to the dead side.
Harvest: First place scores 3 points per dead fly token. Second place scores 1 point per dead fly token.
Solo: When the neutral player plays 1 or 2, it scores and moves live fly tokens on the selected tile. Do not use this tile with the “No More Tricks” variant.
Volcano 3 – 5 players
Mons vesaevus
Components: 1 control token
Gameplay: The Volcano is not a plant and does not grow.
The first player with one of their water drops on the Volcano becomes the controlling player and takes the control token.
If another player passes the controlling player for the number of water drops on the Volcano, they take the control token and remove all of the previous controlling player’s water drops from the Volcano. For other caveats of changing control, see the Primrose.
When you take control of the Volcano, if you have five or fewer water drops there, you may adjust the climate one step hotter, resolve the climate event, and score 2 points.
When you take control of the Volcano, if you have six or more water drops there, you must adjust the climate five steps cooler, resolve the climate event, and score 3 points. After that, all water drops are removed from the Volcano.
Notes: Requires the Cows expansion. Neither the cows nor the bee can be moved on the Volcano.
Mini-Expansions
In this section, you will find the complete descriptions of all mini-expansions released for the game. We recommend no more than one or two of them at a time, and only once you’re familiar with the game and primary expansions.
Permanent Fertilizer 2 – 5 players
Components: 3 large fertilizer tokens
Setup: Place the three fertilizer tokens on three different non-special tiles. Make sure that no two fertilizer tokens are placed adjacent to each other.
Harvest: For each tile with a fertilizer token, the scores for all players are increased by 1 point. Do not remove the Fertilizer tokens after Harvest.
Notes: To avoid confusion between the two different types of fertilizer tokens, do not use this mini-expansion with the Cows expansion.
special tile!
---
Fogcatchers 1 – 5 players
Components: 10 fogcatcher tokens
Setup: Give each player two fogcatcher tokens in their player color.
Gameplay: As an action on your turn, you may discard one card to place a fogcatcher token on any tile, and vote on any one voting target.
Each tile can only have one fogcatcher token. Other players can only remove water drops (of any player) from tiles with your fogcatcher tokens if you grant them permission (except to move their water drops if their supply runs out).
Harvest: At the end of harvest, you may keep one water drop each on harvested tiles with your fogcatcher tokens.
Solo: During setup, the neutral player places their fogcatcher tokens randomly via a die roll (rerolling duplicate targets and invalid targets). The neutral player never grants permission to remove its water drops, but always grants permission to remove yours. At the end of harvest, the neutral player always keeps one of its water drops on each harvested tile with its fogcatcher token.
Notes: Fogcatcher tokens cannot be placed on special tiles.
Orchids 1 – 5 players
Components: 4 orchid tokens
Gameplay: As soon as a tile has five or more water drops, place an orchid token from the supply on that tile if available. As soon as a tile with an orchid token has four or fewer water drops, remove the orchid token from that tile and return it to the general supply.
Harvest: For each tile with an orchid token, the player who has the most water drops on the tile collects the orchid token. If there is a tie for most, the orchid token is returned to the general supply instead.
At the end of harvest, each player scores 2/5/9/14 points for having 1/2/3/4 collected orchid tokens. Then all orchid tokens are returned to the general supply.
Notes: Orchid tokens cannot be placed on special tiles.
Wonders 2 – 5 players
Components: 8 wonder tokens
Setup: Place all wonder tokens in a face-down pile.
Gameplay: At the start of each round, reveal two random wonder tokens. On your turn, if you take both of the actions shown on a revealed wonder token, in that exact order, score 1 point and place the wonder token on any tile. Each tile can only have one wonder token.
Harvest: For each tile with a wonder token, the player who has the fewest non-zero water drops on the tile collects the wonder token. Note, this can be the player with the most drops, if they’re alone on the tile. If there is a tie for fewest, the wonder token remains on the tile instead.
Game End: Each player scores 1/3/6/10/15/21/28/36 points for having 1/2/3/4/5/6/7/8 collected wonder tokens.
Notes: Wonder tokens cannot be placed on special tiles.
Crop Rotation 1 – 5 players
Components: 1 crop rotation token
Setup: Place the crop rotation token on a random tile. Keep all unused tiles nearby, sorted and shuffled by type: standard, honey-producing, and climate-sensitive.
Harvest: At the end of harvest, the player who has the most water drops on the tile with the crop rotation token places it on any other tile. If there is a tie for most, the tie is broken by the current turn order. Then the previous tile is removed from play and replaced with a random new tile of the same type.
Solo: When the neutral player places the crop rotation token, it chooses a tile randomly via a die roll (rerolling invalid targets). After the previous tile has been replaced with a random new tile, rearrange the field according to priority.
Notes: The crop rotation token cannot be placed on Blackberry or special tiles.
---
Extreme Weather Events 1 – 5 players
Components: 8 extreme weather event cards
Notes: If an extreme weather event has effects that refer to an expansion that is not in play, ignore those effects when it resolves.
1 Blizzard
All light clouds become thunderclouds.
In normal turn order, each player may move one cloud they control to an adjacent tile.
Solo: The neutral player never moves a cloud.
In a Cold climate, in normal turn order, each player may then add one water drop to one cloud they control.
In a Frozen climate, in normal turn order, each player may then add one water drop to two clouds they control.
Solo: The neutral player always targets the highest-priority clouds it controls.
Blizzard does not count as Frost weather for plant development (for example: Snowdrop).
2 Hailstorm
Each player rains 1 of their water drops from every thundercloud.
In a Cold or Frozen climate, in reverse turn order, each player may add one water drop to any tile.
Solo: The neutral player always targets the highest-priority tile.
Hailstorm does not count as Frost weather for plant development.
3 Drought
Each player removes half of their water drops from every tile (rounded up).
The player or players with the fewest points each draw one forecast card.
Drought does not count as Sun weather for plant development (for example: Coffee).
4 Heatwave
In reverse turn order, each player chooses one cloud where they have presence and doubles their water drops in it. Check for cloud overflow only after all players have done this.
Solo: The neutral player targets all clouds where it has presence.
In a Warm or Scorching climate, repeat the effect.
In a Scorching climate, repeat the effect again.
Heatwave does not count as Sun weather for plant development.
5 Sandstorm
In reverse turn order, each player must twice move one water drop (of any player) to an adjacent tile. This can be different water drops or the same water drop.
Solo: The neutral player resolves its normal Wind weather effect twice instead.
Each player loses half of their methane (rounded up).
Sandstorm does not count as Wind weather for plant development (for example: Dandelion).
---
6
Tornado
In reverse turn order, each player chooses an effect: Move one light cloud they control to an adjacent tile -OR- move one thundercloud they control directly to any other tile without passing through the tiles between.
Solo: The neutral player resolves its card 7 effect instead.
Each player loses half of their honey (rounded up).
Tornado does not count as Wind weather for plant development.
7
Flood
! All thunderclouds immediately pour.
After this, in reverse turn order, each player chooses one tile where they have presence and doubles their water drops on it.
Solo: The neutral player always targets the highest-priority tile where it does not have majority (or just the highest-priority tile otherwise).
In a Temperate climate, the player or players with the fewest total water drops on tiles then each score 5 points.
! Flood does count as Rain weather for plant development (for example: Rice).
8
Monsoon
! All thunderclouds immediately pour.
During this, in reverse turn order, each player chooses where their water drops fall from each thundercloud: all of them onto the tile below the cloud -OR- all of them onto an adjacent tile.
Solo: The neutral player always targets the tile below the cloud.
! Monsoon does count as Rain weather for plant development.
Terrain Objects 2 – 5 players
Components: 5 terrain objects
Setup: See the setup diagram on page 8.
Gameplay: Each terrain object influences both of the tiles that it is placed on the border between. Terrain objects have unique effects that trigger when you take a specific Weather action on either of the tiles that they influence.
Geyser
When you create a cloud on one of these tiles with the Frost action, you must add one extra water drop to that cloud -AND- you must move the cloud on the other tile (if there is one) to an adjacent tile in any direction except towards the Geyser.
Treerow
When you add water drops to a cloud on one of these tiles with the Sun action, you only add one water drop. Clouds on these tiles overflow at 6+ water drops.
Mountain
When you move a cloud from one of these tiles to the other with the Wind action, you must rain one water drop (of any player) from the cloud onto the cloud’s previous tile -AND- the cloud becomes a thundercloud.
Windmill
When you move a cloud from one of these tiles to the other with the Wind action, you may leave any number of water drops from the cloud behind in a new cloud on the previous tile -AND- you must (if possible) vote for harvest in addition to your normal vote.
Canal
When you rain a water drop (of any player) onto one of these tiles with the Rain action, that player adds one water drop to the other tile.
---
36
Forecast Cards
In this section, you will find the complete descriptions of all forecast cards in the game, organized by expansion.
1
play before harvest: Score 1 point for each different tile type where you have at least one water drop.
2
play before harvest: Choose a tile and score 1 point for every three water drops you have on that tile (rounded down).
3
play before harvest: Count all water drops in the clouds as if they were on the tiles below during this harvest. This might cause some tiles to count as growing.
Note: Do not remove water drops from the clouds at the end of this harvest, unlike water drops on the tiles.
4
play after harvest: Create a cloud with two of your water drops in it and place it on a tile without a cloud.
5
play at start of the Weather Phase: Place one of your votes on a weather space of your choice.
6
play before Frost weather: Choose a cloud and rain all water drops from that cloud onto the tile below. Your presence in that cloud is not required.
7
play during Sun weather: Instead of doubling your water drops in a cloud, add up to two of your water drops to each cloud where you have presence.
8
play before Wind weather: Move one of your water drops from its current tile to an adjacent tile. This move is in addition to your normal move during Wind weather.
9
play before Rain weather: Place one of your water drops directly on a tile of your choice.
10
play as your turn: Choose a cloud and move it to an empty tile of your choice, then add one of your water drops to that cloud. Your presence in that cloud is not required. The cloud moves directly to the destination tile, so no merging occurs.
11
play as your turn: Choose up to three water drops on tiles of your choice and add them to the clouds above them.
12
play as your turn: Choose a cloud with four or fewer water drops in it, then add three of your water drops to that cloud. Your presence in that cloud is not required.
13
play as your turn: Change all harvest dice so that they show the harvest icon. Score 3 points.
14
play as your turn: Add one of your water drops to every cloud where you do not have presence.
15
play as your turn: Rain one water drop from every cloud onto the tile below. Your presence in those clouds is not required.
16
play as your turn: Create a cloud with three of your water drops in it and place it on a tile without a cloud.
17
play after harvest: Gain 4 honey from the supply.
18
play as your turn: Move the bee to an adjacent tile and perform a Bee action. You may repeat this once.
---
19
play as your turn: Adjust the climate
one step in either direction. Do not resolve
the climate event.
20
Play at start of the Climate Phase:
Gain up to 2 methane from the supply.
21
immediate effect: Remove one of your
votes from any weather space and/or spend
1 methane. For each option performed,
either gain 3 honey or draw one card.
(both Honeybee and Cows are optional)
22
immediate effect: Add 2 methane
from the supply to a cloud on a tile with a
bee or cow. Create a new cloud if necessary.
(Honeybee is optional, Cows is required)
23
immediate effect: Spend up to two
methane and/or honey. For each resource
spent, move one of your votes to a different
weather space. (either Honeybee or Cows is
required, the other is optional)
24
immediate effect: Take one card from
the discard pile. If you spend 1 methane
or 1 honey, take an additional card. Then
discard one card. (either Honeybee or Cows
is required, the other is optional)
Player Power Cards
In this section, you will find the complete
descriptions of all player power cards in the
game, organized by expansion.
Frost Player Power
When you create a cloud with the Frost
action, add two of your water drops to the
cloud (instead of one).
Sun Player Power
You may play any one card as a Sun card
(instead of having to play two matching
cards). This also allows you to play any
two cards to perform the Sun action as the
second action on your turn.
Wind Player Power
When you move a cloud with the Wind
action, you may move it a tile of your choice.
Your presence in that cloud is still required.
The cloud moves directly to the destination
tile, which does not have to be adjacent, so
no merging occurs on the tiles between.
Rain Player Power
When you perform the Rain action, you may
perform an alternative action. Place one of
your water drops directly on a tile without
a cloud instead of the normal Rain action.
You may spend 1 methane to add a
second drop to the same tile. Voting still
occurs normally.
Harvest Player Power
At the end of each harvest, you may choose
to keep one of your water drops on up to
three different tiles that were just harvested,
instead of removing them.
Bees Player Power
When you perform the Bee action as your
second action, you may first move the bee
to any tile by spending 1 honey. You
do not have to play one card from hand.
(Honeybee is required)
Methane Player Power
You may treat any cloud that contains two
or more methane as if you have presence in
that cloud. (Cows is required)
---
Meteorologist Player Power
You are dealt two forecast cards at setup (instead of three). During the Cleanup Phase of rounds 1/2/3, draw one additional forecast card.
Southern Winds Cards
In this section, you will find the complete descriptions of all southern winds cards in the game, organized by expansion.
1 place 1 neutral drop on a tile
Place one neutral water drop directly onto the selected tile. Then check to see if the crop is now growing.
2 place 2 neutral drops on a tile
Place two neutral water drops directly onto the selected tile. Then check to see if the crop is now growing.
3 remove 1 player drop from a tile
Remove one of your water drops from the selected tile. Then check to see if the crop is still growing. If you have no water drops on the tile, it is not a valid target.
4 create a cloud with 2 neutral drops
Create a cloud with two neutral water drops on the selected tile. If the tile already has a cloud, it is not a valid target.
5 add 1 neutral drop to a cloud
Add one neutral drop to the cloud on the selected tile. Then check for cloud growth and overflow. If the tile does not have a cloud, it is not a valid target.
6 add 1 neutral drop to a cloud
Add one neutral water drop to the cloud on the selected tile. Then check for cloud growth and overflow. If there is no cloud on the tile, it is not a valid target.
7 move a mixed cloud NW
Move a cloud that has neutral water drops and your water drops from the selected tile to the tile directly northwest (e.g., P4 to P1). The cloud does not move through any other tiles along the way. If the cloud is in the first column, move it north (e.g., P3 to P1). If the cloud is on P2, move it west to P1. If the cloud is on P1, it is not a valid target.
8 move a pure cloud SE
Move a cloud with only neutral water drops from the selected tile to the tile directly southeast (e.g., P3 to P6). The cloud does not move through any other tiles along the way. If the cloud is in the second column, move it south (e.g., P2 to P4). If the cloud is on P5, move it east to P6. If the cloud is on P6, it is not a valid target.
9 reshuffle and redraw
Gather all of the southern winds cards (i.e., the discards, the deck, and this card) and reshuffle them to form a new deck. Then draw a new card and resolve it. If this card is drawn again, repeat this process.
---
10, 11
flight of the bee
If there are no water drops left in the neutral player’s supply, the neutral player scores 1 point and the remaining steps are skipped instead.
1. Move the bee to the highest-numbered tile, besides its current tile, that meets one of these conditions:
° the neutral player does not have water drop majority
° the neutral player has water drop majority, but the crop is not growing
If there are no tiles that meet either of the above conditions, the neutral player scores 1 point and the remaining steps are skipped instead.
2. Remove all dormant pollen from the bee’s new tile and return it to the general supply.
3. If the bee’s new tile is a honey-producing tile and not already at its germinated pollen limit, add one germinated pollen from the general supply to the tile.
4. Place two neutral water drops directly onto the bee’s new tile (or place one if there is only one neutral water drop left).
12, 13 nature’s call
1. Roll the die. Add 2 methane to the cloud on the tile closest to the cow’s current tile (create one if necessary). This is based on the die roll: either the cow’s current tile or the closest adjacent tile.
2. Add one fertilizer from the supply to the cow’s current tile.
3. Roll the die. Move the cow to the closest adjacent tile. The cow must move; it cannot remain on the same tile.
14 time heals
1. Roll the die. Remove all methane from the closest cloud with any neutral water drops. Add it to the neutral player’s personal reserve.
2. Move the cow to the tile with that cloud. If the cow is already there or it’s a tile the cow cannot be moved to, skip this step.
Drafting Variant
When cards would be dealt (at setup and between rounds), perform a draft after dealing them out.
If any players still have cards in hand from the previous round, do not include those cards in the draft. Set them aside before the draft begins, then return them to those players’ hands after the draft is complete.
Carry out the following steps to perform the draft.
• For games with 4 or 5 players:
° Deal each player 6 cards.
° Each player keeps 1 card, passing 5 clockwise.
° Each player keeps 2 cards, passing 3 clockwise.
° Each player keeps the last 3 cards.
• For games with 2 or 3 players:
° Deal each player 7 cards.
° Each player keeps 1 card, passing 6 clockwise.
° Each player keeps 2 cards, passing 4 clockwise.
° Each player keeps 2 cards, passing 2 clockwise.
° Each player keeps the last 2 cards.
• For games with two players: During the draft at setup, after the draft is complete, deal one extra card to the second player.
• For games with the Cows expansion: During the draft at setup and between rounds, after the draft is complete, deal one random extra card to every player.
Note: The drafting variant gives players more control over the cards they receive and allows for another level of tactics. However, it will increase the playtime.
---
Credits
Game Design: David Chircop
Additional Design, Development, Rulebook, and Solo Mode:
Dávid Turczi
Expansion Design: David Chircop and Dávid Turczi
Additional Solo Development and Expansion Adaptation:
Nick Shaw
Illustrations: Daniela Attard
Graphic Design: Sami Laakso
GameTrayz Design: Noah Adelman
Special thanks for assistance with writing the rulebook:
Dominika Skubida, David Minken (connectmore), Paul Grogan
(Gaming Rules!), Nisses, Rachael Mortimer, Gert Van De
Slijke, Dustin Schwartz, and Sami Laakso
Playtesters: Dominika Skubida, Wai-yee Phuah, Mark Harris,
Charlotte Levy, Katalin Nimmerfroh, Tamás Rabel, Katy &
James Faulkner, Stephen Scothern, Alex Kazik, Riccardo
Fabris, Benjamin Schmauss, Ruth Ball, Darren Taylor, Neil
HK, Mihir Shah, Keegan Moser, Jesse Cunningham, Jace
Ravensburg, Lily Kientz, Pauline Hogendoorn, and more in
Malta, Poland, the UK, and all over the world
Special thanks for inspiration for promos and mini-expansions:
Nick Shaw, Noralie Lubbers, Robert Ludlow, Chris Wagner,
Vascariz, Kirsten Beens, NK, Daniel Gallego, John Albertson,
Mihir Shah, and Keegan Moser
David Chircop would like to thank Sandra Sanseigne
for the koalas.
The creators would like to thank the 4,131 backers
who made this Collector's Edition possible.
© 2021 Mighty Boards. All Rights Reserved.
40
---
Por que perguntar ao BoardGamesBot
Em vez de folhear o manual inteiro- Respostas precisas Baseadas exatamente neste manual, com a página de origem.
- Economize tempo Ache a regra em segundos, sem folhear 40 páginas.
- A qualquer hora Tire dúvidas no meio da partida, direto do celular.
- 100% grátis Crie sua conta grátis e comece a usar agora.
Como funciona
Três passos até a resposta- 1 Faça sua pergunta Digite sua dúvida sobre as regras deste jogo.
- 2 Crie sua conta grátis Leva 20 segundos — é só para guardar seu histórico.
- 3 Receba a resposta A IA encontra a regra exata e cita a página do manual.
Manual publicado pela editora · uso para consulta de regras. Mais sobre o jogo em BoardGameGeek e Ludopedia .