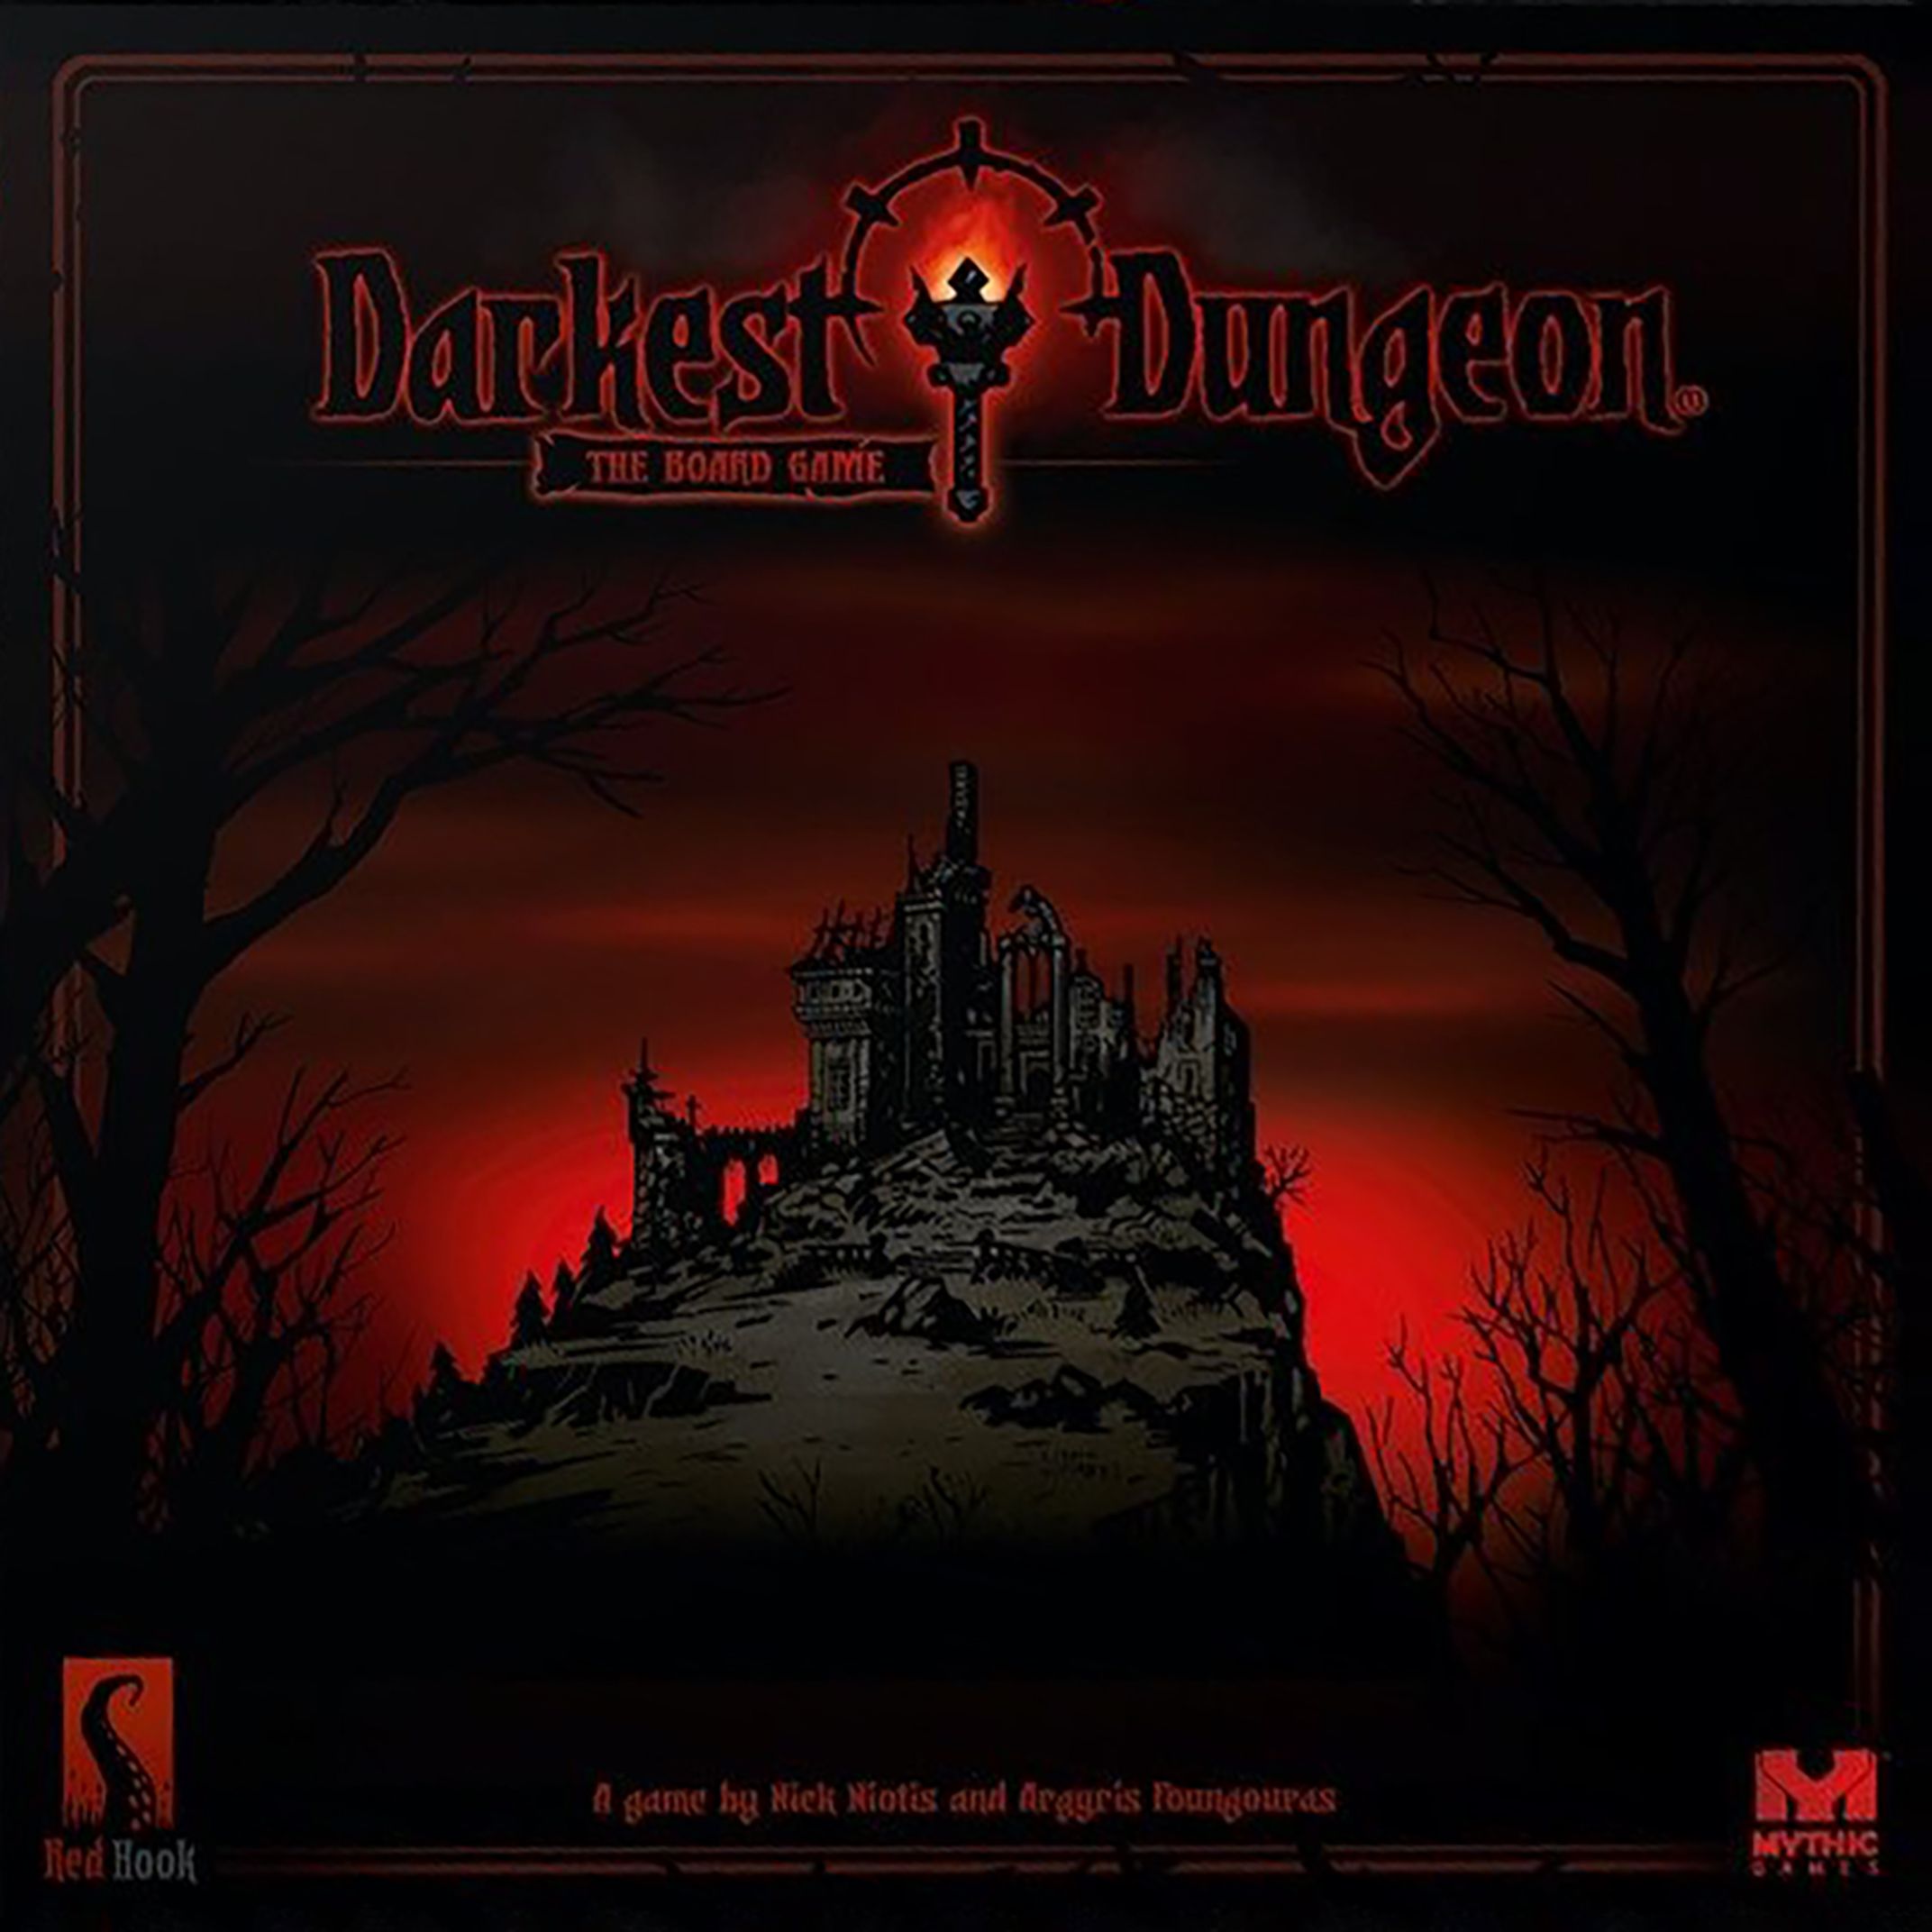
Qual é a sua dúvida sobre Darkest Dungeon: The Board Game?
Pergunte antes de baixar o manual: o assistente foi treinado neste arquivo e responde na hora, citando a página exata.
Tire dúvidas sobre o jogo
Pergunte qualquer coisa sobre Darkest Dungeon: The Board Game: regras, preparação, componentes, complexidade, preço ou se combina com seu grupo.
Escreva sua pergunta primeiro. Você criará sua conta grátis para ver a resposta — leva 20 segundos.
Manual completo
Navegue pelo manual ou baixe o PDF originalTexto completo do manual disponível para leitura Abrir texto
Ruin has come to our family.
You remember our venerable house, opulent and imperial, gazing
proudly from its stoic perch above the moor.
I lived all my years in that ancient rumor-shadowed manor, fattened by decadence and
luxury. And yet, I began to tire of... conventional extravagance. Singular unsettling tales
suggested the mansion itself was a gateway to some fabulous and unnameable power.
With relic and ritual, I bent every effort towards the excavation and recovery of those long
buried secrets, exhausting what remained of our family fortune on... swarthy workmen
and... sturdy shovels. At last, in the salt-soaked crags beneath the lowest foundations, we
unearthed that damnable portal of antediluvian evil. Our every step unsettled the ancient
earth, but we were in a realm of death and madness! In the end, I alone fled, laughing and
wailing, through those blackened arcades of antiquity, until consciousness failed me.
You remember our venerable house, opulent and imperial. It is a festering abomination! I beg you,
return home, claim your birthright, and deliver our family from the ravenous clutching shadows...
…of the Darkest Dungeon.
RULES
---
Darkest
Dungeon
Darkest Dungeon the Board Game is an adaptation of the critically
acclaimed video game created by Red Hook Studios.
The Heir has returned to the Estate, and must reclaim it.
Adventurer, you have been hired to clear out the infested land and restore the Hamlet
to its former glory. With the voice of the Ancestor echoing in your mind, you will delve
deep into cursed dungeons, and face unimaginable eldritch horrors. When these areas
are purified and you are prepared both physically and mentally, then you will assault
the Darkest Dungeon itself and seal off the source of madness once and for all.
Contents
Heroes are Human! ................................................... 4
Place Loot Chests .................................................... 17
Game Components................................................... 4
Set the Round Tracker ............................................ 17
Battle......................................................................... 17
Game Overview ........................................................ 9
Hero Turns ............................................................... 18
Campaign Overview and Goal of the Game ....... 9
1) Start of Turn Effects......................................... 18
Death of a Hero & Failing the Campaign.............. 9
2) Actions .............................................................. 18
Locations................................................................... 9
- Move................................................................ 18
- Interact with the Environment ...................... 18
Set up the Game and Get Ready
for the First Quest ................................................ 10
- Change Stance ............................................... 19
- Use a Skill ...................................................... 19
Determine the First Imminent Threat ................ 11
Critical................................................................ 19
Choose Heroes ..................................................... 11
Self Effects.......................................................... 20
Pick a Quest......................................................... 11
Target Effects...................................................... 20
Place your Heroes on the Hero Stance Tracker....12
Conditions .......................................................... 20
Setting up the Dungeon Layout.......................... 12
Stacking and Using Tokens ................................ 20
Light Up............................................................... 12
Resistances and Immunities .............................. 21
Roll for Provisions............................................... 12
Monster Turns ........................................................ 21
Navigating through Dungeons ............................ 14
Step 1 - Start of Turn Effects............................... 21
1) Scout (optional) ............................................. 14
Step 2 - Act........................................................... 21
2) Exploration...................................................... 14
1) Check what Skill the Monster is about to use.. 21
Long Corridors ................................................. 14
2) Check Target.................................................. 24
3) Backtracking................................................... 14
3) Check Range.................................................. 24
4) Leaving the Dungeon .................................... 14
4) Take the Action ............................................. 24
Entering a Room .............................................. 15
Large and Small Monsters .................................... 24
Resting............................................................... 15
Casualties .............................................................. 24
Gold ................................................................... 15
High and Low Ground .......................................... 25
Battle and Skills ..................................................... 15
Battle Rounds......................................................... 25
Setting up the Battlefield.................................... 15
Battle End .............................................................. 25
Trinkets ................................................................... 26
Reveal Room...................................................... 15
Deploy Heroes, Spawn Monsters and
Quirks ...................................................................... 26
Ready the Initiative Deck.................................. 16
Negative Quirks ..................................................... 26
2
---
Positive Quirks..........................................................27
Diseases................................................................27
Stress, Afflictions and Virtues...........................28
The Light...............................................................29
At Death’s Door and Deathblows....................... 29
Gaining XP (Experience Points).......................... 29
Leveling Up...........................................................29
Bosses...................................................................30
Fighting a Boss..........................................................30
Boss Turns..................................................................30
Monster Summoning................................................31
Hero Death...........................................................31
Returning to the Hamlet..................................... 32
The Hamlet...........................................................32
1) Draw a Hamlet Event............................................32
2) Roll for the Caretaker..........................................33
3) Spend your Days...................................................33
Hamlet Buildings and Upgrades.............................. 33
The Campaign.......................................................35
Saving the Game..................................................35
The Darkest Dungeon..........................................35
Excavation Site Rooms.............................................36
The Final Encounter – Heart of Darkness............... 36
Game Modes.........................................................36
Radiant and Stygian Modes..................................... 36
The Butcher’s Circus (PvP Mode)............................ 37
Deathblows and Heart Attacks in PvP mode......... 37
Optional Rules.............................................................37
The Abomination: A Special Kind of Hero......... 38
Boss Fights............................................................38
The Ruins....................................................................38
Necromancer................................................................38
Prophet..........................................................................38
Collector........................................................................39
Fanatic............................................................................39
Darkest Dungeon......................................................39
The Templars................................................................39
Mammoth Cyst.............................................................39
Shuffling Horror...........................................................40
Final Encounter.........................................................40
Ancestor 1st Form........................................................40
Ancestor 2nd Form........................................................40
Gestating Heart...........................................................41
Heart of Darkness.......................................................41
Suggested Party Compositions.......................... 42
---
4
Heroes are Human!
Although brave and determined, adventurers are fragile and flawed. The horrors they will face will test their brains and bodies to the breaking point and beyond. Your characters may be slain or even driven mad beyond measure. Unlike many role-playing games, Darkest Dungeon Campaigns are not guaranteed to succeed. Failure is likely, and good heroes will fall. Keep this in mind in your Quest. Don’t be discouraged should your favorite Hero meet an untimely end - sacrifice is essential for success.
Game Components
Tokens
• 28 Blight
• 28 Bleed
• 30 Buff
• 12 Debuff
• 9 Stun
• 9 Mark
• 9 Riposte
• 9 Guard
• 6 Protection
• 25 Gold
• 20 Experience Points
Xp
5 Xp
• 21 Room
• 10 Loot
• 1 Firewood
• 11 Hero Stance
CRUSADER BOUNTY HUNTER HELLION HIGHWAYMAN
Dice
• 8 Exploration Dice
• 16 Provision Dice
• 4 Death’s Door Dice
• 4 Ten-sided Dice
Tiles & Boards
• 4 Hero Dashboards
• 1 Light and 2 Stance Boards
• 13 Room Tiles & 1 PvP Arena
Stress
Stress
Stress
Stress
Graveyard
Gain a Virtue for Next Quest
6
Guild
Upgrade a Level 1 Hero Card
Upgrade a Level 1 Skill Card
3 Xp
2 Xp
7
The Hamlet
Tavern
1
3
9
-3
-6
-9
Blacksmith
Use One of your Skills as Its Level 3 Form for the Next Quest Only
3
Sanitarium
Heal 7
Heal 14
Remove Disease
2
4
Abbey
Remove 1 Quirk
Remove 2 Quirks
Gain 1 Positive Quirk
3
5
8
1 1 2 2 3 3 4 4
Survivalist
Gain 1
Gain 2
1
3
1-2
Stagecoach
Add another Waiting Hero token
Nomad Wagon
Reveal two Level I Trinkets and one Level II Trinket
9-10
Graveyard
Gain a Virtue for Next Quest
6
Guild
Upgrade a Level 1 Hero Card
Upgrade a Level 1 Skill Card
3 Xp
2 Xp
7
Blacksmith
Use One of your Skills as Its Level 3 Form for the Next Quest Only and Gain 1
Nomad Wagon
Reveal one Level I Trinket, one Level II Trinket and one Level III Trinket
Survivalist
Gain 1
Gain 2
Gain 3
2
4
1-2
8
Tavern
1
1
3
3
9
2
-3
-6
-9
Heal 5
Heal 10
Remove Disease
3
Sanitarium
Heal 9
Heal 18
Remove Disease
2
4
Abbey
Remove 1 Quirk
Remove 2 Quirks
Gain 1 Positive Quirk
-3
-6
3
3
5
9-10
Stagecoach
Add another Waiting Hero Token
The Hamlet
Graveyard
Gain a Virtue for Next Quest
6
Guild
Upgrade a Level 1 Hero Card
Upgrade a Level 1 Skill Card
3 Xp
2 Xp
7
Blacksmith
Use One of your Skills as Its Level 3 Form for the Next Quest Only and Gain 1
Nomad Wagon
Reveal one Level I Trinket, one Level II Trinket and one Level III Trinket
Survivalist
Gain 1
Gain 2
Gain 3
2
4
1-2
8
Tavern
1
1
3
3
9
2
-3
-6
-9
Heal 5
Heal 10
Remove Disease
3
Remove Disease 2 4 Abbey Remove 1 Quirk Remove 2 Quirks Gain 1 Positive Quirk 3 6 3 3 5 9 10 Stagecoach Add another Waiting Hero Token The Hamlet Graveyard Gain a Virtue for Next Quest 6 Guild Upgrade a Level 1 Hero Card Upgrade a Level 1 Skill Card 3 Xp 2 Xp 7 Blacksmith Use One of your Skills as Its Level 3 Form for the Next Quest Only and Gain 1 Nomad Wagon Reveal one Level I Trinket one Level II Trinket and one Level III Trinket Survivalist Gain 1 Gain 2 Gain 3 2 4 1 2 8 Tavern 1 1 3 3 9 2 3 6 9 Heal 5 Heal 10 Remove Disease 3
Sanitarium
Heal 9
Heal 18
Remove Disease
2
4
Abbey
Remove 1 Quirk
Remove 2 Quirks
Gain 1 Positive Quirk
-3
-6
3
3
5
9-10
Stagecoach
Add another Waiting Hero Token
The Hamlet
Graveyard
Gain a Virtue for Next Quest
6
Guild
Upgrade a Level 1 Hero Card
Upgrade a Level 1 Skill Card
3 Xp
2 Xp
7
Blacksmith
Use One of your Skills as Its Level 3 Form for the Next Quest Only and Gain 1
Nomad Wagon
Reveal one Level I Trinket, one Level II Trinket and one Level III Trinket
Survivalist
Gain 1
Gain 2
Gain 3
2
4
1-2
8
Tavern
1
1
3
3
9
2
-3
-6
-9
Heal 5
Heal 10
Remove Disease
3
Sanitarium
Heal 9
Heal 18
Remove Disease
2
4
Abbey
Remove 1 Quirk
Remove 2 Quirks
Gain 1 Positive Quirk
-3
-6
3
3
5
9-10
Stagecoach
Add another Waiting Hero Token
The Hamlet
Graveyard
Gain a Virtue for Next Quest
6
Guild
Upgrade a Level 1 Hero Card
Upgrade a Level 1 Skill Card
3 Xp
2 Xp
7
Blacksmith
Use One of your Skills as Its Level 3 Form for the Next Quest Only and Gain 1
Nomad Wagon
Reveal one Level I Trinket, one Level II Trinket and one Level III Trinket
Gain 3 2 4 1 2 8 Tavern 1 1 3 3 9 2 3 6 9 Heal 5 Heal 10 Remove Disease 3 Sanitarium Heal 9 Heal 18 Remove Disease 2 4 Abbey Remove 1 Quirk Remove 2 Quirks Gain 1 Positive Quirk 3 6 3 3 5 9 10 Stagecoach Add another Waiting Hero Token The Hamlet Graveyard Gain a Virtue for Next Quest 6 Guild Upgrade a Level 1 Hero Card Upgrade a Level 1 Skill Card 3 Xp 2 Xp 7 Blacksmith Use One of your Skills as Its Level 3 Form for the Next Quest Only and Gain 1 Nomad Wagon Reveal one Level I Trinket one Level II Trinket and one Level III Trinket
Survivalist
Gain 1
Gain 2
Gain 3
2
4
1-2
8
Tavern
1
1
3
3
9
2
-3
-6
-9
Heal 5
Heal 10
Remove Disease
3
Sanitarium
Heal 9
Heal 18
Remove Disease
2
4
Abbey
Remove 1 Quirk
Remove 2 Quirks
Gain 1 Positive Quirk
-3
-6
3
3
5
9-10
Stagecoach
Add another Waiting Hero Token
The Hamlet
1 1 2 2 3 3 4 4
• 13 Room Tiles & 1 PvP Arena
• 4 Waiting Hero
• 56 Wounds
10 5 1 12 3 5
8 9
4
6 7
---
5
• 1 Hamlet Board
Survivalist Survivalist II
Gain 1 1
Stagecoach Stagecoach II
Place two Waiting
Hero tokens
Tavern Tavern II
1
3
-3
-6
Nomad Wagon Nomad Wagon II
Reveal three Level I Trinkets
1-2
3
Sanitarium Sanitarium II
1
3
Heal 3
Heal 10
Remove
Disease2
4
Abbey Abbey II
2
5
Remove 1 Quirk
Remove 2 Quirks
5
9-10
Graveyard Graveyard
Gain a Virtue for Next Quest
6
Guild Guild
2
1
Upgrade a
Level 1 Hero Card
Upgrade a
Level 1 Skill Card
4 Xp
2 Xp
7
Blacksmith Blacksmith II
Use One of the Hero’s
Skills as Its Level 2 Form
for the Next Quest Only
8
1
1 1 2 2 3 3 4 4The Hamlet The Hamlet
• 12 Dungeon Tiles & 2 Darkest Dungeon Tiles
Cards
• 23 Hero Cards I
17
Resistances Immunities
0
CRUSADERCRUSADER
Hamlet Skill: Zealous Speech
(Only as the first action of a day)
Preparation Days -1
(Day ends immediately): All -5 . 32
Resistances Immunities
2
CRUSADERCRUSADER
Hamlet Skill: Zealous Speech
(Only as the first action of a day)
Preparation Days -1
(Day ends immediately): All -5 .
III
II
24
Resistances Immunities
1
CRUSADERCRUSADER
Hamlet Skill: Zealous Speech
(Only as the first action of a day)
Preparation Days -1
(Day ends immediately): All -5 .
• 38 Trinkets
I
I I Accuracy Stone Accuracy Stone
Acc-1 Acc-1
Acc+1 Acc+1
• 11 Diseases
Disease
Black Plague
/Hero Level
1 2t
• 17 Positive & 18 Negative Quirks
Clotter
-1t
Anemic
13t
• 5 Afflictions & 5 Virtues
Stalwart
At the start of
your turn:
1-3
Self -2
Fearful
At the start of
your turn:
1-2
Self +2
• 19 Quest Cards
QuestI
8
2
2
1
1
2
The estate has remained secret
for far too long...
Thus, it was the rightful owner’s decision
to send you on a mission to scout ahead.
Who knew what horrors lurked in the
shadows though?
XP
1 Xp/ 2 Rooms cleared.
Scout Ahead
I
• 16 Hamlet Events Supply Run 2
‘Tis not only the Heroes but
the common folk too, that
offer up anything they can for
the Hamlet’s common good.
Party gains +2
before the next Quest.
• 231 Hero Skill Cards
I
CRUSADER CRUSADER
Smite Smite +1+1vs Unholy
Crit 0Crit 0 1313 Acc 9Acc 9 7700
Smite I
• 8 Initiative Cards
• 169 Monster & Boss Cards I I
Mastery over life and death was chief
among my early pursuits. I began in
humility, but my ambition was limitless.
Who could have divined the prophetic
import of something as unremarkable
as a twitch in the leg of dead rat?
Necromancer
I Fulminate2
Crowded
Eye on You1 1
Rubble of Ruin3
Crowded
2t, +1
1 3t
Special
79
Resistances Immunities
ProphetProphet
Unholy - Front - Large
0
Crit 0 Crit 0 22 Acc 9 Acc 9 11
Crit 0 Crit 0 22 Acc 8 Acc 8 11
1
Crit 0 Crit 0 1414 Acc 8 Acc 8 99
1
21-5
6-10
I
Boss Cards 7
Resistances Immunities
1 2
Graveyard Slash1
Most Wounded
Graveyard Stumble2
Furthest
Bone SoldierBone Soldier
Unholy - Front
1
1
Self Pull 1
0
Crit 1 Crit 1 99 Acc 9 Acc 9 55
Crit 0 Crit 0 66 Acc 5 Acc 5 33
I Crushing Blow1
Closest
Ground Pound 2
Crowded
0
2t
33
Resistances Immunities
1
Bone CaptainBone Captain
Unholy - Front - Large
1
21-6
7-10
1
2
Crit 2 Crit 2 1717 Acc 9 Acc 9 1111 Crit 1 Crit 1 77 Acc 9 Acc 9 55
Push 1
II
Monster Cards
• 22 Hero PvP Cards 1
2
3
CCRRUUSSAADDEERR
32
1
0-1
0-1
Resistances 1
Zealous Accusation
Inspiring Cry
Battle Heal
11, -1, +1
Crit 0Crit 0 99 Acc 9Acc 9 55
Crit 2 Crit 2 55 Acc 14Acc 14 33 1
2
3
CCRRUUSSAADDEERR
32
1
1
0
Resistances
Smite
Zealous Accusation
Holy Lance
1
Self Pull 1 +1
Crit 0Crit 0 99 Acc 9Acc 9 55
Crit 1Crit 1 1313 Acc 9Acc 9 77
+1
Crit 0Crit 0 1616 Acc 10Acc 10 99
Front Large 1 21 6 7 10 1 2 Crit 2 Crit 2 1717 Acc 9 Acc 9 1111 Crit 1 Crit 1 77 Acc 9 Acc 9 55 Push 1 II Monster Cards 22 Hero PvP Cards 1 2 3 CCRRUUSSAADDEERR 32 1 0 1 0 1 Resistances 1 Zealous Accusation Inspiring Cry Battle Heal 11 1 1 Crit 0Crit 0 99 Acc 9Acc 9 55 Crit 2 Crit 2 55 Acc 14Acc 14 33 1 2 3 CCRRUUSSAADDEERR 32 1 1 0 Resistances Smite Zealous Accusation Holy Lance 1 Self Pull 1 1 Crit 0Crit 0 99 Acc 9Acc 9 55 Crit 1Crit 1 1313 Acc 9Acc 9 77 1 Crit 0Crit 0 1616 Acc 10Acc 10 99
• 8 Boss Room Cards
12
BOSS
12—Ancestor Room
• 17 Room Cards
!
!
1
1—Ritual Chamber
Cornered: Heroes ending
their turn here suffer +1.
• 17 Stygian Room Cards
!
!
1
1—Ritual Chamber
Cornered: Heroes ending
their turn here suffer +2.
• 8 Player Aid Cards
Rooms
Empty Room: Nothing special.
It is automatically cleared.
Dark Room: -1. This room
can’t be cleared.
Trap Room: Each Hero suff ers
a combination of and/
or equal to the Dungeon
Level. This Room can’t be
cleared.
Curio Room: Roll . (1-5) the
Room is guarded; commence
Battle! (6-10) the Room is
unguarded. After resolving the
die, draw a Curio and choose
which Hero will interact with it.
The Room is then cleared.
Treasure Room: Commence
Battle! When the Room is
cleared, gain 20.
Objective Room: The location
of your Quest.
Provisions
Torch: +1 / Ignore
negative eff ects of Curios.
Food: 1 1 / Counter
Hunger .
Tool: Ignore a Trap or a
Rubble .
Bandages: 1 1 / Remove .
Potion: -1 / Remove .
Wild: Turn to any side you
want.
• 24 Curio Cards
You feel a shiver down your spine as
you behold this eldritch altar. It has
a small coin pouch on its base, but as
you touch its stony facade, a nauseating
feeling overcomes you.
+1
10
2t
Eldritch Altar
---
Miniatures
Crusader
Vestal
3x Bone Soldier
3x Bone Arbalist
Hellion
Arbalest
3x Bone Courtier
Bone Captain
Bounty Hunter Plague Doctor
2x Bone Defender
Abomination Highwayman
Grave Robber
3x Bone Spearman
Jester
Occultist
2x Bone Bearer
Heroes
Ruins Monsters
Necromancer
Prophet
The Collector
Collected
Highwayman
The Fanatic
Collected
Vestal
Pyre
Collected
Man at Arms
Ruins Bosses
4x Wooden Pews
---
3x Cultist Brawler
3x Gargoyle
3x Bone Rabble
3x Cultist Acolyte
3x Brigand Hunter
Ghoul
3x Brigand Fusilier
3x Brigand Cutthroat
3x Brigand Raider
Brigand Bloodletter
3x Webber
3x Rapturous Cultist
3x Maggot
2x Flesh Hound
3x Malignant Growth
3x Madman
3x Spitter
3x Ascended Witch
3x Ascended Brawler
3x Cultist Priest
3x Pliskin
3x Antibody
3x Polyp
3x Rattler
3x Defensive Growth
Adder
Common Monsters
Darkest Dungeon Monsters
PvP Mode
Butcher
Puppets
---
8
Other
• Round, Light, Days, and Party Counters
LightRound Days Party
• 12 Monster Tokens
(3 colors, 4 each)
Rules
• 1 Old Road Introductory
Tutorial Booklet
• 1 Rulebook
Darkest Dungeon Bosses
Shuffling Horror
White Cell
Stalk
Mammoth Cyst
2x Templar Impaler
2x Templar Warlord
Ancestor
1st Form
3x Perfect
Reflection
Ancestor
2nd Form
Gestating Heart Heart of Darkness
3x Imperfect
Reflection
3x Absolute
Nothingness
1
Welcome Heroes, to our tutorial, a scripted adventure designed to provide a glimpse of the game’s key
elements. Bear in mind, this is NOT a rulebook, merely an introduction.
If you prefer, feel free to head straight to the rulebook.
You are a group of Heroes approaching the Hamlet, not necessarily those you will be playing in your campaign,
just some of those willing to face the horrors, in search of gold, fame and glory.
This is a visual representation of the components you need as explained in the next page.
You will arrive along the Old Road. It winds with a troubling, serpent-like suggestion through
the corrupted countryside, leading only, I fear, to ever more tenebrous places. There is a
sickness in the ancient, pitted cobbles of the Old Road, and on its writhing path you will face
viciousness, violence and perhaps, other damnably transcendent terrors. So, steel yourself,
and remember, there can be no bravery without madness. The Old Road will take you to
Hell, but, in that gaping abyss, we will find our redemption. The Hamlet is just ahead.
THE OLD ROAD
START HERE BEFORE YOU PLAY A FULL GAME.
Miniatures
Dice and Tokens
• Round token
• Light Token
• 4 Stress Counters
• 8 Exploration
Dice
• 8 Provision
Dice
• Wound Tokens
• 4 Ten-sided
Dice 1051
Crusader
Vestal
Hellion
Brigand
Fusilier
Highwayman
Brigand
Bloodletter
Cards
Crit 1 Crit 1 12 Acc 9 7
0 0
Wicked Hack I Crit 1 Crit 1 12 Acc 9 7
2
Iron Swan I 2 2t
Crit 0 Crit 0 8 Acc 9 5
1
If It Bleeds I +1+1vs Unholy
Crit 0 Crit 0 13 Acc 9 7
0
Smite I Crit 0 Crit 0 9 Acc 9 5
1
Zealous Accusation I Self
Pull 1
Crit 1 Crit 1 13 Acc 9 7
+1+1vs Unholy
1
Holy Lance I Crit 1 Crit 1 9 Acc 9 5
+2+2vs
1-21-2
Pistol Shot I Self
3t
Crit 0 Crit 0 3 Acc 10 2
1-21-2
Tracking Shot I Push 1
Self
Push 1
Crit 1 Crit 1 15 Acc 10 9
0 0
Point Blank Shot I Punishment2
Closest
1
Rain of Whips1
Crowded
1
Point Blank Shot
Push 1
3
Closest
1
Self
2t
1 3t, +1
2 2t, +1
24
1
1
2
2
31-4
1-5
5-8
6-10
9-10
Resistances Immunities
Brigand Bloodletter Brigand Bloodletter
Human - Front - Large
2
0
Crit 0 Crit 0
2 2 Acc 9 Acc 9
1 1
Crit 1 Crit 1
5 5 Acc 9 Acc 9
3 3
Crit 2 Crit 2
12 12 Acc 9 Acc 9
6 6
I
• 12 Hero Skill Cards
17
Resistances Immunities
0
CRUSADERCRUSADER
Hamlet Skill:
Zealous Speech
(Only as the first action of a day)
Preparation Days -1
(Day ends immediately): All
-5 .
• 4 Hero Cards
• 2 Monster Cards
Conditions
Bleed X : When removed, suffer x
.
Blight X : When removed, suffer x
.
Stun: When removed, skip your
first action if it is a Hero; skip the
whole turn if it is a Monster.
Buff : A s long as the character is
Buffed, their Skills gain +1
Crit Crit per
stack.
Debuff : A s long as the character
is Debuffed, others gain +1
Crit Crit to
their Skills targeting them.
Guard: Enemies must always
target a character with Guard with
their Skills.
Riposte: When attacked, the
character deals half (round up)
back to the attacker.
Marked: Characters targeting a
marked character gain +1
Acc Acc.
Protection: A protected character
takes only half (round up)
.
Rooms
Empty Room: Nothing special.
It is automatically cleared.
Dark Room:
-1. This room
can’t be cleared.
Trap Room: Each Hero suffers
a combination of
and/
or
equal to the Dungeon
Level. This Room can’t be
cleared.
Curio Room: Roll
. (1-5) the
Room is guarded; commence
Battle! (6-10) the Room is
unguarded. After resolving the
die, draw a Curio and choose
which Hero will interact with it .
The Room is then cleared.
Treasure Room: Commence
Battle! When the Room is
cleared, gain 20
.
Objective Room: The location
of your Quest .
Provisions
Torch:
+1 / Ignore
negative effects of Curios.
Food: 1 1 / Counter
Hunger .
Tool : Ignore a Trap
or a
Rubble
.
Bandages:
1 1 / Remove
.
Potion:
-1 / Remove
.
Wild: Turn to any side you
want .
Exploration
Curio: Draw a Curio card.
You can consume a Torch
before doing so to ignore all
negative effects.
Trap: Consume a Tool
Dungeon Level This Room can t be cleared Curio Room Roll 1 5 the Room is guarded commence Battle 6 10 the Room is unguarded After resolving the die draw a Curio and choose which Hero will interact with it The Room is then cleared Treasure Room Commence Battle When the Room is cleared gain 20 Objective Room The location of your Quest Provisions Torch 1 Ignore negative effects of Curios Food 1 1 Counter Hunger Tool Ignore a Trap or a Rubble Bandages 1 1 Remove Potion 1 Remove Wild Turn to any side you want Exploration Curio Draw a Curio card You can consume a Torch before doing so to ignore all negative effects Trap Consume a Tool
to ignore it or roll
an attack against you ->
Acc 8 Acc 8 (
2 2/Dungeon Level),
Crit 2 Crit 2 (4 4/Dungeon Level).
Stressful Darkness:
Consume a Torch
or gain
+2 or -1.
Hunger : Consume 1 Food
or suffer 2
/Hero Level.
Rubble: Consume a Tool
or suffer 1
/Dungeon
Level and +1.
• 8 Player Aid Cards
1t, +1
Crit 1 Crit 1 4 Acc 9 2
1
Dazzling Light I Crit 3 Crit 3
5 Acc 12
3
0-10-1
Divine Grace I Crit 0 Crit 0 9 Acc 9 5
+1+1vs Unholy
1
Mace Bash I I
8
Resistances Immunities
Brigand FusilierBrigand Fusilier
Human - Back
Blanket Fire1
Rushed Shot
Self
Push 1
2
12
1
Crowded
Closest
2
1
Crit 0 Crit 0
4 Acc 7 2
Crit 1 Crit 1
5 Acc 6 3
2t
Tiles & Boards
• 1 Room Tile
• 1 Light Board
• 4 Hero Stance Tokens
• 2 Stance Boards
• 4 Hero Dashboards 0 C RRUUSSAADDEERR H EELLLLIIOONN H IIIGGHHWWAAYYMMAANN
VESTAL VESTAL0
1
The air felt so heavy and humid, yet they were far from exhausted. They shifted their attention back to the
center of the table, glancing at all the parchments and papers scattered lazily on it. “No need to go back there”,
she muttered hesitantly under her heavy hood. The highwayman scanned her figure as she talked. Was she
afraid? They had ventured the cursed halls of the ruins thrice this week, and the vestal hesitated to go there
at all. Why is she cowering now? “Sister”, said the crusader as he lifted the visor of his helmet revealing his
scarred face. “There can be no end to the madness if we don’t put an end to the vile necromancer dwelling
there. It is imperative to go there and vanquish him once and for all.” His voice was stern, yet his hands
trembled faintly, not out of fear though. Everyone in the party knew that the noble warrior had resorted to
drinking, in a vain attempt to drive the horrors he had seen out from his mind. The hellion nodded in approval
of the knight’s words “We can’t falter now, nun. It’s now or never“ The vestal raised her eyes to meet those of
the hellion. Silence ensued for a moment, only to be broken by the sounds of the carriage wheels on the freshly
repaired plaza of the Hamlet’s square. “New recruits!” she thought, yet her companions’ stern faces cast
her hopes away. And she knew that their brief adventures granted them so much experience, knowledge and
insight that no amateur adventurer possessed yet. “Let’s do it then.” She admitted in defeat. Her mind sound,
yet her hopes scattered like leaves in the autumn wind. Would there ever be an end to this? Were they doomed
to fail? Was there any hope of survival at all? Shivers ran down her spine. She clutched her mace tightly and
muttered a soft prayer to her god, as the rest of the party fetched for their gear. She cast these timid thoughts
aside and she stepped out of the Hamlet’s tavern. This was her fate. To face and defeat the Darkest Dungeon!
RULES
and
• Caretaker
and
• 1 Save Sheet
Notepad
• 1 Save Box
• Hero Name and Level :
..............................................................................................................................
Wounds
:
Stress
: Xp: Disease
: .........................................
• Trinkets: ......................................./ ............................................../ ..................................................
• Quirks: ........................................../ ............................................../ ..................................................
• Level 2 Skills: ......................................................................................................................................
• Level 3 Skills: ......................................................................................................................................
• Hero Name and Level :
..............................................................................................................................
Wounds
:
Stress
: Xp: Disease
: ........................................
• Trinkets: ......................................./ ............................................../ ..................................................
• Quirks: ........................................../ ............................................../ ..................................................
• Level 2 Skills: ......................................................................................................................................
• Level 3 Skills: ......................................................................................................................................
• Campaign Level :
................
• Discarded Quests: .........................................
..........................................................................
..........................................................................
..........................................................................
..........................................................................
Active Boss: ..................................................
• Discarded Hamlet Events: .............................
..........................................................................
• Level 2 Buildings:............................................
..........................................................................
• Level 3 Buildings:............................................
..........................................................................
Heroes
Campaign
• Stagecoach Xp: • Waiting Heroes:
: : Gold
• 4 Stress Counters
---
9
Game Overview
In Darkest Dungeon, players assume the role of adventurers, each with their own unique abilities and characteristics. They will take part in an eleven-Quest, four-act Campaign, clearing the various Locations from Monsters and fighting their Bosses. In between adventures, they will spend their accumulated riches upgrading the Hamlet and themselves until they are ready to face the Darkest Dungeon itself. Some of them might perish in this perilous mission but there will be more to replace them. When this happens, the player can choose one of the available adventurers waiting patiently back at the Stagecoach for their time to shine. Beware though…
If there are not enough Heroes to form a party of four, the Campaign is over and you have failed on your mission.
But, worry not - you can always start over. The game expects you to start again and learn from your failed Campaigns. Step up to the challenge and begin a new Campaign that will not be the same as the last!
Campaign Overview and Goal of the Game
Before the Heroes storm the Darkest Dungeon, they must first deal with the Imminent Threats to the Hamlet and gain strength. The Campaign consists of four Acts. The first three acts consist of two general Quests and a Boss Quest each. By defeating a Boss, the Heroes end their Imminent Threat and advance the Campaign to the next act (and difficulty Level). When the first three acts are completed, the gate to Darkest Dungeon will open and the 4th and final act will take place. If they defeat the final Boss, the Heroes are victorious and the players have won the game!
After each Quest, players will be able to spend some time in the Hamlet and upgrade its buildings, as well as improve their fighting capabilities.
Death of a Hero & Failing the Campaign
Heroes can die permanently (and thus be removed from the game) in any of the following ways:
• Deathblow: When the Hero is at Death’s Door (has suffered Wounds equal to their Life) and rolls a Deathblow.
• Heart Attack: Their Stress Level reaches 10, and the Hero already has an Affliction or Virtue.
• Gives in to Madness: The Hero receives a 4th Negative Quirk.
When a Hero dies in one of these ways, the controlling player must choose a new one from the Stagecoach and continue playing.
If no Hero is available at the Stagecoach, the players have failed the Campaign and it is over!
The Campaign is also failed if the Heroes are defeated during a Boss Quest.
All of these are explained in detail later in this rulebook.
Locations
Around the Hamlet there are various Locations where the Heroes can venture to defeat the Imminent Threats. Each Location is accompanied by its own set of Monsters, Rooms, Quests and Curios and are identified with a unique icon. This core box contains two Locations: the Ruins and the Darkest Dungeon. Along with the unique cards there are some common ones that are mixed in along with the Location specific cards except the Darkest Dungeon which plays with its own set of cards. These common cards do not have a Location icon.
---
Setting up the Game and Get Ready for the First Quest
Steps 1-9 are general set up steps that are common in each playthough.
1 Ready Stance Trackers & Initiative Deck: Place the Heroes and Monsters Stance Trackers in the middle of the table opposing each other. Leave space near them to place Room Tiles as required. Choose whichever orientation suits you best (vertical or horizontal). Take the 8 Initiative Cards and shuffle them into a single deck; place it close to one of the Stance Trackers.
2 Ready the Room Tiles: Find all Ruins Room tiles and place them in a pile to the side within reach.
3 Separate the Decks: Separate the Positive Quirks, Negative Quirks, Diseases, Virtues, Afflictions, Ruins’ Curios, and Level 1 Trinkets Cards and shuffle them into their respective decks. Place them by each other and close to the Hero Stance Tracker.
4 Construct the Monsters Deck: The game comes with three groups of Monsters: Common, Ruins and Darkest Dungeon. Leave all Darkest Dungeon Monsters out of the game until you reach the 10th Quest. Find all Level 1 Common and Ruins Monsters and shuffle them together in a single deck. This is the Monsters Deck. The rest won’t be needed before you defeat the first Boss, unless a Quest specifies differently. Place the Monsters Deck close to the Monsters Stance Tracker.
5 Construct the Rooms Deck: Find all Ruins Room Cards and shuffle them together to form a single deck. Place it close to the Rooms pile.
6 Construct Loot Pile: Find the 10 Loot Chest Tokens and shuffle them together in a single pile. Place them close to the Rooms Deck and Rooms pile.
7 Ready the Tokens: Separate all Wounds and Condition Counts (Bleed, Blight, etc) by type and place them within reach.
8 Ready the Provisions: Take the 16 Provisions Dice and place them within reach. Place the Firewood Token next to the Provisions Dice. Gain 10 Gold and place them in a common pool beside your Provisions.
9 Ready Hero Areas: Give each player two Exploration Dice, a standard ten-sided die and an At Death’s Door die (the red one with the skulls). Give each player a Hero Dashboard and a Stress Counter. Place the Stress Counter on the Stress Tracker white-side up at 0.
When you start the game and get ready for your first Quest, you won't do anything in the Hamlet beforehand. You can skip the next set up step for now, unless you want to have it ready for when you finish the Quest.
10 Ready the Hamlet: Place the Hamlet Board on the side of the table. Find the Hamlet Event Cards and shuffle them in a single deck; place I
17
Resistances Immunities
0
CRUSADER
Hamlet Skill: Zealous Speech
(Only as the first action of a day)
Preparation Days -1
(Day ends immediately): All -5.
Hero Level
Hero Name
Dodge
Trinket Slot
Hamlet Ability
Death’s Door
Die Slot
Hero
Life
Hero
Movement
Stress Tracker
Skill Slots
Quirk
Placement
Disease
Placement
Anatomy of the Hero Boards
---
them next to the Hamlet Board. Find the
Caretaker Token/Miniature and place it next to
the Hamlet Board too. Place two Waiting Hero
Tokens on the Stagecoach building on the
Hamlet Board. The game comes with upgrade
Tokens for the Hamlet buildings. You won’t
need them before your first Hamlet phase (and
maybe not even then) so you can leave them in
the box for the time being.
Great. The basic set up is ready. Now let’s prepare
for your first Quest!
Determine the First Imminent Threat:
Find the four Level 1 Ruins Boss Cards and shuffle
them together (there are also Darkest Dungeon
Boss Cards but leave them out of the game for
now), then draw one at random and read its flavor
text aloud; this is the first Imminent Threat. Find
its Level 1 Threat Card and place it somewhere in
the middle of the table, Dungeon-side up, for easy
access to its rules.
Boss Threat Card
Boss Card
This is Unholy!
Unsettling Silhouettes
Graveyard is blocked.
After Battles, remove
any non-unholy Monsters
permanently from the game.
Mastery over life and death was chief
among my early pursuits. I began in
humility, but my ambition was limitless.
Who could have divined the prophetic
import of something as unremarkable
as a twitch in the leg of dead rat?
Necromancer
This is Unholy!
Unsettling Silhouettes
Graveyard is blocked.
After Battles, remove
any non-unholy Monsters
permanently from the game.
Necromancer
ACTIONS / Round: 1
Summoning: When a Monster
is summoned, the Monster miniature is
placed on the Target Area, and
a new Monster Initiative Card is
shuffled into the Initiative Deck.
If all Stances are occupied, the
Summoning does not take effect.
Dungeon Side Hamlet Side
Front
Back
Bosses are an Imminent Threat to the Hamlet and
also affect the Dungeon itself. Each Boss has 3
Levels of Threats. At the beginning of the game, the
Boss you draw will be at Level 1. Until you complete
your first couple of Quests and are able to face the
Boss itself, its passive abilities will affect your time
in the Dungeon and the Hamlet.
Each Boss also has a Battle Card per Level, but you
won’t be needing it until the third Quest of each Act.
Choose Heroes
Each player chooses a Hero and takes their miniature.
Take your Level 1 Hero Card and place it next to
your dashboard. Find your roster of seven Level 1
Skills and pick three of those to equip on your Hero
Dashboard Skill Slots. Leave the rest on the side.
Your Level 2 and 3 Hero and Skill Cards won’t be
used until you train to Level them up, so leave them
in the box for now.
If you find it difficult to choose which Skills you want,
feel free to use one of our pre-set builds found in
page 42 of this rulebook.
Resistances Immunities+1+1vs Unholy
Crit 0Crit 0
13 Acc 9
0Crit 2 4 Acc 12
0-1
Battle Heal I Crit 0 9 Acc 9 5
1
Zealous Accusation I
Smite I
0
CRUSADER
Hamlet Skill: Zealous Speech
(Only as the first action of a day)
Preparation Days -1
(Day ends immediately): All -5.
Keep in mind that the seven Skills for each Hero are
always available to them throughout the Campaign
and they can swap them freely between Quests
(more on page 32 “The Hamlet”).
Pick a Quest
Quest
Shuffle the Level 1 Quest Cards and
form the Quest Deck. Draw two and
choose one to play. The other is
permanently discarded from the
Campaign. Quests grant Experience
Points (Xp) when their objectives are
completed (thus allowing Heroes to
Level Up) and also define the Rooms
you’ll be exploring in the Dungeon. The Quest
also indicates if you’re taking any Firewood
supplies with you to rest and how many Resting
Points it provides (on the top left corner of the
card). If it does, take the Firewood Token
and
place it along with the rest of your Provisions (see
page 12: Roll for Provisions).
Rooms Pile
Rooms
Pile
8
2
2
1
1
2
The estate has remained secret
for far too long...
Thus, it was the rightful owner’s decision
to send you on a mission to scout ahead.
Who knew what horrors lurked in the
shadows though?
XP
1 Xp/ 2 Rooms cleared.
Scout Ahead
8 Scout Ahead
2
2
1
1
2
The Estate has remained secret for
far too long...
Thus, it was the rightful owner’s
decision to send you to a mission
to scout ahead.
Who knew what horror’s lurked
into the shadows though?
1 Xp per
2 rooms
cleared
---
Place your Heroes on the Stance Tracker
Each player should now place their Hero Stance Token on the Hero Stance Tracker. Stances can change throughout play but this will be their starting positions. This positioning usually has to do with what Skills the players have chosen for their Heroes.
Aggressive Stances
Heroes Monsters
Ranged Stances
Heroes Monsters
Defensive Stances
Heroes Monsters
Support Stances
Heroes Monsters
HIGHWAYMAN HELLION
CRUSADER
Setting up the Dungeon Layout
Find the Dungeon Tiles, shuffle them up and draw one at random; place it beside the Hero Stance Tracker or any other convenient place. At the bottom of your Quest Card you can see which Rooms and how many of each you’ll encounter in your Quest. Take the Room Tokens indicated on the Quest Card, shuffle them and place them face-down randomly on the Room Slots. Find the Party Miniature and place it on the start location of the Dungeon Map. Boss Quests have a twist on how you place Rooms on the Board. See page 30 in the Bosses section of the rulebook.
Set up a Dungeon Rooms pile
Determined by Quest Card.
Start Location
Light Up
Place the Light Counter at 5 on the Light Tracker.
Roll for Provisions
Roll two Provision Dice for each Hero. After rolling, each player that has rolled a wild (DD) turns the die to any side they like. Place all Provisions Dice on the side in a common pool. This pool can never exceed a maximum of 16 dice. When not used to counter Exploration Hazards (see the Exploration section on p14), Provisions have several beneficial uses. They can be used any time by any Hero, by discarding the appropriate dice during Exploration or as a free action during Battle. These uses are:
Food – Heal 1. Also counters Hunger during Exploration.
Bandage – Remove all Bleed or Heal 1.
Potion – Remove all Blight or Stress -1.
Torch – Light +1 (move your Light Counter 1 space up on the Light Tracker). Alternatively, it removes all the negative effects of Curios.
Tool – This Provision is only used to counter Exploration Hazards (Traps and Rubble).
Wild – Flip it to a side of your choice.
You are now ready to start!
---
Example of Setup
HIGHWAYMAN HELLION CRUSADER
Disease Disease Disease QuestII
1-2 5-6 3-4 9-10 7-8 11
This is Unholy!
Unsettling Silhouettes
Graveyard is blocked.
After Battles, remove
any non-unholy Monsters
permanently from the game. Self
2t
Pull 1 Crit 1 Crit 1
88
Acc 9 Acc 9
44
11
Duelist’s Advance I
Self
3t
Crit 0 Crit 0
33
Acc 10 Acc 10
22
1-2 1-2
Tracking Shot I Crit 0 Crit 0
99
Acc 10 Acc 10
55
2
2t
00
Open Vein I
5
5
5
5
5
5
10
10
10 10 I
17
Resistances Immunities
CRUSADER
Hamlet Skill:
Zealous Speech
2 Q O \ D V W K H ¬ U V W D F W L R Q R I D G D \
3 U H S D U D W L R Q ' D \ V
' D \ H Q G V L P P H G L D W H O \ $ O O
-5
. I
12
Resistances Immunities
VESTAL
Hamlet Skill:
Pray
6 H O I
-9
,
6t
.
or
Chant
ALL
:
-1
,
3t
. I
14
Resistances Immunities
HELLION
Hamlet Skill:
Sharpen Spear
6 H O I
5t
.
or
Intimidate
5 H P R Y H W K H & D U H W D N H U I U R P S O D \ I
12
Resistances Immunities
HIGHWAYMAN
Hamlet Skill:
Clean Guns
6 H O I
6t
. Crit 1 Crit 1
12 12
Acc 9 Acc 9
77
22
Iron Swan I Crit 1 Crit 1
17 17
Acc 10 Acc 10
99
00
Wicked Hack II
1t
Acc 10 Acc 10
00
Barbaric YAWP! I
1t
Crit 0 Crit 0
88
Acc 9 Acc 9
44
00
Stunning Blow I +1+1
vs Unholy
Crit 0 Crit 0
13 13
Acc 9 Acc 9
77
00
Smite I Crit 2 Crit 2
44
Acc 12 Acc 12
22
0-10-1
Battle Heal I
Xp
Xp
Xp
Xp
Xp
Xp Crit 1 Crit 1
10 10
Acc 10 Acc 10
55
Self
33
1-2 1-2
Judgement II
Self
3t
Crit 1 Crit 1
66
Acc 9 Acc 9
33
+1+1
vs Unholy
11
Hand of Light I Crit 0 Crit 0
11 11
Acc 10 Acc 10
77
+2+2
vs Unholy
11
Mace Bash II
1
1
1
1 1
1
1
1
---
14
Navigating through Dungeons
You are now in the Dungeon. You will navigate
through its Corridors and explore Rooms so you
can complete the objectives of your chosen Quest.
When in the Dungeon, the Heroes can choose to
Scout and then they must Explore, Backtrack or
leave the Dungeon.
Scout (Optional)
By Scouting, the players can reveal the Rooms
adjacent to the one they’re in. In order to Scout,
Heroes must suffer 1 Stress each. Then reveal all
adjacent Rooms. In addition, during their next
Exploration and only then, the Heroes will roll only
one Exploration Die instead of two (see Exploration
below for more details). Keep in mind that this is
a group decision, so the Heroes will Scout only if
every player agrees to it.
Exploration
During the Exploration Phase, players can take their
time to discuss tactics and strategies, plan their
path, change their Heroes’ Stances and consume
any Provisions they like.
When moving from one Room to another, Heroes
must explore the Corridor. The Heroes move
together as a party and cannot split up. Heroes roll
two Exploration Dice each and then they must take
turns resolving them. The turn order is decided by
Stance priority: the Hero in the Aggressive Stance
goes first, then the Hero in the Defensive Stance
and so on. Players choose which die their Hero
resolves first.
Keep in mind that if the Heroes have previously
Scouted, each will roll only one Exploration Die
during this Exploration instead of two.
Rubble – Rubble blocks your path forward
and must be cleared out with either your
hands or a tool. Spend 1 or suffer 1
Wound per Dungeon Level and suffer +1 Stress.
Hunger – Hunger overwhelms you and you
must eat. Spend 1 or suffer 2 Wounds
per Hero Level.
Stressful Darkness – This Corridor is so
dark you can hardly see what’s around
you. The Hero who resolves Stressful
Darkness must spend 1 or reduce Light by 1 or
suffer +2 Stress.
Curio – An object of interest lies before you,
beckoning you to search it. Draw a Curio
Card and see what you’ve found. Curios can
have positive and negative effects. Usually both at
the same time. You may spend 1 before you draw
the card to ignore all negative effects of the Curio.
Trap – An old protective mechanism is
set off when you trip it! Spend a or
roll an attack of Acc 8/ Dungeon
Level, Crit 2/ Dungeon Level against you
(Attacks are explained in detail on page 19).
Long Corridors
Some Corridors run
further than others. They
are indicated by a gray
dot. When moving down a Long Corridor you
must stop on the dot before exploring further. If
you previously Scouted before entering a Long
Corridor, the dot will prevent you Scouting past
that point (it acts like an adjacent Room).
Backtracking
When you move from a Room back to one you
have already passed through, you’re considered to
be Backtracking. When the party Backtracks, each
Hero suffers 1 Stress for each Corridor the party
Backtracks through. No Exploration Dice are rolled.
Leaving the Dungeon
The Heroes can leave the Dungeon and return to
the Hamlet at any point during the Exploration
Phase but before they roll any Exploration Dice.
This is a group decision and all players must agree
to it. Once out of the Dungeon, the Heroes will
gain Experience Points
Xp according to the Quest
objectives they’ve completed up to that point
(more about
Xp on page 29). There is no failing the
Quest.All Quests usually give between 0 and 3
Xp.
---
is up to the players how far they wish to push their
Heroes into the Dungeon to gain Xp.
Entering a Room
After the Exploration is over, the party moves to the
desired Room. Depending on the type of the Room,
different effects occur.
Empty: This Room is empty and nothing
happens. Remove its Token from the
map; it is now cleared.
Trap: Each Hero suffers a total of Wounds
and/or Stress equal to the Dungeon
Level, dividing the amount between the
two as they wish. Do not remove the
Room Token after it is resolved; a Trap Room is
never cleared and Heroes must face the Trap again
the next time they pass through here.
Dark Room: Reduce the Light by 1
point. Do not remove this token after
it is resolved. Like the Trap Room, Dark
Rooms never clear and Heroes must face
them every time they cross them.
Lair: This Room is a Lair of Monsters.
Heroes must initiate Battle immediately.
If the Heroes win the Battle, remove the
Token from the Board; the Room is cleared.
Curio: A Curio lies in the center of the
Room. Curio Rooms can be guarded by
Monsters. Roll a ten-sided die; if you
rolled 1-5, initiate Battle. If the Battle is
won, the Room is cleared. Remove the Token from
the Board.
If you roll 6-10 the Room is cleared; remove the
Token from the Board. When the Room is cleared,
draw a Curio Card and choose which Hero will
interact with it (Torches can still be used to ignore
negative effects as normal).
Treasure: This Room contains a Treasure
that is guarded by Monsters and you must
face them. Initiate Battle immediately. If
the Battle is won, the Room is cleared.
Remove the Token from the Board and gain 20 Gold.
Objective: Some Quests have Objective
Rooms. Quest Cards indicate what happens
in these Rooms. Usually the Objective
Rooms are specific Dungeon Rooms. Set
these Rooms aside as you begin your Quest so you
won’t encounter them in random Battles. Quest
Rooms are always guarded by Monsters.
Resting
Some Quests will provide you with Firewood
supplies, giving you a chance to Rest when in the
Dungeon. You can only Rest in Rooms you have
cleared and only if the entire party agrees. The
Quest Card specifies how many Resting Points
the party receives. You collectively choose how to
distribute this amount among your party members
to recover 1 Life or 1 Stress per point spent. You can
discuss how many Resting Points each Hero gets but
if you can’t agree, you can split the amount equally
and let each Hero spend their Rest Points as they
see fit. After you’ve Rested, discard the Firewood
Token from your Provisions Pool.
Gold
While questing, Heroes will accumulate Gold. Gold
is a shared resource, so whenever you gain an
amount, place it in a shared pool beside the rest
of your Provisions. You’ll spend Gold when in the
Hamlet.
Battle and Skills
Setting up the Battlefield
Once Battle begins, you need to set up the Room
in which the Battle takes place. Do it with the
following steps.
Reveal Room
Draw the topmost
card of the Room
Deck, search for the
appropriate Room
Tile and place it on
the center of the
table. Read out any special effects that occur in
the Room and leave the card nearby for easy access
to everyone.
A
B
B
!
!
4
A
B
B
!
!
4
4—Spiked Pit
A Circle of Power: Monsters standing
here at the end of their turn 44.
B Spiked Pit: Heroes and Monsters that
are or standing here at the end of their
turn take 33 and suffer 1 3t.
---
Deploy Heroes, Spawn Monsters and Ready the Initiative Deck
On each Room Tile you can find the starting location for both Heroes and Monsters. Place each Hero’s miniature on the Area indicated, according to the Hero’s Stance. Take the four Hero Initiative Cards and form the Initiative Deck.
Example: 2 Starting Locations of Monsters
Example: 2 Starting Locations of Heroes
A B ! 6 A B ! 6 7
Resistances Immunities
Graveyard Slash 1
Most Wounded
Graveyard Stumble 2
Furthest
Bone Soldier Bone Soldier Unholy - Front
Self Pull 1 0
Crit 1 Crit 1
99 Acc 9 Acc 9
55
Crit 0 Crit 0
66 Acc 5 Acc 5
33
HIGHWAYMAN
HELLION
VESTA
CRUSADER
A B ! 6 6—Treasure Chamber
A Loot the Chest: Spend 2 actions here to draw a Trinket. Once per encounter.
B Hide and Heal: When no Monsters are here, spend 1 action and suffer +2 to remove all .
Set up a Battle
1. Draw a Room Card
2. Reveal the Room
3. Setup the tile corresponding to the the card in the center of the table
4. Place Loot Token(s)
5. Place Hero Miniatures according to their Stances
6. Place Monster Miniatures according to their Stances
7. Place the Round Token on Round 1
8. Place Monster Tokens on the Miniatures to identify duplicates
Resistances Immunities
Cultist Brawler Cultist Brawler Human - Front
Rend for the Old Gods 1
Stumbling Scratch
Self Pull 1 2
Self Pull 1 2
0 Closest Closest 11
Crit 0 Crit 0
55 Acc 8 Acc 8
33
Crit 1 Crit 1
55 Acc 5 Acc 5
33
1 3t , 2t , +1 +1 +1 vs 7
Resistances Immunities
Graveyard Slash 1
Most Wounded
Graveyard Stumble 2
Furthest
Bone Soldier Bone Soldier Unholy - Front
Self Pull 1 0
Crit 1 Crit 1
99 Acc 9 Acc 9
55
Crit 0 Crit 0
66 Acc 5 Acc 5
33
Resistances Immunities
Bone Courtier Bone Courtier Unholy - Back
2 1
6-10 1-5
2 1 Tempting Goblet +1
1
Knife in the Dark
2
1
Most Stressed
Closest 20
Crit 0 Crit 0
55 Acc 10 Acc 10
33
Crit 1 Crit 1
55 Acc 7 Acc 7
33
---
17
To spawn Monsters, start drawing cards from the Monsters Deck. If you draw a front Monster, place the card on the first empty slot on the Monster Stance Tracker starting from the front (Aggressive to Support). If you draw a back Monster, place the card on the first empty slot on the Stance Tracker starting from the back (Support to Aggressive). Once you’ve placed the card, find the Monster Miniature and place it on the Room Tile on the Area that corresponds to its Stance. Then take a Monster Initiative Card and shuffle it into the Initiative Deck.
Brigand Bloodletter
Human - Front - Large
Resistances Immunities
2
0
Crit 0 Crit 0 22 Acc 9 Acc 9 11
Crit 1 Crit 1 55 Acc 9 Acc 9 33
Crit 2 Crit 2 1212 Acc 9 Acc 9 66
Brigand Bloodletter
Human - Front - Large
Resistances Immunities
2
0
Crit 0 Crit 0 22 Acc 9 Acc 9 11
Crit 1 Crit 1 55 Acc 9 Acc 9 33
Crit 2 Crit 2 1212 Acc 9 Acc 9 66
Brigand Bloodletter
Human - Front - Large
Resistances Immunities
2
0
Crit 0 Crit 0 22 Acc 9 Acc 9 11
Crit 1 Crit 1 55 Acc 9 Acc 9 33
Crit 2 Crit 2 1212 Acc 9 Acc 9 66
Cultist Brawler
Human - Front
Rend for the Old Gods
Self Pull 1
Stumbling Scratch
Self Pull 1
Closest
1
0
Crit 0 Crit 0 55 Acc 8 Acc 8 33
Crit 1 Crit 1 55 Acc 5 Acc 5 33
13t, 2t, +1
+1+1vs
7
Resistances Immunities
Bone Courtier
Unholy - Back
Tempting Goblet
+1
Knife in the Dark
Most Stressed
Closest
2
1
16-10
1-5
2
0
Crit 0 Crit 0 55 Acc 10 Acc 10 33
Crit 1 Crit 1 55 Acc 7 Acc 7 33
7
Resistances Immunities
Graveyard Slash
Most Wounded
Graveyard Stumble
Furthest
Bone Soldier
Unholy - Front
Self Pull 1
1
1
0
Crit 1 Crit 1 99 Acc 9 Acc 9 55
Crit 0 Crit 0 66 Acc 5 Acc 5 33
Front Monster Back Monster
Large Monsters occupy two slots on the Stance Tracker as well as on the Room Tile, so if you draw one it will occupy the next slot too. For the purpose of Spawning and Skill use, large Monsters are considered to occupy the higher priority Stance of the two. Large Monsters thus reduce the number of Monsters actively in Battle (there may be three or even only two Monsters if two large Monsters appear). If there are already three Monsters in play and you draw a large Monster that can’t fit, discard the last non-large Monster you Spawned and place the large Monster, shifting them if necessary towards the Aggressive Stance. Large Monsters have cards which fit over two slots on the Stance Tracker. Locate the corresponding card and place it on the Tracker. If you draw two or more of the same Monster, note the color of the Monster Token displayed on each Monster Card and place it on the corresponding miniature so you can distinguish between them. Continue to do this until all Monster Stance Slots on the Tracker are filled. The large Monster that has just Spawned is considered to be in the Defensive Stance.
Place Loot Chests
In Areas that have a !! place a random Loot Chest Token, face-down.
Set the Round Tracker
Place the Battle Round Counter on round 1. Heroes have four rounds to defeat the Monsters or they’ll need to flee (more on that on page 25).
Battle
The order in which characters (Heroes or Monsters) play during Battle is determined by Initiative Cards. To figure out who plays next, draw an Initiative Card from the Initiative Deck. The character drawn next in line by Stance priority order plays. So, if you draw a Hero Initiative Card on the first round of Battle, the Hero in the Aggressive Stance plays their turn. Nobody knows whether a Hero or a Monster plays next, but players always know which Hero or Monster it will be. If a character dies before their turn comes, keep playing the round as normal until you draw the excess Initiative Card and remove it from the deck at that point.
---
18
The Next Hero is Activated
HIGHWAYMAN HELLION VESTAL CRUSADER
The Next Monster is Activated
17
7
Resistances Immunities
Bone Courtier
Unholy - Back
2
16-10
1-5
2 1
Tempting Goblet
+1
1
Knife in the Dark
2
1
Most Stressed
Closest
2
0
Crit 0 Acc 10 33
Crit 1 Acc 7 33
Resistances Immunities
1 2
Graveyard Slash
Most Wounded
Graveyard Stumble
2
Furthest
Bone Soldier
Unholy - Front
1
1
Self Pull 1
0
Crit 1 Acc 9 55
Crit 0 Acc 5 33
Resistances Immunities
1 2
Graveyard Slash
Most Wounded
Graveyard Stumble
2
Furthest
Bone Soldier
Unholy - Front
1
1
Self Pull 1
0
Crit 1 Acc 9 55
Crit 0 Acc 5 33
Resistances Immunities
Cultist Brawler
Human - Front
Rend for the Old Gods
1
Stumbling Scratch
Self Pull 1
2
Self Pull 1
1 2
0
Closest
Closest
1
1
Crit 0 Acc 8 33
Crit 1 Acc 5 33
13t, 2t, +1
+1vs
Hero Turns
Hero Turns have two steps: 1) Start of Turn effects,
and 2) Actions.
1) Start of Turn Effects
Roll for any Affliction/Virtue the Hero might have.
After this, remove one Token of each Condition
Stack on your Hero and apply their effects, if any
(See Stacking and Removing Tokens on page 20).
2) Actions
Heroes can perform two actions during their turn
from the following list:
a Move
b Interact with the Environment
c Change Stance
d Use a Skill
A Hero can perform the same action twice if they like.
A Hero can also consume any amount of Provisions
as a free action.
a Move: A Hero can move as many Areas as their
Speed allows. A Hero cannot end their turn in a
fully occupied Area or an Area with no space. If
they use a move as their first action and end in
one of these Areas, they must use their next
action to move out.
b Interact with the Environment: Some Rooms
might contain a Loot Chest or other items a
Hero can interact with. If a Loot Chest is in their
Area, a Hero can spend an action to pick it up.
This is the most common interaction. Other
special interactions are indicated by special
Room effects or Quest Cards.
To loot a Chest, a Hero must be in the same Area
as it and spend an action to interact with the Loot
Chest. Flip the Token to see what you’ve found,
then remove it from the Board.
Special lootable items and interaction with them
are usually indicated on the Room Card.
Roll for Provisions: Grab an unused
Provision Die, roll it and add it to your
Provision pool.
Choose a Provision: Grab an unused
Provision Die, choose its side and add it
to your Provision pool.
Roll for Either Gold or Provision: Choose
whether you want to roll the ten-sided
die and gain an equal amount of Gold
or roll an unused Provision Die and add it
to your pool.
Roll for Double Gold or Choose a
Provision: Choose whether you want
to roll the ten-sided die and gain
double the amount of Gold or add an
unused Provision Die with the side of
your choice to the Provisions pool.
Heroes can only interact during a Battle. The
moment the Battle ends (when the last Monster
is slain), any chance to interact is lost.
---
19
c Change Stance: A Hero can spend an action to move one place forwards or backwards on the Hero Stance Tracker. This, however, will move around the other Heroes occupying the Stance.
H HIGHWAYMAN H HELLIONVESTAL
C CRUSADERVESTAL Self 3t
Crit 1 Crit 1 7 Acc 10 Acc 10 4
+2 +2 vs Unholy
11
Hand of Light II A
B
!
6 A
B
!
6
Example: Highwayman changes from Defensive to Aggressive Stance, forcing the Hellion to move one Stance position down.
H HIGHWAYMAN H HELLION C CRUSADER
d Use a Skill: A Hero can use any Skill eligible with their Stance. However, if the Skill is used successfully (it didn’t miss its target) then the Hero cannot use that Skill again during the same turn.
Self
Effects
Target
Effects
Name
Eligible
Stances
Range
Targets
Accuracy
Critical
Anatomy of a Skill
1
2
3
5
46
7
1 Eligible Stances
The Stance icons indicate which Stance the character needs to be in to use this Skill.
Example: Vestal can only use Hand of Light I if she’s in the Aggressive or Defense Stances.
2 Range
When a Hero uses a Skill, they target an Area on the Board. Range indicates how far they can target. They must be at the exact distance indicated by the Skill’s . So, if a Skill has 0, you can only target the Area you are in. If it has 2, you must target an Area 2 spaces away. If its range varies (for example 1-2) you can target an Area in that bracket (in this case, an Area 1 or 2 spaces away).
3 Targets (Heroes or Monsters)
This indicates how many Targets a Skill can affect in the Area it targets. The indicates that the Skill targets Monster(s) while the indicates that it targets Hero(es). The number of icons show how many of these the Skill can target in an Area. When multiple Targets are eligible, Heroes can choose which ones they affect, while Monsters will follow the Stance order.
4 Accuracy
Acc 9 Acc 933
The number after Acc indicates the maximum value you need to roll on the ten-sided dice to cause a Hit when you use the Skill. This number is modified by the Target's Dodge (ally or not). If a Skill targets more than one character, you roll just once and compare the roll individually.
When a character hits its target, apply Wound Tokens on the Target equal to the Damage the Skill dealt, or remove Wound Tokens from the Target if the Skill heals instead.
Note: If a Skill has no Acc value, then no roll is required and the Skill takes effect immediately.
5 Critical
Crit 1 Crit 166
The number after Crit indicates the maximum value you need to roll on the ten-sided dice to cause a Critical Hit when you use the Skill. This number is not modified by the Target’s Dodge . In short, when you roll to Hit with a Skill, if you roll up to the Crit value, the Skill will cause a Critical Success instead of a
---
20
standard one, with more powerful effects. A Critical
Hit will deal the Critical Damage or Heal
instead of the standard one. In addition:
Whenever a Hero causes a Critical Hit, that Hero and
all other Heroes in the same Area recover 1 Stress.
Whenever a Hero suffers a Critical Hit, that Hero
and all other Heroes in the same Area that were
not targeted by the Skill suffer +1 Stress.
6 Self Effects
Some Skills impose effects on the character
that used them. These are indicated on the
card with a , and, after you roll (if a roll is needed),
take place before any other effects of that Skill.
These effects take place regardless of if the Skill
hits or misses. Self Effects ignore Resistances and
Immunities.
7 Target Effects
Some Skills impose effects on the Target of
the Skill. These are indicated on the card with
a and take place after any other effects of that
Skill. These effects take place only if the Skill hits
its Target. Crit 3 Crit 3 44 Acc 14 Acc 1433
Self 33
11
Divine Comfort II Crit 1 Crit 1 1212 Acc 9 Acc 9 7722
Iron Swan I
Example 1: The Hellion uses her Iron Swan Skill
against a Bone Arbalist. Her Skill has Accuracy 9
and the Arbalist has Dodge 1. She needs to roll up
to 8 (Accuracy 9 - 1 from the Arbalist Dodge). She
rolls a 2. This is a Hit! Arbalist suffers 7 Damage
from the Iron Swan I.
Example 2: The Vestal uses her Divine Comfort II
on her three allies. She rolls a 2. This is a Critical
Hit! She heals herself for 3 (Self Effect) and her
allies for 4 each.
Conditions
In addition to inflicting Damage or Healing, Skills can
apply a plethora of different effects to the Target.
From causing or recovering Stress to Buffing,
Debuffing, Protecting, dealing Damage over time,
shuffling characters around, Stun etc. Some take
instant effect while others are more persistent. To
track those persistent Conditions, the game uses a
stacking tokens mechanism.
Stacking and Using Tokens
Each time a Condition is applied to a Hero or
Monster, take as many tokens as its turn duration
(t) indicates and make a stack on the character card
or next to it. If you need to apply a Condition that
already exists, just make a new stack – don’t put the
tokens all together. At the start of the character’s
turn, remove the top token of each stack and apply
its effects, if any. This way multiple Buffs, Debuffs,
Bleed, Blight etc can be applied to a Target. Keep
in mind that Conditions that apply Wounds, like
Bleed and Blight, do so at the same time. This is
important for Heroes who are at Death’s Door (see
page 29).
Example: The Highwayman suffered a 2t Bleed
Condition, so he takes 2 Double-Bleed tokens and
makes a stack of them on his card. He already has
a stack of 2 Buff tokens and a stack of a Single
Bleed tokens.
2t22
On his next turn, he removes one token from each
stack. He takes 3 Wounds because of the Bleeds
and his Buff will last one more turn. One of the
Bleed Condition stacks is gone so next turn he will
only suffer 2 Damage from the remaining Double-
Bleed stack.
---
Suffer or Recover Stress: Simply increase or decrease your Stress as indicated.
Shuffle (push X or pull X): Move the Target closer to (pull) or away from (push) the Skill user by X Areas. In addition, move the Target forwards (pull) or backwards (push) in the Stance Tracker an equal number of spaces. This will move all other characters accordingly. Note that you cannot place a Shuffled character in a fully occupied Area and the shuffle will be cut short. This will not prevent moving on the Stance Tracker unless there is no room to move further forwards or backwards.
When applied to the user of the Skill, move the user closer to (pull) or away from (push) the Skill Target’s Area by X Areas. In addition, move the user forwards (pull) or backwards (push) on the Stance Tracker an equal number of spaces.
Bleed (x /xt): This shows how many Wounds per round this character will take from Bleed (x Wounds / x Rounds). Take a number of tokens equal to the rounds the character Bleeds and form a stack on its character card. So, if a character suffers 11 3t, take three 11 tokens and form a single stack. When a token is removed from a stack, the character suffers Wounds equal to the number indicated on the token.
Blight (x /xt): Similar to Bleed, but you use the Blight tokens instead.
Stun xt: Make a stack of x Stun tokens. At the start of their turn, remove one Stun token per stack from the Stunned character. If you remove 1 or more Stun tokens: Heroes lose one action for that turn / Monsters lose their whole turn.
Buff xt: Make a stack of x Buff tokens. Buffed characters have +1 CritCrit per stack.
Debuff xt: Make a stack of x Debuff tokens. Characters targeting a debuffed enemy gain +1 CritCrit against them per stack.
Riposte xt: Make a stack of x Riposte tokens. When a character with one or more Riposte stacks takes Damage from an enemy, they deal half of it (rounded up) back to the attacker.
Guard xt: Make a stack of X Guard tokens. Characters must always target Guard enemies when using Skills that don’t target allies.
Mark xt: Make a stack of X Mark tokens. Enemies attacking the marked character gain +1 AccAcc per stack.
Protection xt: Make a stack of X Protection tokens. As long as the character has one or more Protection stacks, they take only half Damage (rounded up) from attacks.
Some Skills can remove Conditions from the Target. When this happens, remove ALL stacks of the relevant Condition.
Resistances Immunities
Bone Defender Bone Defender
Unholy - Front
Axeblade 1
Dead Weight 2t, Push 1
Clumsy Axeblade 2
Self Pull 1
3
3
1
26-10
1-5
Closest
Furthest
Closest
0
1
0
Crit 1 Crit 1 66 Acc 8 Acc 8 44
Crit 0 Crit 0 55 Acc 5 Acc 5 33
Crit 1 Crit 1 55 Acc 9 Acc 9 33
0
Important: Some Monsters have built-in Protection printed on their card. This Protection applies at all times and cannot be removed.
Resistances and Immunities
Heroes and Monsters are resistant and/or immune to various Conditions. Resistance reduces the duration of the Condition by 1 turn (or one Area and Stance space for ) while immunity negates the effect altogether. Heroes can choose to ignore resistance/immunity when they shuffle themselves.
Monster Turns
Monsters act in a more straightforward way than Heroes and their behaviour depends on the Stance they are in. They usually move towards their Target and use a Skill. Monster Skills read and play similarly to Hero Skills, and the icons are the same. The Monster turn and the Monsters’ respective rolls are made by the players. To play a Monster follow the steps below:
Step 1 - Start of Turn Effects: As with Heroes, remove one Token from each Condition stack on the Monsters and apply the effects, if any.
Step 2 – Act:
Check what Skill the Monster is about to use. This is determined by its Stance and it is shown on the Monster Card (by stating the ability 1, 2 or 3 next to it). Some Monsters may choose between multiple Skills; in that case roll a ten-sided die to determine which one they’ll use.
---
A Monster's Turn
1
Players flip the next Initiative Card in the Initiative Deck which reveals it’s the Bone Defender’s time to act!
2
The Monster is in the Ranged Stance, so it will use its 3 Skill, Clumsy Axeblade as indicated on its card.
3
Clumsy Axeblade requires that the Monster targets the furthest opponent. In this case the Highwayman and the Hellion are the same distance away from the Bone Defender.
6
The Skill has a pull 1 Self Effect, so the Bone Defender pulls itself 1 Area towards its Target AND in addition, moves its card up one Stance on the Stance Tracker, thereby pushing the Bone Arbalist back one Stance space. A player must now make an attack roll for the Bone Defender against the Hellion.
Clumsy Axeblade has an accuracy of 5 against the Hellion’s 1 Dodge, so any roll up to 4 (5 Acc - 1 Dodge = 4) is a success and will inflict a Damage of 3. Not a particularly threatening attack but it has placed Bone Defender AND Bone Arbalist both in a better position for their next turns.
Cultist Brawler
Human - Front
Rend for the Old Gods
1
Stumbling Scratch
Self
Pull 1
Closest
Crit 0
Acc 8
Crit 1
Acc 5
1
2
0
1
5
3
5
3
Resistances Immunities
Cultist Brawler
1
2
0
1
5
3
5
3
+1
vs
I
Bone Defender
Unholy - Front
Axeblade
1
Dead Weight
2t, Push 1
Clumsy Axeblade
Self
Pull 1
Closest
Furthest
Closest
Crit 1
Acc 8
Crit 0
Acc 5
Crit 1
Acc 9
0
1
0
6
8
4
5
5
3
5
3
+1
vs
I
Bone Defender
Unholy - Front
Axeblade
1
Dead Weight
2t, Push 1
Clumsy Axeblade
Self
Pull 1
Closest
Furthest
Closest
Crit 1
Acc 8
Crit 0
Acc 5
Crit 1
Acc 9
0
1
0
6
8
4
5
5
3
5
3
+1
vs
I
Bone Arbalist
Unholy - Back
Quarrel
1
2
1
Marked -> Furthest
Closest
Crit 1
Acc 9
Crit 0
Acc 8
2
0
8
5
5
3
I
I
Bone Courtier
Unholy - Back
Tempting Goblet
+1
Knife in the Dark
2
1
Most Stressed
Closest
Crit 0
Acc 10
Crit 1
Acc 7
2
1
0
5
3
5
3
---
HIGHWAYMAN
HELLION
ESTATE
CRUSADER
Because the Hellion is
higher in Stance order,
she must be chosen as the
Bone Defender’s Target.
Clumsy Axeblade has a range of 1, so the Bone Defender uses its
Speed to move within range of its Target, the Hellion.
Resistances Immunities
Bone Defender
Unholy - Front
Axeblade
Dead Weight
Push 1
Clumsy Axeblade
Self
Pull 1
Closest
Furthest
Closest
Crit 1
Acc 8
Crit 0
Acc 5
Crit 1
Acc 9
vs
Bayonet Jab
Self
Push 1
Resistances Immunities
Bone Arbalist
Unholy - Back
Quarrel
Marked -> Furthest
Closest
Crit 1
Acc 9
Crit 0
Acc 8
Resistances Immunities
Bone Courtier
Unholy - Back
Tempting Goblet
+1
Knife in the Dark
Most Stressed
Closest
Crit 0
Acc 10
Crit 1
Acc 7
Resistances Immunities
Cultist Brawler
Human - Front
Rend for the Old Gods
Stumbling Scratch
Self
Pull 1
Self
Pull 1
Closest
Crit 0
Acc 8
Crit 1
Acc 5
+1+1
vs
---
24
Anatomy of a Monster Card I
9
Stressful Incantation
+1, -1
1
Eldritch Pull
Pull 2
2
Eldritch Push
Push 2
3
1
1
2
3
31-4
1-5
5-7
8-10
6-10
Resistances Immunities
1
Cultist Acolyte
Cultist Acolyte
Human - Back
Most Stressed
Closest
Furthest
1
1
2
Crit 0 Crit 0 22 Acc 9 Acc 9 11
Crit 1 Crit 1 22 Acc 9 Acc 9 11
Crit 1 Crit 1 22 Acc 9 Acc 9 11
Monster Name
Monster Type &
Position
Dodge
Life
Speed
Location
Monster Level
Protection Indication
(if available to the Monster)
Resistances &
Immunities
Monster Skills
Stance/Skill Eligibility
2
Check Target. Pick the Target as indicated on
the Monster Card. As always, if more than one
character qualifies as a Target, prioritize by Stance
(Aggressive to Support).
Closest: Targets the Hero that is in the closest Area.
Furthest: Targets the Hero that is in the farthest
Area.
Crowded: Targets the Area with the most Heroes
in it.
These are the most common targeting choices. In
a similar fashion:
Most Wounded: Targets the Hero that has suffered
the most Wounds.
Most Stressed: Targets the Hero that has suffered
the most Stress.
There are other target priorities unique to some
Monsters. Also, some Monster Skills will have
multiple priorities. This will be shown, for example,
in the format Marked -> Closest. In this instance, the
Monster will target a Marked Hero first. If there
is none, then it’ll target the closest one.
3
Check Range. The Monster will move up to a
maximum number of Areas indicated by its Speed,
positioning itself in order to take its action
according to the Skill’s Range. If it is not within
Range of its Target after moving, it will skip the rest
of its turn. When there is more than one eligible
Area the Monster can move into, the targeted
player(s) decide where it goes.
4
Take the Action. Roll for the attack as you
would do for your Hero or perform any other action
the Skill indicates. As usual, if the Skill targets
multiple Heroes in the Target Area, roll once and
apply the result separately to each.
Large and Small Monsters
Some Monsters are of a different size than most
characters. They can be large or small and this is
indicated on their card. A large Monster can end
its turn in a fully occupied Area. When it does, the
players should move one of the other characters
into an adjacent Area. This character cannot be the
Monster’s Target. Characters that are not small
can end their turn in a fully occupied Area that
contains at least one small Monster. Players, then,
will have to move one small Monster to an adjacent
Area. In short, larger characters can move smaller
ones around, when they need to end their turn in a
previously fully occupied Area.
Casualties
When a Hero or a Monster dies during Battle, remove
their miniature from the Board and their card from
the Stance Tracker. Characters behind them in the
Stance Tracker will slide to fill the position, leaving
the last Stance empty.
A Monster dies when it has suffered Wounds equal
to or greater than its Life.
For more about Hero death, see pages 29 and 31.
---
25
Example: The Heroes attack and manage to kill
the Gargoyle.
BUNTER HELLIONCULTIST
CRUSADER
I
7
Resistances Immunities
Gargoyle
Unholy - Front
Flurry of Claws1
Lash of the Tail2
2
Crowded
Closest
0
1
Crit 1 Crit 1 66 Acc 9 Acc 9 44
Crit 1 Crit 1 44 Acc 9 Acc 9 33
2
2t
2t, Push 1
1
21-6
7-10
I
6
Resistances Immunities
Bone Rabble
Unholy - Front
Bump in the Night1
Tic-Toc2
0
Closest
Closest
0
1
Crit 0 Crit 0 66 Acc 7 Acc 7 44
Crit 0 Crit 0 66 Acc 5 Acc 5 44
1 2
Self Pull 1
I
5
Resistances Immunities
Webber
Beast - Back - Small
Web1
Bite2
1
Furthest
Marked -> Closest
1
0
Crit 1 Crit 1 22 Acc 9 Acc 9 11
Crit 0 Crit 0 44 Acc 8 Acc 8 22
1
21-5
6-10
1 3t, +2+2vs
2t, 2t, 3t
I
8
Slice and Dice
2t
1
Uppercut Slice
Push 1
2
Harmless Poke3
2
1
31
1-4
5-10
Resistances Immunities
2
Brigand Cutthroat
Human - Front
Crowded
Furthest
Closest
1
1
0
Crit 1 Crit 1 66 Acc 8 Acc 8 44
Crit 1 Crit 1 99 Acc 8 Acc 8 55
Crit 0 Crit 0 55 Acc 5 Acc 5 33
Self 2t, Pull 1
Its miniature and card are immediately removed
from play. The Monsters that stood behind it in
the Stance Tracker will move forward to fill up
the space.
BUNTER HELLIONCULTIST
CRUSADER
I
6
Resistances Immunities
Bone Rabble
Unholy - Front
Bump in the Night1
Tic-Toc2
0
Closest
Closest
0
1
Crit 0 Crit 0 66 Acc 7 Acc 7 44
Crit 0 Crit 0 66 Acc 5 Acc 5 44
1 2
Self Pull 1
I
5
Resistances Immunities
Webber
Beast - Back - Small
Web1
Bite2
1
Furthest
Marked -> Closest
1
0
Crit 1 Crit 1 22 Acc 9 Acc 9 11
Crit 0 Crit 0 44 Acc 8 Acc 8 22
1
21-5
6-10
1 3t, +2+2vs
2t, 2t, 3t
I
8
Slice and Dice
2t
1
Uppercut Slice
Push 1
2
Harmless Poke3
2
1
31
1-4
5-10
Resistances Immunities
2
Brigand Cutthroat
Human - Front
Crowded
Furthest
Closest
1
1
0
Crit 1 Crit 1 66 Acc 8 Acc 8 44
Crit 1 Crit 1 99 Acc 8 Acc 8 55
Crit 0 Crit 0 55 Acc 5 Acc 5 33
Self 2t, Pull 1
High and Low Ground
Some Areas provide elevation while others have
a height disadvantage. High Ground Areas are
indicated with a while Low Ground ones with
a . When a Monster or Hero stands on a High
Ground Area, they gain +1 optional Range and
+1 Acc to all their Skills targeting Non-High Ground
Areas. Characters targeting others in a Low Ground
Area (while not in Low Ground themselves), gain +1
Acc and +1 optional range against them.
Battle Rounds
When the Initiative Deck is empty and all Heroes
and Monsters have taken their turns, the round
ends. Reform the Initiative Deck by shuffling an
Initiative Card for each Hero and Monster still alive;
then advance the Battle Round Tracker one turn.
Battle End
A Battle can end in three ways: when all Monsters
are defeated, when the fourth round ends and
Heroes are forced to flee or when all Heroes are
defeated.
• All Monsters Defeated: When the last Monster
is dead, the Battle ends immediately with the
Heroes being victorious. Remove the Room Token
from the Dungeon Tile and gain any bonuses
the Room might provide (Treasure Room, Curio
Room, etc). The Room is now considered cleared
and the party can rest when they are here.
• Heroes Flee: If the fourth round of Battle ends
and there are Monsters still alive, the Heroes are
forced to flee since their enemies gained enough
time for reinforcements to arrive – the Battle
now looks unwinnable! Follow all the steps of a
Battle End but do not remove the Room Token
from the Dungeon Tile since it is not cleared. The
party is now forced to continue with Exploration
and move away from the Room. If they come
back at some point, they have to treat it as a new
Room they’ve never encountered.
• All Heroes are Defeated: In the rare occasion
where all Heroes die in Battle but there are
still four more waiting at the Stagecoach in
the Hamlet, the Battle ends as if the Heroes
have fled.
When the Battle ends take your
miniatures back, shuffle all Monster
Cards used in Battle back into
the Monsters Deck and place
the Room Tile back on its stack.
Leave all Looted Chests and the
Room Card discarded for the rest
of the Dungeon run. You won’t
encounter them again, unless a
Quest specifies otherwise. The
party can now continue with their
Exploration. Any chests or other
features that were not interacted
with, are lost – Heroes
have the chance to do
so only as long as the
Battle is taking place.
---
26
Trinkets
I
During their trek, the Heroes will acquire special items that give them additional abilities. These items are called Trinkets. Heroes are limited as to how many Trinkets they can carry at once - this limit is equal to their Level. When a Hero acquires a Trinket, they decide whether they’re going to keep it, give it to a companion or discard it. A Hero can discard or pass over a Trinket they already use to make space for a new one if they wish to do so. Heroes cannot hold or store excess Trinkets.
All Trinkets have a positive and a negative side. When a Hero equips themselves with a Trinket, they turn it positive side up. Trinkets have active abilities and can be used when the situation applies. When a Hero wants to use a Trinket, they declare the use, resolve the effect and they turn it negative side up. The next time it’ll be used, the Hero will have to resolve the negative effect to turn it positive side up again. In battle, a Trinket can be used only once per turn.
I I
Acc-2 Acc-2
Crit+2 Crit+2 Critical Stone Critical Stone
II
Acc-2 Acc-2
Crit+2 Crit+2 Critical Stone Critical Stone
Active Positive side Active Negative side
Example: Hellion has equipped the Critical Stone. She is about to attack a Monster and she has a CritCrit 22. She rolls a 4. She decided to use the Trinket and gain the +2 CritCrit, successfully scoring a Critical Hit! The Trinket is now turned to its negative side. In order to gain the +2 CritCrit again she first needs to use it to give herself a -2 AccAcc at some point.
Trinkets can be sold at the Nomad Wagon in the Hamlet.
Quirks
Delving in the darkness of dungeons and facing unspeakable horrors of the abyss will certainly leave its mark upon the Heroes’ psychology. While sometimes these dangers will strengthen their resolve, often they’ll leave them with phobias and other bad psychological effects.
Positive Quirk
Negative Quirk
There are two kinds of Quirks: Positive and Negative and they are kept in separate decks. As implied, the former produce positive effects while the latter negative. Quirks have passive effects that are triggered whenever something specific happens to the Hero.
A Hero cannot have more than three Quirks at a time. If a Hero already has three Quirks and acquires a fourth positive one, they must either discard it or swap it with a positive one that they already have. If the fourth Quirk is negative, the player discards a Positive Quirk and replaces it with the negative one. If a Hero already has three Negative Quirks and the fourth is positive, the positive one is discarded and has no effect.
If a fourth Negative Quirk is acquired, the Hero succumbs to madness and is treated as permanently dead.
Quirks can be treated at the Abbey in the Hamlet.
Negative Quirks
Anemic: Whenever a Bleed Condition is applied to the Hero, apply an additional 11 3t.
Bad Gambler: Whenever the Hero rolls a 10 while in the Dungeon, take 1 Wound per Hero Level.
Clumsy: Whenever the Hero takes Damage, apply Debuff to them for 1 turn.
Fear of the Unknown: Whenever the Hero is about to interact with a Curio during Exploration, they suffer +1 Stress.
Fragile: Whenever the Hero takes Damage, they take 1 additional.
Infirm: When the Hero is healed, they are healed for 1 less point.
Light Sensitive: Whenever the Light goes up, the Hero suffers 2 Wounds per Hero Level.
Nervous: Whenever the Hero suffers Stress, they suffer 1 more.
---
27
Night Blindness: Whenever the Light goes down, the Hero suffers +1 Stress.
Nocturnal: Whenever the Light goes up, the Hero suffers +1 Stress.
Mercurial: Whenever the Hero’s Resolve is Tested, they have -1 Virtue Chance (see p.28 for more).
Off Guard: When the Hero takes Damage, they suffer +1 Stress.
Shocker: Whenever the Hero suffers Critical Damage, apply Stun to them for 1 turn.
Slow Reflexes: Whenever the Hero Resolves a Trap during Exploration, they have a -2 Dodge penalty.
Soft: Whenever the Hero suffers Stress, they suffer 1 Wound per Hero Level.
Stress Eater: Whenever the Hero consumes a Food Provision, they suffer +1 Stress.
Thin Blooded: Whenever a Blight Condition is applied to the Hero, apply an additional Blight Condition.
Weak Grip: Whenever the Hero suffers Critical Damage, they suffer +1 Stress.
Positive Quirks
Balanced: Whenever the Hero is to be Shuffled (pushed or pulled), they can choose to be Shuffled for 1 less.
Clotter: Whenever Bleed is to be applied to the Hero, reduce it by 1 turn.
Early Riser: Whenever the Light goes up, the Hero gains Buff for 2 turns.
Evasive: Whenever the Hero successfully Dodges, they recover 1 Stress.
Fast Healer: Whenever the Hero is healed, they Heal 1 additional point per Hero Level.
Hard Noggin: Whenever Stun is to be applied to the Hero, reduce it by 1 turn.
Hard Skinned: Whenever the Hero suffers Critical Damage, reduce it by half (rounded up).
Hoarder: When you roll a Curio during Exploration, you recover 1 Stress.
Night Owl: When the Light goes down, recover 1 Stress.
On Guard: When the Hero takes Damage, reduce it by 1.
Photomania: When the Light goes up, recover 1 Stress.
Quick Reflexes: Whenever the Hero Resolves a Trap during Exploration, they gain a +2 Dodge bonus.
Resilient: Whenever the Hero recovers Stress, they recover 1 additional point.
Skilled Gambler: Whenever the Hero rolls a 1 in the Dungeon, the Hero recovers 1 Stress.
Stress Faster: Whenever the Hero consumes a Food Provision, they recover 1 Stress.
Thick Blooded: Whenever Blight is to be applied to the Hero, reduce it by 1 turn.
Warrior of Light: When Light goes up, the Hero heals 2 points per Hero Level.
Diseases
Disease
Black Plague
/Hero Level
1 2
Long abandoned Curios left unattended through time might infect curious and reckless Heroes with Diseases. When a Disease is applied to a Hero, draw one from the deck and place it in the appropriate Hero Board Slot. The Hero is now affected by it. Diseases work like Quirks – applying negative effects when something specific happens. Heroes can have only one Disease at a time.
If a Hero must suffer a Disease while they already have one, replace it with the new one and gain a Negative Quirk.
Diseases can be treated for a fee by visiting the Sanitarium in the Hamlet.
Diseases
Black Plague: When Blight is applied to the Hero, apply an additional Blight Condition and take 2 Wounds per Hero Level.
Bulimic: When the Hero consumes a Food Provision, they discard another Food Provision (if any) and suffer +1 Stress.
---
Creeping Cough: When the Hero resolves Rubble during Exploration, apply a Bleed Condition 114t to them.
Ennui: When the Hero’s Resolve is Tested, they have -1 Virtue chance (See Stress, Afflictions and Virtues).
Hemophilia: Whenever Bleed is applied to the Hero, apply an additional Bleed Condition 112t and take 2 Wounds per Hero Level.
Lethargy: When the Hero uses a Move action, they take 1 Wound per Hero Level.
Spotted Fever: Whenever the Hero takes Damage, apply a Blight Condition 112t to them.
Syphilis: When the Hero takes Damage, they take 1 Wound per Hero Level.
Tapeworm: When the Hero resolves Hunger during Exploration, apply a Bleed Condition 114t to them.
The Worries: Whenever the Hero suffers Stress, they suffer 1 additional Stress and 2 Wounds.
Vertigo: Whenever the Hero is Shuffled (pushed or pulled), they suffer +2 Stress.
Stress, Afflictions and Virtues
Facing the horrors of the abyss is a stressful deal, even for the bravest of adventurers.
Stress Tracker on the Hero Dashboard.
All Heroes start the adventure at 0 Stress and it can go up to 10. Stress is represented by the icon.
It can be gained or recovered in a variety of ways; Monster abilities, letting the Light go down, or even suffering Critical Hits will stress the Heroes.
When a Hero’s Stress reaches 10, the Hero’s Resolve is Tested as it can either drive them to despair or boost their willpower further. When their Resolve is Tested, roll a ten-sided die: On a roll of 1 or 2 they gain a Virtue. On a roll of 3 or more they gain an Affliction. A Hero can have their Resolve Tested only once during a Quest and can never have more than 1 Affliction and/or Virtue at a time. Affliction and Virtues’ effects have a chance to trigger at the start of the Hero’s turn only during Battle. Each has a different chance to trigger and it’s determined by the roll of a ten-sided die as indicated on the card.
After a Hero acquires a Virtue or an Affliction, reset their Stress Tracker to 0!
At the end of the Quest, when the party returns to the Hamlet, if a Hero is Afflicted, they discard the Affliction and gain a Negative Quirk.
If the Hero is Virtuous, they discard the Virtue and gain a Positive Quirk.
Focused
At the start of
your turn:
1-5
Self 2t
Selfish
At the start of
your turn:
1-4
Consume one
Provision.
Back BackFront Front
Virtue Card Affliction Card
When a Hero reaches 10 Stress and has an Affliction or a Virtue already, they die of a Heart Attack!
To keep track of your Stress, take a Stress Counter and place it white side up on your Hero Dashboard's Stress Tracker – moving it up until it reaches 10.
Use white side until your Resolve has been Tested.
When it reaches 10 and the Hero has undergone a Test of their Resolve, return the Stress Counter to 0 and flip it on its red side. If the counter is on its red side when you return to the Hamlet, flip it onto its white side again. White/red sides are a reminder of whether the Hero is heading towards a Test of their Resolve or a Heart Attack.
Use red side when you already have an Affliction or a Virtue.
---
The Light
The Light is very important throughout the Quest. It illuminates dark corners and drives back Monsters. Light can increase or decrease in various ways (for example: from Exploration hazards or entering Dark Rooms) and it can produce different Effects depending on its Level.
Heroes have +1 Dodge.
Heroes and Monsters gain +1 Crit.
When Heroes suffer Stress, they gain +1.
Monsters gain +1 Dodge and +1 Acc.
Effects from 4 to 0 are cumulative.
For example, when Light is down to 1, ALL previous effects take place; Monsters and Heroes gain +1 Crit in addition to the +1 effect. However, the bonus of +1 is lost if the Light is not on 5.
At Death’s Door and Deathblows
Heroes don’t die immediately when they suffer Wounds equal to their Life. Instead, they enter a state called At Death's Door. When at this stage, they don’t take any more Wounds but every blow they suffer has a chance to finish them off.
Keep in mind that a Hero can never have more Wounds than their Life total.
Take the special Deathblow Die and place it in the corresponding space on your Hero Board. Any time the Hero suffers any amount of Wounds, roll the die instead – if you roll a skull, the Hero receives a Deathblow and is dead! If not, you have cheated death – for now…
Keep in mind that if multiple wounding Conditions, such as Bleed and Blight happen while a Hero is At Death’s Door, you’ll roll only once, as these Conditions apply their Wounds simultaneously.
When a Hero who is At Death’s Door is healed (removing at least 1 Wound), they are no longer considered to be At Death’s Door (remove the Deathblow Die from its spot) and they can’t be killed by a Deathblow unless they find themselves At Death’s Door again.
Gaining XP (Experience Points)
XP
XP are important in order to make your Heroes stronger and more able to survive when you enter the Darkest Dungeon. In order for your Heroes to gain XP, they need to complete Quest objectives first. All Quests grant between 0 to 3 XP depending on how many of its objectives the party completes.
XP are awarded when the Heroes return to the Hamlet and they all gain the same amount of XP.
In addition, after your party returns to the Hamlet and gains XP, add the amount gained per Hero to the Stagecoach. So, if the party fully completed a Quest and each Hero gained 3 XP, also add 3 XP to the Stagecoach. You’ll need it later if a Hero is dead and a new one must take their place.
Leveling Up
Heroes can Level Up their stats independently from their Skills. Each Hero has three Hero Levels and each of their Skills also has three Levels. In order to Level Up any of them, the Hero must visit the Guild in the Hamlet and pay the appropriate Gold and XP cost.
When you Level Up a particular Skill, remove its previous version and add the new Level Card into your roster of seven.
When you Level Up a Hero, replace the Hero Card with the next level Hero Card. Your Hero now has increased stats, added Resistances and/or Immunities and an additional slot for Skills and Trinkets. Keep in mind that you can now equip an additional Skill from your roster of seven.
---
30
Bosses
I
Necromancer
ACTIONS / Round: 1
Summoning: When a Monster
is summoned, the Monster miniature is
placed on the Target Area, and
a new Monster Initiative Card is
shuffled into the Initiative Deck.
If all Stances are occupied, the
Summoning does not take effect.
Bosses are your Imminent Threat.
Powerful entities that are a
constant threat to the Hamlet and
must be dealt with before you can
enter the Darkest Dungeon.
Each Boss has three versions
according to the Campaign Level.
Bosses have two passive threat
abilities; one for the Hamlet and
the other for inside the Dungeons.
They vary from Level to Level.
In order to face a Boss, the Heroes must complete
two Quests beforehand. When they do so, the
Boss location is revealed and they can venture off
to slay it. There is a general Quest Card for every
Boss, named Face the Threat; when you must face
one, consult that card for the Dungeon layout and
Firewood supplies.
Boss Quest
The Threat has shown itself.
Now is the time to strike! Find
its lair and eradicate it.
SPECIAL RULES
Set up this Dungeon according
to the Boss Quest rules. You
can’t return to the Hamlet
before you defeat the Boss!
XP
3 Xp
21
1 11
1
Face the Threat!
1
12
Bosses always hide at the far end of the Dungeon.
When you are about to set up a Boss Quest
Dungeon, note how many Rooms the Dungeon Tile
has on the edge. An Edge Room is a Room that has
only one Corridor leading to and from it. Take the
Objective Room along with as many random Room
Tokens as you need, shuffle them together and
place them on these Edge Rooms. Then fill up the
rest of the Room slots as usual. The Boss always
waits at the edge of the Dungeon. Which edge is
for you to find out!
Fighting a Boss
There is no turning back once you’ve started a
Face the Threat Quest. You don’t have the option
to leave the Dungeon and if you fail to defeat the
Boss, the Campaign is over!
When you enter the Objective Room, use
the Room Tile that is unique to the Boss
you are fighting. Each Boss has its own
Room Tile.
Flip the Boss Card from the Threats side to the
Battle abilities side. The Threats cease to function
at that moment. As Bosses have special Battle
rules, take a moment to read them both on their
card and, for a more extensive explanation, in the
Boss’ special rules section of this book (page 38).
Do not count Battle Rounds while fighting the Boss.
When you defeat it, the Battle ends immediately.
Remove any other Monsters from play – you don’t
need to fight them.
To form the Initiative Deck, check how many
actions/round the Boss has and add that many
Monster Initiative Cards for it in the deck. Do the
same for any other special Monsters that might
start the battle along with the Boss.
When you kill a Boss, the Campaign advances a Level
and you enter the next Act.
Boss Turns
Since most Bosses have more than one action/
round, they get to act more frequently than other
Monsters. When Monsters with multiple actions/
round are in Battle, they’ll use the Initiative Cards
to act before Monsters that are behind them in
Stance order.
Example: The Shuffling Horror has two actions/
round. The players draw an Initiative Card showing
it’s the Monsters' turn to go. The Shuffling Horror
acts and finishes its action.
Next, the players draw the next Initiative Card
and the Monsters go one more time. Since the
Shuffling Horror has one more action remaining
and has priority (Aggressive Stance) it gets
B
BO
OU
UN
NT
TY
Y
H
HU
UN
NT
TE
ER
R
H
HEELLLLIIOONNOOCCCCUULLTTIISSTT
C
CRRUUSSAADDEERR
III
26
Resistances Immunities
Cultist PriestCultist Priest
Eldritch - Beast - Back
Death Lash1
The Finger2
3
1
21-6
7-10
1t, +1
33t, +2,
+5+5vs
Crowded
Furthest
1
2
Crit 1 Crit 1 88 Acc 11 Acc 11 66
Crit 2 Crit 2 1515 Acc 11 Acc 11 1111
III
28
Resistances Immunities
Malignant GrowthMalignant Growth
Eldritch - Front
Maul the Flesh1
Daze the Mind2
2
1
21-5
6-10
23t
2t
Closest
Furthest
1
1
Crit 1 Crit 1 1616 Acc 10 Acc 10 1111
Crit 1 Crit 1 1010 Acc 11 Acc 11 66 Undulations2
Crowded
Lacerate1
Echoing Disassembly3
Closest
Rearrange Hero Stances +2, -1,
Crit 1 Crit 1 44 Acc 12 Acc 12 22
109
Resistances Immunities
Shuffling HorrorShuffling Horror
Eldritch - Large - Front
3
Crit 1 Crit 1 1111 Acc 11 Acc 11 77
Crit 0 Crit 0 22 Acc 11 Acc 11 11
1
1
Crowded
33t
1
21-7
8-10
1
---
its second action now. The next two Monster Initiative Cards will go to the Cultist Priest and the Malignant Growth respectively, as the Shuffling Horror is out of actions this round.
Boon Hunter Hellion Crusader
III
26
Resistances Immunities
Cultist Priest
Eldritch - Beast - Back
Death Lash 1
The Finger 2
3
1
21-6
7-10
1t, +1
3 3t, +2,
+5+5vs
Crowded
Furthest
1
2
Crit 1 8 Acc 1 6
Crit 2 15 Acc 1 11
III
28
Resistances Immunities
Malignant Growth
Eldritch - Front
Maul the Flesh 1
Daze the Mind 2
2
1
21-5
6-10
2 3t
2t
Closest
Furthest
1
1
Crit 1 16 Acc 10 11
Crit 1 10 Acc 1 6
Undulations 2
Crowded
Lacerate 1
Echoing Disassembly 3
Closest
Rearrange Hero Stances +2, -1,
Crit 1 4 Acc 12 2
109
Resistances Immunities
Shuffling Horror
Eldritch - Large - Front
3
Crit 1 11 Acc 1 7
Crit 0 2 Acc 1 11
1
1
Crowded
3 3t
1
21-7
8-10
1
III
Should something happen to move the Shuffling Horror to the Defensive Stance before it has the opportunity to take its second action (for example, being pushed back by a Hero), then the Cultist Priest will act when the next Monster Initiative Card is drawn because he now has the priority. The Shuffling Horror must wait for the following Monster Initiative in order to take its second action.
Boon Hunter Hellion Crusader
III
26
Resistances Immunities
Cultist Priest
Eldritch - Beast - Back
Death Lash 1
The Finger 2
3
1
21-6
7-10
1t, +1
3 3t, +2,
+5+5vs
Crowded
Furthest
1
2
Crit 1 8 Acc 1 6
Crit 2 15 Acc 1 11
III
28
Resistances Immunities
Malignant Growth
Eldritch - Front
Maul the Flesh 1
Daze the Mind 2
2
1
21-5
6-10
2 3t
2t
Closest
Furthest
1
1
Crit 1 16 Acc 10 11
Crit 1 10 Acc 1 6
Undulations 2
Crowded
Lacerate 1
Echoing Disassembly 3
Closest
Rearrange Hero Stances +2, -1,
Crit 1 4 Acc 12 2
109
Resistances Immunities
Shuffling Horror
Eldritch - Large - Front
3
Crit 1 11 Acc 1 7
Crit 0 2 Acc 1 11
1
1
Crowded
3 3t
1
21-7
8-10
1
III
Monster Summoning
A common practice of Bosses is to summon other Monsters to their aid. Some are special Monsters unique to the Boss, others might be common Monsters found in the Dungeons. Which ones they are and how they’re summoned is described in each Boss' special rules and is indicated with the icon on their Battle Card. When a Monster is summoned during battle, it is placed in the first empty Stance Slot; its miniature goes to the corresponding Area on the Room Tile (unless the Boss specifies otherwise). If there is no space there, a Hero must move to the nearest available Area. If the Area the summoned Monster spawns into is fully occupied by Monsters, players choose which one to move to the nearest available Area to make space. Once done, shuffle an Initiative Card for the Monster into the Initiative Deck. Unless the Heroes take it out, the Monster gets its chance to act during the round it’s summoned!
Hero Death
When a Hero dies, the player removes all cards from the Hero Board along with its miniature. This Hero is no longer available for the rest of the Campaign. Trinkets can be taken by fellow players and equipped to their Heroes immediately, positive side up. If no one wants them, they are discarded. The player who lost their Hero must now choose one of the available Heroes waiting at the Stagecoach. A player can choose any Hero that is available and has not already died during the Campaign. The new Hero gains Xp equal to those the party has accumulated during the Campaign up to now (recorded at the Stagecoach – do NOT remove any Xp from there) and immediately spends any Xp they want to make up to two upgrades to their Hero and/or Skills as if they have visited the Guild in the Hamlet, but without spending any Gold (see Hamlet Buildings on page 33). If the Hero died during Battle, the new Hero waits until it is finished in order to join the party. Once the Hero is chosen, remove a Waiting Hero Token from the Stagecoach and continue with Exploration as normal.
---
32
Returning to the Hamlet
However successful it was, after the Quest is over,
Heroes return to the Hamlet to lick their Wounds
before they face the horrors again. When returning
to the Hamlet, Heroes take the following steps:
a Shuffle back in their respective decks all
discarded Trinkets, Curios, Quirks, Diseases,
Room Cards and Loot Chests.
b All Conditions are removed and Light goes up
to 5.
c All equipped Trinkets are turned to their positive
side.
d Afflictions and Virtues are reshuffled into their
decks and are replaced by Negative and Positive
Quirks respectively. No Life or Stress is
recovered. No Quirks or Diseases are removed.
Heroes need to heal themselves by visiting the
buildings of the Hamlet.
Remaining Provisions may immediately be
consumed to gain their benefits. Unused Provisions
must be returned to the supply and they each
provide 1 Gold.
If you want, you can save the game at this point (see
page 35 for more about saving the game).
The Hamlet
The Hamlet is your hub where you rest, shop,
train and help the Heir to slowly restore it back
to its former glory. Heroes return to the Hamlet
after each Dungeon delve and they must take the
following steps:
1 Draw a Hamlet Event Card and mark your
preparation days.
Then each day:
2 Roll for the Caretaker.
3 Spend your day.
Heroes can swap Skills from their roster of seven,
change Stances and upgrade buildings freely at any
time.
Always pay attention to the current Boss’s Hamlet
Threat ability!
1 Draw a Hamlet Event Card
Draw a Hamlet Event Card, follow its instructions
and then shuffle it back into its deck. Each Hamlet
Event Card also indicates how many days you have
to prepare for your next Quest. Place the Days
Counter on the Days Tracker.
Survivalist Survivalist II
Gain 1 1
Stagecoach Stagecoach II
Place two Waiting
Hero tokens
Tavern Tavern II
1
3
-3
-6
Nomad Wagon Nomad Wagon II
Reveal three Level I Trinkets
1-2
3
Sanitarium Sanitarium II
1
3
Heal 3
Heal 10
Remove
Disease 2
4
Abbey Abbey II
2
5
Remove 1 Quirk
Remove 2 Quirks
5
9-10
Graveyard Graveyard
Gain a Virtue for Next Quest
6
Guild Guild
2
1
Upgrade a
Level 1 Hero Card
Upgrade a
Level 1 Skill Card
4 Xp
2 Xp
7
Blacksmith Blacksmith II
Use One of the Hero’s
Skills as Its Level 2 Form
for the Next Quest Only
8
1
11 22 33 44 The Hamlet The Hamlet
---
33
Note that some events will be permanently discarded
from the Campaign after they are resolved. Supply Run 2
‘Tis not only the Heroes but
the common folk too, that
offer up anything they can for
the Hamlet’s common good.
Party gains +2
before the next Quest.
The icon in the upper left corner of the Hamlet Event Card
(Front) shows how many preparation days you’ve got before
you must venture out on your next Quest.
2 Roll for the Caretaker
This suspicious-looking person took
care of the Hamlet before the Heir
arrived and continues to do so during
his temporary absence. At the start of
each day, roll a ten-sided die and place
him on top of the appropriate building. He occupies
that space and blocks Heroes from visiting. If you
need to roll for something else that blocks a location
as well (such as a Boss’s threat ability) and you roll
the same location as the Caretaker, roll again until
you roll a free building.
3 Spend your Days
By Stance order (Aggressive to Support),
Heroes visit the various buildings of the Hamlet
spending money and time to Heal both physically
and mentally, train their Skills, cure their Diseases,
etc. Each Hero occupies the building during their
visit, blocking other Heroes from visiting the
same building the same day. Heroes can take only
one of the available choices each day they visit a
building. Instead of visiting a building, a Hero can
spend their day to use one of their Hamlet Skills.
After all Heroes have spent their day, move the Day
Counter one day down and repeat steps 2 and 3
until all your days are spent and you must set out
on your next Quest. As usual, draw two Quest Cards
and decide which one you’ll follow. If it is time to
fight a Boss, don’t draw any Quests but instead
follow the Face the Threat Quest Card (see p.30).
Survivalist Survivalist II
Gain 1 1
Stagecoach Stagecoach II
Place two Waiting
Hero tokens
Tavern Tavern II
1
3
-3
-6
Nomad Wagon Nomad Wagon II
Reveal three Level I Trinkets
1-2
3
Sanitarium Sanitarium II
1
3
Heal 3
Heal 10
Remove
Disease
2
4
Abbey Abbey II
2
5
Remove 1 Quirk
Remove 2 Quirks
5
9-10
Graveyard Graveyard
Gain a Virtue for Next Quest
6
Guild Guild
2
1
Upgrade a
Level 1 Hero Card
Upgrade a
Level 1 Skill Card
4 Xp
2 Xp
7
Blacksmith Blacksmith II
Use One of the Hero’s
Skills as Its Level 2 Form
for the Next Quest Only
8
1
11 22 33 44
The Hamlet
Hamlet Buildings and Upgrades
Any time during their stay in the Hamlet, players
can spend money to upgrade any buildings of their
choice. This will make the locations more effective.
This is a group choice, however, so everyone should
agree on which building should be upgraded. The
cost to upgrade a building one Level is
20 Gold
except for the Blacksmith and the Nomad Wagon
which are
10 Gold
. Also note that the Guild and
the Graveyard cannot be upgraded.
Stagecoach
The Stagecoach is not a
building Heroes can visit.
Instead, the first time you
set up the Hamlet, place two
Waiting Hero Tokens here. When a Hero dies and a
player picks a new one, remove a Token from here.
If there are no Tokens to be removed, you’ve failed
the Campaign. Additionally, when Heroes return to
Hamlet and gain
Xp, add the same amount here.
When a player must choose a new Hero, this Hero will
start with the
Xp the party has accumulated here. Do
not remove any
Xp from the Stagecoach! They’ll
keep piling up until the end of the Campaign.
Level 1
Place two Waiting Hero Tokens.
Level 2
Add a Waiting Hero Token.
Level 3
Add a Waiting Hero Token.
Nomad Wagon
Level 1
The first day a Hero visits the
Nomad Wagon, draw and
reveal three Level 1 Trinkets. Leave them here until
the Hamlet phase ends, then reshuffle them back
into the deck when the Heroes leave for the next
Quest. A Hero visiting the Nomad Wagon can sell
one of their equipped Trinkets and buy one from the
available Trinkets at the following prices: Buy a Level
1 Trinket for
4
; sell a Level 1 Trinket for 2 , a
Level 2 Trinket for
3
and a Level 3 Trinket for 4 .
Selling prices are the same for all Nomad Wagon
Levels.
---
34
Level 2
Place two Level 1 and one Level 2 Trinkets. Level 2 Trinkets cost 6 to buy.
Level 3
Place one Trinket of each Level. Level 3 Trinkets cost 8 to buy.
Abbey
Level 1
Remove 1 Quirk for 2 OR remove 2 Quirks for 5.
Level 2
Remove 1 Quirk for 2 OR remove 2 Quirks for 5 OR gain a Positive Quirk for 3.
Level 3
Remove 1 Quirk for 1 OR remove 2 Quirks for 4 OR gain a Positive Quirk for 3 OR recover 3 for 1 OR recover 6 for 3.
Sanitarium
Level 1
Heal 5 for 1 OR Heal 10 for 3 OR remove a for 2.
Level 2
Heal 7 for 1 OR Heal 14 for 3 OR remove a for 2.
Level 3
Heal 9 for 1 OR Heal 18 for 3 OR remove a for 2.
Tavern
Level 1
Recover 3 for 1 OR recover 6 for 3.
Level 2
Recover 3 for 1 OR recover 6 for 3 OR recover 9 for 9.
Level 3
Recover 3 for 1 OR recover 6 for 3 OR recover 9 for 9 OR Heal 5 for 1 OR Heal 10 for 3 OR remove a for 2.
Survivalist
Level 1
Gain a Provision Die for 1.
Level 2
Gain a for 1 OR gain 2 for 3.
Level 3
Gain a OR for 2 gain 2 OR for 4 gain 3.
The Guild
The Guild cannot be upgraded. During your visit you can make up to two of the following upgrades to your Hero.
Spend 4 Xp and 2 to Level Up the Hero by 1.
Spend 2 Xp and 1 to Level Up one of the Hero’s Skills by 1. Remove the old version permanently from the game.
Blacksmith
Level 1
Pay 1 and use one of the Hero’s Skills as its Level 2 form for the next Quest only.
Level 2
Pay 1 and use one of the Hero’s Skills as its Level 3 form for the next Quest only.
Level 3
Pay 1 to gain 1 and use one the Hero’s Skills as its Level 3 form for the next Quest only.
When you use the Blacksmith’s services, keep the old card to the side as it will replace the temporarily upgraded one once the next Quest is over.
The Graveyard
The Graveyard cannot be upgraded. Pray for the losses of your fallen comrades and swear vengeance to bolster the Hero’s will and gain a Virtue. Be careful, though, for this means the next time the Hero’s Stress reaches 10 they’re dead!
---
35
The Campaign
Each time the Heroes defeat a Boss, the Campaign
advances a Level. When Heroes have beaten all three
Imminent Threats, they must enter and clear the
Darkest Dungeon itself to secure complete victory.
Starting the game at Campaign Level 1, shuffle all
Level 1 Boss Cards and draw one at random. Read
the flavor text aloud and set it aside. Find its Threat
Card and place it next to the play Area for quick
reference, as its Threats affect both the Hamlet and
the Dungeons and won’t cease until you kill it. Always
follow its Threat rules when you are in these places.
Before you are able to face the Boss, you must
take on some general tasks first. Draw two Level 1
Quest Cards and decide which one you’ll do. Discard
the other permanently from the game. When you
return, take time off to recover in the Hamlet.
After two Level 1 Quests are complete you must
take on the Boss Quest. These are the same in all
first three Acts; use the “Face the Threat” Quest
Card as a reference. At this point it’s either you or
the Boss. If you fail to eliminate it, your Campaign
is over. If you succeed, the Campaign advances to
Level 2:
• Shuffle the Level 2 cards of the remaining Bosses
and draw a new card at random as your next
Imminent Threat.
• Add the Level 2 Monsters into the Monster deck –
you’ll face some stronger Monsters from now on!
• Leave the Level 1 Trinkets aside to use them only
when visiting the Nomad Wagon at the Hamlet.
Bring in the Level 2 Trinkets deck as now you’ll
only draw from this deck when in the Dungeons.
• Remove all Level 1 Quests and swap in the Level
2 ones; form a new Quest deck with those. You
only draw from the Level 2 Quest deck from
now on.
When you finish Campaign Level 2 (Act 2) and you
enter Level 3 (Act 3), do the same thing for the Level
3 cards.
When you defeat the 3rd Imminent Threat, the
denizens of the Hamlet (those who are left, at
least) can enjoy some calm. There is no rest for the
Heroes, though, for now the path is open and the
gates of the Darkest Dungeon (Act 4) are ready to
be stormed!
The last act is about to begin and it consists of
two parts: the Darkest Dungeon itself – a place
of unspeakable horrors and powerful foes (all
Monsters are Level 3), and its Guardian and the final
fight with the root of all Evil.
Remember: Dungeons have Levels too. The Level of
a Dungeon is the same as the Level of the Campaign
(1 to 3). Since you reach Campaign Level 3 when you
start the third Act, Darkest Dungeon is considered
a Level 3 Dungeon. This is important because the
severity of many of the Dungeon hazards scale with
their Level.
In short: Act I = Campaign Level I, Act II = Campaign
Level II, Act III = Campaign Level III, Act IV =
Campaign Level III.
Saving the Game
The game comes with a set of save game sheets.
When you return from the Dungeon to the Hamlet,
take one and note down all the information required.
When you continue your Campaign at a later time,
this sheet will help you pick up where you left off.
In addition to save game sheets, you are provided
with a save box, where you can store all the
necessary components so you don't need to search
for them when you resume your game.
The Darkest Dungeon
This is the fourth and final Act of the game. As the
next two Quests are both to fight a Boss, failing
them means the Campaign is over.
After you play the Hamlet phase following the
defeat of the final Imminent Threat, get ready for
delving into the Darkest Dungeon itself. Remove
all previous Monster cards and bring in the Darkest
Dungeon ones, then shuffle them into a deck. This
is the Monster deck from now on. Be wary: Darkest
Dungeon Monsters are all Level 3 Monsters!
There are three Darkest Dungeon Quest Cards.
Shuffle them and draw one at random. This is
the one you’re up against in this Campaign. You’ll
notice that the reward, in addition to the 3 Xp, is
that you cancel a form of the final Boss (further
details will be explained later). You’ll also notice
the Quest has 16 Rooms. The Darkest Dungeon is
twice as big as a normal Dungeon. But worry not
– you can find old excavation sites that you can
scavenge to help you pull through.
---
36
Now remove all standard Dungeon Tiles and find
the two Darkest Dungeon ones (they have a red
bordered back). Shuffle them and draw one at
random. This is the Dungeon layout for this Quest.
Form the Dungeon as usual, shuffling the Room
Tokens and placing them randomly on the Board.
Only this time, to place the Boss you won’t count
the typical Edge Rooms, but the ones indicated on
the tile with the . There are three possible places
to find the Boss. Take the Objective Room Token
and shuffle it with two random non-Objective ones.
Place them first on the indicated Boss Slots and then
fill the Dungeon with the rest of the Room Tokens.
Remove all Room Tiles and Room Cards you used
up until now and bring out the Darkest Dungeon
ones . Shuffle the Room Cards to form a Room
Deck as usual.
The Trinkets you find in the Darkest Dungeon are
still Level 3 Trinkets.
Another difference is that there are no Empty
Rooms this time around. Instead, there are three
Excavation Site Rooms. These work differently than
Empty Rooms, though they will only benefit your
party. More about this later on.
Quirks, Diseases, Virtues and Affliction decks remain
the same. For Curios, use the Ruins Curios deck.
The Darkest Dungeon is set up and you are now ready
to explore it. Roll for Provisions and good luck!
NOTE: Darkest Dungeon is considered a Level 3
Dungeon.
Excavation Site Rooms
The Darkest Dungeon has no typical Empty Rooms.
Instead, treat Empty Rooms as Excavation Site
Rooms. These were chambers where the Ancestor
practiced his eldritch magic as he was excavating
towards the Gates of Oblivion. Luckily, stuff from
the long-gone workers can still be found there.
When the Heroes enter an Excavation Site Room,
they immediately roll one Provision die each and add
it to the pool. In addition, they immediately take a
free Rest Action as if they had 8 Resting Points (this
won't use up your standard Firewood provided by
the Quest). Once these actions are taken, the Room
is cleared.
The Final Encounter – Heart of Darkness
After your final session in the Hamlet, you are
ready to face the final Boss. This final Hamlet phase
is 4 days of preparation without a Hamlet Event
(do not draw one this time). There is no Dungeon
Exploration prior, just a long Boss fight. You still roll
for Provisions before you start the fight.
The final Boss has four forms in total but you’ll only
face three of them. One form will be ignored and
it has to do with the Quest previously undertook.
There is a specific order in which to fight these
forms. Once a form is defeated, the Battle ends
momentarily. Initiative Cards are reshuffled and
a new Battle Round starts when the new form
emerges. The new form follows the standard
Spawning rules. There is no pause to rest, change
Stances, etc when changing Boss forms.
The order in which forms succeed one another is:
• I- Ancestor 1
st
Form
• II- Ancestor 2
nd
Form
• III- Gestating Heart
• IV- Heart of Darkness
Depending on which Quest you undertook prior to
the final Boss, one of the three first forms will be
ignored.
The battle takes place in the same Room; keep its
card close, as always, as a reminder of its special rules.
For more details about the Boss fight, see page 38.
Game Modes
There are a couple more ways to play the Darkest
Dungeon Board Game.
Radiant and Stygian Modes
Did you find the game too difficult for your gaming
group? Or is it too forgiving for you? We've got you
covered for both situations!
When you start a Campaign, you may choose to
play the game in one of the two following difficulty
modes instead.
Radiant mode is the easier way to play. When you
play in this mode, follow these rules:
• Start the Campaign with 20 Gold in the common
pool instead of 10.
• When you roll for Provisions before entering a
---
37
Dungeon, Heroes roll only one die and choose the
side for the other one (for bonus dice provided by
other effects, follow their rules as normal).
• When exploring, Heroes roll one Exploration
Die instead of two (when Scouting reduce this
to zero dice).
Stygian mode is a harder way to play. When you
play in this mode, follow these rules:
• Start the Campaign without any Gold at all.
• Find the Stygian Room Cards and replace the
standard Room Cards. Room hazards are now
tougher.
• All Bosses have +1
CritCrit to their Skills.
The Butcher’s Circus (PvP Mode)
The Hamlet may have fallen on hard times, but the
creak of wagons and blare of abused trumpets signals
a change in fortune for the bold and meek alike: the
Circus is in town!
A weathered and bloodstained pavilion tent beckons,
the Twins flank the flap, and a rheumy-eyed Barker
announces:
“The Butcher demands a show!”
In this mode players will form teams and fight
against each other in a friendly, yet brutal bout.
This mode is a stand-alone one. It doesn’t link to the
Campaign and it is mostly for 1 versus 1, though you
can play it as a 2 versus 2 if you want, having two
players controlling one team.
To play the Butcher’s Circus find the Arena Tile and
the special PvP Hero cards (you won't be using the
standard Hero Dashboards and Skill/Hero Cards).
Keep in mind that this version of the cards has
to indicate opponent Heroes and to indicate the
Heroes of your team.
Each Hero has four different profiles (except the
Abomination that has two) consisting of a group of
three Skills each. Each team has four Heroes.
Choose one of the two arenas and place it in the
middle of the table, then take the two Stance
Trackers, giving one to each player. Light is irrelevant
in this mode.
Choose sides, determine randomly which team
goes first, and give them the Party Counter (torch
miniature).
You will now draft Heroes in turn. The first team
picks one Hero; then the second team picks two
Heroes. The first team now picks two Heroes, then
the second team picks two as well. Finally, the first
team picks their final Hero.
Decide which profile you want to use for each of
your Heroes.
Now, starting from the first team, place your
Heroes one by one in turns, inside the Areas of
your side’s color. When all Heroes are placed, the
Battle can begin!
Each team will take turns activating one Hero at
a time. Players can choose to activate any of their
Heroes that hasn’t been activated in the current
round. There is no random Initiative draw in the
Circus. Once a Hero has finished their turn, place an
Initiative Card on them to indicate they’re done for
this round. After all the Heroes have been activated,
remove the Initiative Cards from the Hero Cards and
start a new round. Pass the Party Counter to the
other team; now they play first.
When all Heroes of one team are eliminated, the
Battle ends and the team with Heroes still standing
in the arena is the winner.
Deathblows and Heart Attacks in PvP mode
Heroes can die by Deathblow when At Death’s Door
and by Heart Attack when they accumulate Stress as
normal, though in PvP there are a few differences.
When you roll the Deathblow Die, skulls count as
safe and blanks count as Deathblows. This means
the Deathblow chance in PvP is 7 out 10!
There are no Afflictions and Virtues in PvP, that
means your Resolve will not be Tested. When a
Hero’s Stress reaches 10, they instantly die of a
Heart Attack!
Optional Rules: There are a couple of optional
rules that you can use in your PvP games if you so
choose.
The Puppets – If you want to use the Puppets, place
the miniatures in one of the Areas with capacity 1.
This Area is now always fully occupied.
The Butcher – If you want to use the Butcher, start
the Battle with her in Area 1. At the start of every
round, roll a ten-sided die and move her one Area
towards the corresponding Area of the dice roll. The
Butcher has the Out for Blood special ability: Heroes
in the same Area as the Butcher and all
Heroes targeting the Area containing
her, have +1 CritCrit.
You can use one or both of these
rules at the same time.
---
38
The Abomination:
A Special Kind of Hero
The Abomination is a Hero that plays quite
differently from the rest. This Hero has two forms: a
human one and a beast one, and can switch between
those two at will.
Three of the Abomination’s Skills can only be used
when he is in human form and three can only be
used in beast form. The seventh Skill, Transform,
is a unique one that allows him to change from
one form to the other. You'll notice it's a double
sided one. You are not obliged to equip it at all
times, though if you don’t have it, you can’t have
the Hero transform into his Beast form.
The Abomination is always in its human form when in
the Hamlet. It’ll switch to this form automatically if
you leave the Dungeon while in beast form, though,
since the Skill is not used at that time, there are no
transformation effects.
When you switch from one form to another, using
the Transform Skill, flip the Skill Card, the Hero
Card and the Stance Token to its other side (using
an action and resolving all effects as normal) and
replace the miniature with the one of the current
form. All these are reminders of which form you
are currently using (remember, not all Skills can be
used by both forms).
Self Change: Beast
2t, +2
Allies: +2
All Allies
Transform to Beast I
Human Form Only
Self Change: Human
3t, -1
Allies: -1
Beast Form Only
Transform to Human I
All Allies
Boss Fights
This section covers setting up Boss fights and the
use of Boss Fight special rules.
The Ruins
Necromancer: When you face the
Necromancer, follow these steps:
1. Find the Necromancer Room
Card and its corresponding Room
Tile and put it in play.
2. Place the Necromancer’s Battle Card and
miniature in the Aggressive Stance on the Monster
Stance Tracker and on the Room Tile respectively.
Shuffle one Initiative Card for the Necromancer into
the Initiative Deck.
3. Find the Bone Rubble (or Bone Soldier or Bone
Spearman, depending on the Boss’s Level) cards
and miniatures and have them on hand on to the
side. When the Necromancer summons one of them
by using a Skill, place their respective card on the
first empty Stance Slot and their miniature on the
Target Area on the Room Tile, then shuffle an
Initiative Card for this Monster in the Initiative Deck.
When the Necromancer is defeated, remove all
other Monsters from play.
Prophet: When you face the Prophet,
follow these steps:
1. Find the Prophet Room Card
and its corresponding Room Tile and
put it in play.
2. Place the Prophet’s Battle Card and miniature
in the Aggressive Stance on the Stance Tracker and
Room Tile respectively.
3. Shuffle three Initiative Cards for the Prophet
into the Initiative Deck.
4. Find the four Wooden Pews and keep them on
hand on the side.
Each round, during his first turn, instead of using
one of his Skills, roll four ten-sided dice and place
the Wooden Pews on the respective Areas on the
Room Tile.
Each round, during his third turn, the
Prophet will always use his Rubble of Ruin
Skill, attacking each Area with a Pew; roll
for each Pew separately. This means an
---
39
Area with two Pews can be attacked twice. Pews don’t occupy space in Areas and cannot be targeted. When the Prophet is defeated, remove the Pews from play.
Collector: When you face the Collector, follow these steps:
1. Find the Collector’s Room Card and its corresponding Room Tile and put it in play.
2. Place three Loot Chests on the indicated Area.
3. Find the Battle Cards and miniatures for the Collector, the Collected Man at Arms, Collected Highwayman and Collected Vestal.
4. Place the Collector’s Battle Card and miniature in the Aggressive Stance on the Stance Tracker and on the Room Tile respectively. Keep the Collector's Collected Cards and miniatures on hand on the side.
5. Shuffle one Initiative Card for the Collector into the Initiative Deck.
During the Collector's turn if there are no Collected in play, instead of using one of his Skills, the Collector will summon a Collected Man at Arms in the Defensive Stance and Area, a Collected Highwayman in the Ranged Stance and Area and a Collected Vestal in the Support Stance and Area. Immediately place their cards and miniatures accordingly and shuffle three Initiative Cards into the Initiative Deck.
When the Collector is dead, remove any remaining Collected from play.
Fanatic: When you face the Fanatic, follow these steps:
1. Find the Fanatic Room Card and its corresponding Room Tile and put it in play.
2. Find the Fanatic’s Battle Card and miniature and place them in the Aggressive Stance on the Stance Tracker and Room Tile Area respectively.
3. Find the Pyre’s card and miniature and place them in the Ranged Stance on the Stance Tracker and Tile Area respectively.
4. Shuffle four Initiative Cards (three for the Fanatic and one for the Pyre) into the Initiative Deck.
During every Fanatic's turn, if the Pyre is still in play and there is space in its Area, the Fanatic will move towards the closest Hero. If he reaches them, he will throw them in the Pyre. Place the Hero Miniature in the Area with the Pyre.
When the Fanatic is defeated, if the Pyre is still in play, remove it.
Darkest Dungeon
The Templars: When you face the Templars, follow these steps:
1. Find the Templars’ Room Card and its corresponding Room Tile and put them into play.
2. Find the Battle Cards and miniatures for the Templars. Place the Templar Impaler in the Aggressive Stance on both the Stance Tracker and on the Tile Area. Place the Templar Warlord on the Ranged Stance on both the Stance Tracker and on the Room Tile Area.
3. Shuffle four Initiative Cards (two for each Templar) into the Initiative Deck.
When the Templar Impaler uses his Body Slam Skill and hits a Hero, the Pit Toss effect activates: Roll a ten-sided die and place the target Hero in the corresponding Spiked Pit, suffering the effect referred to on the Room Card.
Mammoth Cyst: When you face the Mammoth Cyst, follow these steps:
1. Find the Mammoth Cyst Room Card and its corresponding Room Tile and put it in play.
2. Find the Battle Cards and miniatures for the Mammoth Cyst and the White Cell Stalk. Place the Mammoth Cyst card and miniature in the Aggressive Stance both on the Stance Tracker and on the Room Tile Area. Keep the White Cell Stalk card and miniature on hand on the side.
3. Shuffle two Initiative Cards for the Mammoth Cyst in the Initiative Deck.
During the Mammoth Cyst's turn, if there is no White Cell Stalk in play, it will summon one instead of using a Skill. Place the White Cell Stalk card and miniature in both the Stance Tracker and on the Room Tile Area respectively. Immediately shuffle two Initiative Cards for the White Cell Stalk in the Initiative Deck.
When the White Cell Stalk uses its Teleportation Skill on a Hero, roll a ten-sided die and place the affected Hero on the corresponding Area.
---
Shuffling Horror: When you face the Shuffling Horror, follow these steps:
1. Find the Shuffling Horror Room Card and its corresponding Room Tile and put it in play.
2. Find the Shuffling Horror, Cultist Priest and Malignant Growth Battle Cards and miniatures. Place the Shuffling Horror card and miniature in the Aggressive Stance on the Stance Tracker and on the Room Tile Area respectively. Keep the Cultist Priest and Malignant Growth cards and miniatures on hand on the side.
3. Shuffle two Initiative Cards for the Shuffling Horror into the Initiative Deck.
During the Shuffling Horror's turn, if the Monster Stance Tracker is not full, it will use its Echoing Disassembly Skill. Its special effect will summon a Cultist Priest and/or a Malignant Growth if one of those is not already in play. Place their cards and miniatures in that order on the Stance Tracker and on the Room Tile Area respectively. Immediately shuffle one Initiative Card for each into the Initiative Deck.
When the Shuffling Horror uses its Undulations Skill, take all Hero Stance Tokens from the Hero Stance Tracker, shuffle them and put them back randomly from Aggressive to Support.
Once again, the stars are right, and the Manor sits at the very epicenter of cosmic unrest. Cultists rally to their twisted idols, and great gongs sound in anticipation of the coming sacrifices. Far below, life-laden shadows pulse to the unrelenting rhythm of a beating heart...
Final Encounter
This Boss has four different forms and its battle follows three phases. Depending on the Quest you completed prior to this encounter, one of its forms will not be used. When you defeat one of the forms, the next phase begins. Heroes are unable to recover Life or Stress. A new Initiative Deck is created and the battle phase starts anew.
The forms and their respective order that you fight them is as follows:
• I- Ancestor 1st Form
• II- Ancestor 2nd Form
• III- Gestating Heart
• IV- Heart of Darkness
Check your previous Quest Card to see which of these forms won’t be used. All Battles take place on the same Room Tile, so:
1. Find the Ancestor Room card and its corresponding Tile and put it in play.
Ancestor 1st Form: When you face the Ancestor 1st form, follow these steps:
2. Find the Ancestor’s 1st form, Perfect Reflections and Imperfect Reflections Battle Cards and miniatures.
3. Place the Ancestor (1st form) Battle Card and miniature on the Aggressive Stance on the Stance Tracker and on the Tile Area respectively.
4. Place two Perfect Reflections Cards and one Imperfect Reflections Card randomly in the unoccupied Stances on the Monster Stance Tracker then place their miniatures respectively on the Room Tile.
5. Shuffle four Initiative Cards into the Initiative Deck.
During the Ancestor 1st form's turn, if all Monster Stance slots are occupied, he will use the Time Heals All Skill. Otherwise, he will take actions until all the Stance slots are filled. If the Reflections have all taken turns, all remaining Initiative Cards will activate the Ancestor.
Reflections have Guard at all times, meaning they must be targeted before the Ancestor.
When an Imperfect Reflection is eliminated, the Ancestor suffers 10 Wounds. Do not remove Initiative Cards when Reflections are eliminated. There should always be four Monster Initiative Cards in the deck.
When the Ancestor is defeated, remove all Reflections and Monster Initiative Cards in play and get ready for the next phase.
Ancestor 2nd Form: When you face the Ancestor 2nd form, follow these steps:
2. Find the Ancestor’s 2nd form Battle Card and miniature and place them in the Aggressive Stance on the Monster Stance Tracker and on the Room Tile Area respectively. Find the Absolute Nothingness miniatures and place them in the Areas with the Monster's Defense, Ranged and Support Stance, one in each.
---
41
3Shuffle two Initiative Cards for the Ancestor
into the Initiative Deck.
The Absolute Nothingness’ are untargetable but,
since they are miniatures, they still occupy one
space in the Area they are in.
After the Ancestor finishes an action, roll a ten-
sided die and teleport him to the corresponding
Area on the Tile:
(1-3) Monster Defense Area, (4-6) Monster
Ranged Area,
(7-9) Monster Support Area, (10) No
Teleportation.
When the Ancestor’s 2nd
form is defeated, remove
all Monster Initiative Cards from the deck and all
Absolute Nothingness miniatures from the Room
Tile and ready for the next phase.
Gestating Heart: When you face the
Gestating Heart, follow these steps:
2Find the Gestating Heart Battle
Card and miniature and place them
in the Aggressive Stance on the
Monster Stance Tracker and the Room Tile Area
respectively.
3Gather the Darkest Dungeon Monster deck and
the miniatures and keep them on hand to the side.
4Shuffle one Initiative Card for the Gestating
Heart into the Initiative Deck.
When the Gestating Heart uses its Sispersion Skill,
summon a random Darkest Dungeon Monster in the
next available Stance and immediately shuffle one
Initiative Card for it into the active Initiative Deck.
When a Hero attacks and Wounds the Gestating
Heart, they suffer 22 3t and they are Healed
for 2.
When the Gestating Heart is defeated, remove all
other Monsters and Monster Initiative Cards from
play and get ready for the next phase.
Heart of Darkness: This is the last
form of the final encounter and, as
you have seen, it cannot be skipped.
When you face the Heart of Darkness,
follow these steps:
2Find the Heart of Darkness Battle Card and
miniature and place them in the Aggressive Stance
on the Stance Tracker and the Room Tile Area
respectively.
3Shuffle two Initiative Cards for the Heart of
Darkness into the Initiative Deck.
At the start of Battle and after the Heart of Darkness
finishes an action, it will use its Impending Doom
ability. Roll a ten-sided die and place it near its card.
This is the roll you’ll use to pick which Skill the Heart
of Darkness will use during its next turn. This way
the Heroes are forewarned of its actions. Use this
knowledge wisely.
When the Heart of Darkness is defeated, the Heroes
have won the game. Read the outcome below aloud
and bask in your success.
Victory... a hollow and ridiculous notion.
We are born of this thing, made from it. And we will be
returned to it, in time.
The great family of man -- a profusion of errant flesh.
Multiplying. Swarming. Living. Dying.
Until the stars align in their inexorable formation,
and what sleeps is roused once more, to hatch from
this fragile shell of earth and rock, and bring our
inescapable end...
You are trapped here forever by that sickening prose,
echoing through the infinite blackness of space and time:
Ruin has come to our family.
---
42
Group 1 – Adventuring Party (low complexity)
Hero | Stance | Skill 1 | Skill 2 | Skill 3
------- | -------- | -------- | -------- | --------
Crusader | | Smite | Zealous Accusation | Holy Lance
Hellion | | Wicked Hack | Iron Swan | If It Bleeds
Highwayman | | Pistol Shot | Tracking Shot | Point Blank Shot
Vestal | | Divine Grace | Dazzling Light | Mace Bash
Group 2 – Battlefield Experts (medium complexity)
Hero | Stance | Skill 1 | Skill 2 | Skill 3
------- | -------- | -------- | -------- | --------
Crusader | | Stunning Blow | Battle Heal | Smite
Bounty Hunter | | Come Hither | Uppercut | Collect Bounty
Occultist | | Wyrd Reconstruction | Sacrificial Stab | Daemon’s Pull
Vestal | | Dazzling Light | Judgement | Divine Grace
Group 3 – Damage Over Time (medium complexity)
Hero | Stance | Skill 1 | Skill 2 | Skill 3
------- | -------- | -------- | -------- | --------
Hellion | | If It Bleeds | Bleed Out | Adrenaline Rush
Grave Robber | | Pick to the Face | Throw Dagger | Poison Dart
Plague Doctor | | Incision | Noxious Blast | Plague Grenade
Occultist | | Wyrd Reconstruction | Abyssal Artillery | Weakening Curse
Group 4 – The Dancers (high complexity)
Hero | Stance | Skill 1 | Skill 2 | Skill 3
------- | -------- | -------- | -------- | --------
Crusader | | Holy Lance | Battle Heal | Zealous Accusation
Grave Robber | | Lunge | Shadow Fade | Flashing Daggers
Jester | | Solo | Finale | Dirk Stab
Arbalest | | Sniper’s Mark | Blindfire | Sniper Shot
Suggested Party Compositions
If you don’t want to look through all the Heroes and their Skills to form your first party, you can use one of the following pre-made party compositions. There are four, each with a focus on different strategies and each with a different Level of complexity. Note that the Abomination is not in any of these groups as, we believe, it’s a bit too complex a Hero for new players.
---
43
CREDITS
A BOARD GAME BASED ON THE
VIDEO GAME BY RED HOOK STUDIOS
Design Director: Tyler Sigman
Creative Director: Chris Bourassa
Game Designers: Nick Niotis, Argyris Poungouras
Project Lead: Nick Niotis
Game Developers: Nick Niotis, Argyris Poungouras
Playtesters: Anastasios Grigoriadis, Konstantinos
Lekkas and the Dracon Rules Design Studio
playtesters, Marc Lagroy, Jean-Baptiste Gaillet,
Vassilis Milingos, Thomas Mastakouris, Sokratis
Goundanas, Dimitris Tavoularis, Isidoros
Davazoglou, Thanos Konstantinidis, Konstantinos
Rentas, Stavros Tsiakalos, Christos Tsoukalas,
Konstantinos Pattakos
Narrative Creator: Babis Giannios and Red Hook
Studios
Art Directors: Stéphane Gantiez, Christophe Madura
Tile Artist: Leni Sheider
Miniature Sculptors: Edgar Skomorowski, Edgar
Ramos, Irek Zielinski, Gregory Clavilier, Arnaud
Boudoiron, Olivier Thill
Graphic Designers & DTP: Stéphane Gantiez,
Sandra Fournel, Panagiota Tsibalidi
Brand Manager: Helena Tzioti
Project Managers: Konstantinos Lekkas, Helena
Tzioti, Stephanie Berri
TRANSLATION
Localization & Linguistic Manager: Anne Vétillard
Proofreaders: Ella Colles, Alfred Moragas Segura,
Mari Schmidt, Anne Vétillard, Heidi Lajos, Ben
Clapperton, Charles Elliott
SALES & COMMUNICATION
Art Director, Communication: Christophe Madura
Content Creators: Mathieu Rivero, Helena Tzioti
Graphic Designers, Communication: Christophe
Madura, Panagiota Tsibalidi, Louis Guillon, Arnaud
Marchand, Laurent Lucchini
Community Director: Sam Healey
Communications Manager: David “R’Lyeh” Hannoun
Trailer Producer: Fabien Delarue
Sales Expert: Anna Mentzelopoulou
Sales & Marketing Director: Helena Tzioti
CUSTOMER SERVICE
Head of CS: Marco Cervone
CS Agent: Chris Marras
PRODUCTION
Production Manager: Erwann Le Torrivellec
Publishers: Benoît Vogt, Léonidas Vesperini
Special thanks to our ambassadors for demoing the
game during conventions!
---
Por que perguntar ao BoardGamesBot
Em vez de folhear o manual inteiro- Respostas precisas Baseadas exatamente neste manual, com a página de origem.
- Economize tempo Ache a regra em segundos, sem folhear 43 páginas.
- A qualquer hora Tire dúvidas no meio da partida, direto do celular.
- 100% grátis Crie sua conta grátis e comece a usar agora.
Como funciona
Três passos até a resposta- 1 Faça sua pergunta Digite sua dúvida sobre as regras deste jogo.
- 2 Crie sua conta grátis Leva 20 segundos — é só para guardar seu histórico.
- 3 Receba a resposta A IA encontra a regra exata e cita a página do manual.
Expansões
Conteúdo adicional publicado

Outros Jogos que Você Vai Gostar
Baseado em mecânicas e tema





Manual publicado pela editora · uso para consulta de regras. Mais sobre o jogo em BoardGameGeek e Ludopedia .