
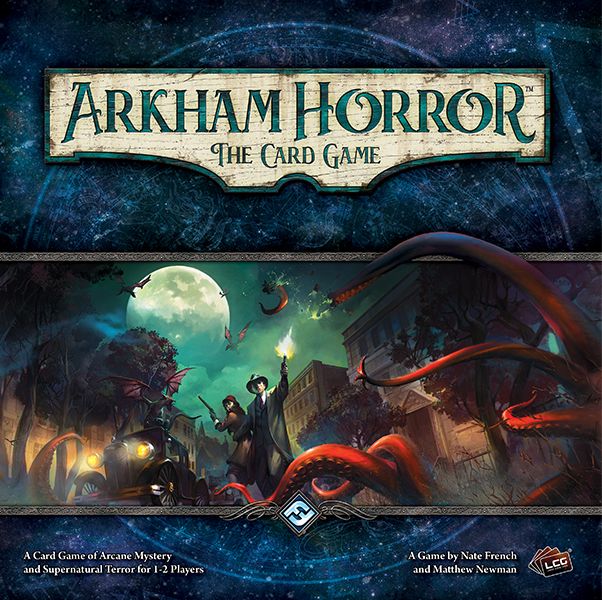
How to Play Arkham Horror: The Card Game
Fantasy Flight Games, Arclight Games, asmodee · Board game · 2016What do you want to do now
Ask anything about Arkham Horror: The Card Game: rules, setup, components, complexity, price, or whether it fits your group.
Video: How to Play
Start here, then follow the written guide
Step by step
Unraveling the Horrors: A Definitive Guide to Arkham Horror: The Card Game
Welcome, fellow investigators! Grab your lanterns, steady your nerves, and prepare to delve into the chilling world of Arkham Horror: The Card Game. As your friendly neighborhood SEO expert and editor at BoardGameBot, I’m here to guide you through the shadowy streets and sanity-shattering encounters of this incredible cooperative LCG. Forget those dusty rulebooks; we’re going to learn how to play like seasoned veterans, with a casual, fun approach that still hits all the technical beats. Let's get started!
Objective of the Game
In Arkham Horror: The Card Game, you and your fellow players aren't just playing a game; you're stepping into the shoes of investigators, each with their own unique strengths and weaknesses, battling against unspeakable cosmic horrors. Your primary goal? To survive the scenario and uncover the truth!
The game unfolds through a series of scenarios, each with its own narrative and challenges. You'll be working together to gather vital clues and use them to advance through the act deck. This deck represents your progress through the story, and reaching its conclusion (hopefully a favorable one!) is your path to victory. But beware, the forces of evil have their own agenda, represented by the agenda deck. If the agenda deck advances to its conclusion, a usually darker resolution awaits, and that's generally not good news for humanity!
Ultimately, you win a scenario by triggering a resolution indicated on an encounter card, which then directs you to the Campaign Guide to see the outcome of your harrowing journey. So, gather your wits, protect your sanity, and prepare to face the unknown!
Preparation (Setup)
Alright, investigators, let's get our table ready for some cosmic dread! Here’s a step-by-step guide to setting up your game:
- Choose Your Investigator: Each player selects a different investigator card and places it in their play area.
- Designate a Lead Investigator: One player is chosen as the lead investigator and takes the Campaign Guide.
- Assemble Decks and Tokens:
- Shuffle each player's investigator deck.
- Place separate piles of damage, horror, clue/doom, and resource tokens within reach.
- Prepare the Chaos Bag:
- Choose a difficulty level.
- Place the indicated chaos tokens (from the campaign setup instructions) into the chaos bag (an opaque container). Return any unused chaos tokens to the box.
- Starting Resources and Cards:
- Each player takes 5 resources and places them near their investigator card as their resource pool.
- Each player draws 5 cards from their deck. If you draw a weakness card, draw an additional card, then shuffle the weakness back into your deck.
- Mulligan Time: Each player may take a single mulligan. Set aside up to 5 drawn cards, draw an equivalent number of new cards, and then shuffle the set-aside cards back into your deck.
- Scenario Setup:
- Read the scenario introduction in the Campaign Guide.
- Perform the scenario setup instructions: gather listed encounter sets, place locations (unrevealed side faceup), place investigator mini cards at starting locations, set aside any listed cards, and shuffle the remaining encounter cards to form the encounter deck.
- Assemble Act and Agenda Decks:
- Assemble the agenda deck in sequential order, art side faceup, with 1a on top. Read the story text on 1a.
- Place the scenario reference card next to the agenda deck.
- Assemble the act deck in sequential order, art side faceup, with 1a on top. Read the story text on act 1a.
- No Action Windows During Setup: Remember, you can only trigger player card abilities or play cards from hand during setup if the card or ability's specific triggering condition is met.
The Game Round
A round in Arkham Horror is a tense dance between your investigators' efforts and the encroaching horrors. Each round is divided into 4 phases, and during the very first round, you'll skip the Mythos phase.
The Mythos Phase
This is where things get spooky! Resolve these steps in order:
- Place Doom: Place 1 doom token on the current agenda.
- Check Doom Threshold: Compare the total number of doom tokens in play (on the current agenda and other cards) to the doom threshold of the current agenda. If the number is equal to or greater than the threshold (and no Objective requirements override it), advance the agenda deck.
- Draw Encounter Cards: In player order (starting with the lead investigator and going clockwise), each investigator draws the top card of the encounter deck.
- Treachery: Resolve the card's ability, then place it on the encounter discard pile.
- Enemy: The enemy spawns engaged with the investigator who drew the card, unless it has a Spawn instruction, in which case it spawns at the indicated location.
The Investigation Phase
Your chance to fight back, explore, and gather clues! Each investigator takes a separate turn. As a group, you choose who goes first, and then continue choosing who goes next until everyone has had a turn.
On your turn, you have 3 actions. You can perform any of the following tasks as many times as you like, in any order, as long as you have actions available. Just a heads-up: if you're engaged with ready enemies and take an action other than evade, fight, or activate a parley or resign ability, those enemies will get an attack of opportunity against you!
Here are your action options:
- Draw: Draw 1 card from the top of your deck. If your deck is empty, shuffle your discard pile back into your deck, then take 1 horror after completing the draw.
- Resource: Gain 1 resource from the token pool.
- Activate: Resolve an action trigger ability (with the action icon) on a card you control (including your investigator card), on a scenario card at your location, or on the current act or agenda card. You must spend 1 action for each specified in the ability's cost.
- Engage: Engage 1 enemy at your location. Place that enemy in your threat area. You can even engage an enemy already engaged with another investigator at your location.
- Investigate: Attempt to find clues at your location. Make an intellect test against the shroud value of that location. If successful, take 1 clue from the location and place it on your investigator card. If you fail, no clues are discovered.
- Evade: Attempt to evade 1 enemy you are engaged with. Make an agility test against that enemy's evade value. If successful, the enemy is exhausted and disengaged; move it from your threat area to your current location. If you fail, the enemy remains engaged.
- Move: Move your mini card to any other location connected to your current location (indicated by matching icons). When you enter a location for the first time, turn it to its revealed side and place clues equal to its clue value on it.
- Play: Select an asset or event card from your hand, pay its resource cost, and play it.
- Event card: Resolve its effects, then place it in its owner's discard pile.
- Asset card: Place it in your play area. It stays in play until an ability or game effect removes it. Remember, skill cards are committed to skill tests, not played.
- Cards with the fast keyword do not cost an action to play!
- Slots: Assets may require slots (1 ally, 1 body, 1 accessory, 2 hand, 2 arcane). If a slot is full, you must discard an existing asset to make room.
- Fight: Attack any 1 enemy at your location. Make a combat test against the enemy's fight value.
- If successful, you deal 1 damage to the enemy (modified by weapons/spells). Place damage tokens on the enemy. If an enemy has damage equal to or exceeding its health, it's defeated and placed in the encounter discard pile. If it provides victory points, place it in a shared victory pile instead.
- If you fail, no damage is dealt. However, if you fail a combat test against an enemy engaged with another investigator, that investigator takes the damage instead!
If you end your turn early, any unused actions are lost.
The Enemy Phase
The monsters get their turn! Resolve these steps in order. If there are no enemies in play, skip to the Upkeep phase.
- Hunter Enemies Move: Each enemy with the hunter keyword moves once, to a connecting location, towards the nearest investigator. Exhausted hunter enemies and those already at a location with an investigator do not move. If a hunter enemy moves to a location with an investigator, it immediately engages one of them.
- Enemy Attacks: Each ready, engaged enemy makes an attack against the investigator it's engaged with. Resolve these attacks in player order. When an enemy attacks, it deals both its damage and horror simultaneously to the engaged investigator. After attacking, exhaust the enemy. (Enemies do not exhaust from attacks of opportunity).
The Upkeep Phase
A moment to breathe, but not too long! Resolve these steps in order:
- Ready Investigator Mini Cards: Each investigator turns their mini card faceup.
- Ready All Exhausted Cards: All exhausted cards become ready (upright). Any unengaged enemy that readies at the same location as an investigator immediately engages them.
- Draw and Gain Resource: Each investigator draws 1 card and gains 1 resource.
- Discard Excess Cards: Each investigator with more than 8 cards in hand chooses and discards cards until only 8 remain.
After these steps, the round is over, and you proceed to the Mythos phase of the next round (unless it's the very first round, in which case you go to the Investigation phase).
Skills and Skill Tests
When the going gets tough, your investigator's willpower, intellect, combat, and agility are put to the test. To perform a skill test, you reveal a random chaos token from the chaos bag. This token modifies your skill value. If your modified skill value equals or exceeds the test's difficulty, you succeed!
Before drawing a chaos token, you can boost your skill value:
- Commit Cards: Commit cards from your hand that have icons matching the skill type of the test. A wild icon matches all skill types. Each matching icon increases your skill value by 1 for that test. You can commit any number of your own cards, and other investigators at your location can commit 1 card to help. You don't pay resource costs for committed cards.
- Activate Free Trigger Abilities: Use free trigger abilities (lightning bolt icon) to modify your skill.
After a skill test, discard all committed investigator cards and return the revealed chaos token to the chaos bag.
Chaos Token Effects: Refer to the scenario reference card for effects. An Elder Sign triggers an effect on your investigator card. An Auto-fail token means the test automatically fails. Numerical modifiers on tokens are applied to your skill value.
End of Game and Scoring
The game ends when a resolution is triggered. This usually happens when an encounter card instructs you to refer to a specific resolution number (→R#) in the Campaign Guide. This text will tell you what happens next in your campaign.
What if all investigators are eliminated? If all investigators are defeated during a scenario, you'll use the "if no resolution was reached" conclusion in the Campaign Guide. This is generally not the best outcome!
Campaign Play: After each scenario, you'll engage in some crucial post-game activities:
- Count Experience: Each investigator earns experience equal to the total victory value of all cards in the victory display (victory point enemies, revealed victory point locations with no clues, and resolved victory point treachery cards), plus any modifiers from the Campaign Guide. Add this to any unspent experience from previous scenarios.
- Purchase New Cards: Spend your hard-earned experience to purchase and add new cards to your deck. Each card costs experience equal to its level (minimum 1). When upgrading to a higher-level version of a card you already have, you only pay the difference in experience (minimum 1). Remember to maintain your deck size by removing a non-permanent card for each new card added.
- Record Unspent Experience: Any unspent experience is recorded in the campaign log for future use.
Trauma: Being defeated in a scenario has consequences! If you're defeated by damage, you suffer physical trauma; by horror, mental trauma. Trauma carries over to future scenarios, making them harder. If trauma equals your printed health or sanity, your investigator is killed or driven insane, removed from the campaign, and you'll need to choose a new investigator.
Tips for Winning
Arkham Horror is a challenging game, but with a few strategic insights, you can increase your chances of survival and success:
- Cooperate and Communicate (Carefully!): The game explicitly encourages investigators to work together and plan out their actions. Talk through your turns, strategize about who should tackle which enemy, and where to focus your clue-gathering efforts. However, remember the "hidden information" rule: don't reveal specific cards in your hand or deck to other players. Keep the mystery alive, even among allies!
- Balance Act and Agenda Progress: You're in a race against time! While advancing the act deck is your primary objective, you must always keep an eye on the agenda deck. Don't let too much doom accumulate, or the scenario might end prematurely (and probably badly!). Sometimes, you'll need to prioritize dealing with doom-generating threats over gathering clues.
- Master Your Actions: With only 3 actions per turn, efficiency is key. Think carefully about the most impactful actions you can take. Are you better off investigating for clues, fighting a dangerous enemy, or evading to buy yourself some time? Don't forget about fast cards – they don't cost an action and can be incredibly powerful for maximizing your turn!
Good luck, investigators. May your sanity hold, and your clues be plentiful!
More videos
More rules explanations from the community
In English
-
 6 Quick Tips For New Players | ARKHAM HORROR: THE CARD GAME
-
 Original Core Vs Revised Core Set – ALL key differences explained!
-
 15 games for Arkham Horror LCG Fans
-
 The Drowned City NEW Investigator Preview
-
 Arkham Horror: The Card Game - 12 Rules That You Might Get Wrong!
-
 Arkham Horror: The Card Game - New Buyers Guide In 5 MINUTES - Part 1: New Content
-
 Campaigns and Cycles for Arkham Horror: the Card Game - A Complete Beginners Guide
-
 What is an Investigator Starter Deck for Arkham Horror the Card Game EXPLAINED
-
 Arkham Horror: The Card Game - Complete Guide Part 1 - Introduction, LCGs and Whats in the box
-
 Edge of the Earth Investigator Preview for Arkham Horror: The Card Game
-
 Rating the Mystics in Arkham Horror LCG - Part 1
Rules manual
Official PDF file
Frequently Asked Questions
Quick answers about the rules
