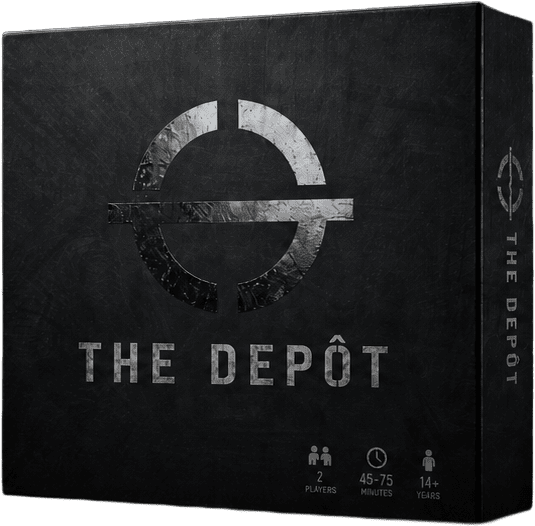
What is your question about The Depôt?
Ask before downloading the manual: the assistant was trained on this file and answers instantly, citing the exact page.
Ask questions about the game
Ask anything about The Depôt: rules, setup, components, complexity, price, or whether it fits your group.
Write your question first. You will create your free account to see the answer — it takes 20 seconds.
Full rulebook
Browse the manual or download the original PDFFull manual text available to read Open text
GIVEAWAY: Win 1 of the first 3 signed copies! Click here
FOLLOW THE SIGNAL: Launching Sept 29 on Gamefound
---
THREE PRINCIPLES TO KEEP IN MIND:
The rules closest to the situation take precedence:
If an effect on a Scenario, Subject, or AI card contradicts this rulebook, the card’s effect applies first, then the Scenario’s, and finally this rulebook’s.
When in doubt, the Depot will not help you:
If a rule remains ambiguous or if there are multiple possible interpretations, choose the harshest outcome for the Subjects at that moment (most dangerous target, most penalizing effect, etc.).
If you still do not agree, let the Depot decide:
In case of a tie or persistent disagreement (initiative order, target selection, movement direction...), simply roll a die to determine which protagonist gets the last word.
The Depot might not make mistakes, but it always has the last word.
The Depot is played in 45 to 75 minutes per mission, with an unapologetic difficulty level: defeat is part of the story.
What matters is what the Bay remembers of you... not how many times it almost classified you as «lost.»
TABLE OF RULES:
> 1. About the Game – Dossiers to Process.............................................. 01
> 2. Game Components – Resource Inventory................................. 02-03
> 3. The Depot Board – Zones and Infrastructure........................... 04-06
> 4. Choosing Your Subject – Dossier Selection............................... 07-08
> 5. Subject Board – Reading a Profile............................................... 08-10
> 6. Mission Setup – Initializing The Depot......................................... 10-12
> 7. Mission Phase – A Round in The Depot......................................... 12-13
> 8. Subject Turn – 3 Actions to Survive................................................... 13
> 9. General Actions – What Subjects Can Do..................................... 13-15
> 10. Injured Subject – Loss of Capability........................................... 15-16
> 11. Guardian’s Turn – AI Deck Resolution........................................... 16-19
> 12. Target Selection – Subject Targeted by the Guardian .................. 19
> 13. Winning or Losing – Validation or Archival............................... 19-20
> 14. Rest Phase – Between Two Cycles.................................................. 20
> 15. Specific Subject Tokens – Exclusive Action.................................... 21
1. ABOUT THE GAME - DOSSIERS TO PROCESS:
THE DEPOT IS A COOPERATIVE NARRATIVE GAME FOR 2 PLAYERS:
You portray two Subjects scanned, classified, and then confined in a semi-conscious transit zone: the Bay. Your dossier indicates that you are no longer useful. The Guardian in charge of your block starts up to process you like everything else that is obsolete here: by archiving you.
A game of The Depot is played in missions. During a mission, you must hold out against the Guardian, destroy its structural Cores, exploit the Bay, and accomplish the Scenario objectives.
Between missions, the Bay remembers your choices: Subjects sacrificed or saved, airlocks used as weapons or as lifelines, protocols triggered... These traces modify future games and build your campaign.
WHAT MAKES THE DEPOT UNIQUE:
The Guardian has no traditional health bar: it is controlled by an AI Deck. Each point of damage removes a future card, changing its actions.
Each Subject possesses a dual health pool: Physical and Mental, with different consequences at 0 HP and 0 SAN.
The campaign operates with «long-term memory»: your decisions unlock Protocols, modify missions, and add or remove cards.
---
1 Rulebook
Contains the complete game rules and necessary references.
1 Scenario Booklet
Contains the scenarios, special rules, and campaign elements.
Subject Cards (164 cards)
Guardian AI Cards (240 cards)
Scenario Cards (26 cards)
2. GAME COMPONENTS
This game contains everything you need to lead your missions and face the Depot and its Guardians.
CARDS:
The game contains three types of cards, each with its own back for quick identification.
BOARDS:
The boards represent the Depot, the game environment, the actions, as well as the Guardian’s health and each Subject’s status.
The Depot Main Board:
The heart of the game. It represents the sector where all movement, combat, and mission effects take place.
8 Subject Boards:
Each Subject has their own board to track their characteristics, states, and the possible actions during their turn.
---
16 Standees Miniatures
The Subjects and Guardians to be placed on the board according to the missions.
2 Custom Dice
Used for tests, attacks, and game effects.
4 Plastic Cubes
Used as markers for physical and mental status.
Organization:
Keep the cards sorted by type and keep the Subject boards within easy reach. Good organization is the key to survival in the Depôt.
Components may vary slightly depending on the edition. All cards and tokens are designed for an optimal experience.
4 Metal Tokens
Tokens representing the Guardian’s Cores.
3 Punchboards
Contains all the markers, tokens, and references used during your games.
---
3. THE DEPÔT BOARD - ZONES AND INFRASTRUCTURE:
The Depôt board represents the sector in which you are locked. This is where all movements, attacks, tests, and mission effects take place.
Starting Zone: Starting spaces for the Subjects. Determined by the Scenario.
Obstacle: Elements that block both movement and line-of-sight.
Anomaly: Used as a reminder of upcoming Bonuses / Penalties (Malus).
Danger Zone: Unstable or compromised spaces. Can inflict damage or negative effects.
SYSTEM INFO:
//Obstacles block both line-of-sight (LOS) and movement//
THE 10X10 GRID:
> The main board area is a tight 10x10 grid of spaces.
> Subject miniatures, the Guardian, and Scenario tokens (objectives, zones, campaign trackers) are always placed on these spaces.
> All movements are strictly orthogonal (up, down, left, right), unless otherwise indicated on a card or by the active scenario.
> Scenario cards and the Scenario Book indicate which spaces are special: Generators, Consoles, SAS, danger zones, obstacles, etc.
At the start of each scenario, you will find an illustration of the board setup. This illustration shows the starting locations of the Subjects, the Guardian, obstacles, and other tokens.
---
3.1 THE LEFT SIDE OF THE BOARD:
The left side of the board groups together the key elements used to track the Guardian’s actions and the active scenario. It consists of the game zone dedicated to the Guardian, the mission progression tracker, and the 10x10 grid.
GUARDIAN’S AI ZONE (TOP LEFT)
AI Draw Pile (1):
> Place the shuffled Guardian AI deck here. At the start of each round, reveal the top card during the Guardian’s turn and immediately resolve the directives written on the card, in the order indicated.
AI Discard Pile (2):
> The revealed AI card is placed face-up in the discard pile after being resolved.
Scenario Slot:
> Place the active mission’s Scenario deck here. Reveal the card(s) as indicated by the active scenario.
THE 10x10 GRID:
> The main board area is a tight 10x10 grid of spaces.
> Subject miniatures, the Guardian, and Scenario tokens (objectives, zones, campaign trackers) are always placed on these spaces.
> All movements are strictly orthogonal (up, down, left, right), unless otherwise indicated on a card or by the active scenario.
> Scenario cards and the Scenario Book indicate which spaces are special: Generators, Consoles, airlocks, danger zones, obstacles, etc.
> Always keep an eye on this zone: it is the Guardian’s brain.
---
Guardian Status Token
Slots
Defense, Anomaly tokens, etc.
3.2 THE RIGHT SIDE OF THE BOARD:
The right side of the board groups together the elements related to the Guardian’s resistance. It consists of the Guardian’s Cores and the main game grid.
GUARDIAN CORES (TOP RIGHT)
Place 1 to 4 Cores on the dedicated slots at the start of the mission, as indicated by the Scenario instructions. These Cores represent the Guardian’s stability and track your progression toward victory.
AI DECK CYCLE
AI Deck Depleted: Every time the AI Deck is completely depleted (all AI cards are in the discard pile),
Remove Core: Remove 1 Core from this zone,
Reshuffle: Reshuffle the discard pile to form a new AI deck,
Apply Phase Change: Apply the phase-change effects indicated by the Guardian or the active Scenario.
NEUTRALIZING THE GUARDIAN
Once all Cores have been removed and there are no AI cards left to draw, the Guardian is neutralized. If the victory conditions of the Scenario are met, you win the mission.
---
4. CHOOSING YOUR SUBJECT - DOSSIER SELECTION:
In The Depôt, you do not browse a list to choose «the best character». You choose a dossier of which you only see the cover at first.
4.1 CHOOSE AN IMAGE, NOT A PROFILE
> Shuffle the 8 Subject mats face-down.
> Arrange them so that only the illustrated back is visible.
> Each image features a number, symbols, and fragments of a cryptic history: a silhouette, a gesture, a graphic detail.
> In turn, each player simply chooses the image that attracts them the most, without looking at the «profile» side.
YOU CHOOSE A FEELING. THE BAY HANDLES THE REST.
4.2 EVEN / ODD BALANCE
To keep the mission balanced, your duo must be complementary. Each Subject has a number on their mat, identified as even or odd:
> GROUP A - ODD: 1, 3, 5, 7
> GROUP B - EVEN: 2, 4, 6, 8
All characters are designed to work in a duo with several others, but:
> an even + even duo, or
> an odd + odd duo
can make certain missions significantly harder (even unmanageable).
4.3 CHOOSING YOUR SUBJECTS WHILE MAINTAINING BALANCE
1 - Selection: Each player first selects two mat backs that they like:
> one even number,
> one odd number.
2 - Reveal: For each, flip over the two selected mats (one even, one odd) and keep the one you prefer.
3 - Resolution: If in the end:
> you both have the same Subject,
> or you find yourselves with two even or two odd Subjects, each player falls back to their second option (the one they did not choose first).
4 - Result: This way, both players end up with a different Subject, and the even + odd duo is guaranteed.
The even/odd balance is not just a simple rule: it is what guarantees your duo will be able to face The Depôt.
Trust your feelings: the image you choose often speaks louder than statistics.
“WARNING: THIS ONE HAS ALREADY GLITCHED THE SCANNER THREE TIMES.”
---
If you are already at your maximum hand size (for example, 5) and an effect causes you to draw, you must immediately discard a card of your choice to return to this limit.
4.4 RETRIEVE THE COMPONENTS FOR EACH SUBJECT
> Take the Subject Board.
> Take their corresponding miniature.
> Retrieve their deck of 15 Subject cards (this deck will evolve throughout the campaign).
> Take 1 red cube to place on their Physical Health (HP).
> Take 1 blue cube for their Mental Health (SAN).
> Take 1 Depot die, which will be used for all your tests.
4.5 SET STARTING VALUES
Place the red and blue cubes on the starting values indicated on the Subject board (base HP and SAN).
YOUR DOSSIER IS NOW OPEN IN THE DEPÔT. FROM THIS MOMENT ON, EVERYTHING YOU DO WITH THIS SUBJECT WILL BE RECORDED.
5. SUBJECT BOARD – READING A PROFILE
Each Subject has a personal board: this is your dashboard for the entire mission.
5.1 BASE STATISTICS
In the top left, the STATISTICS box displays 4 values:
> PHYSICAL HEALTH (HP):
> Your resistance to physical damage.
> MENTAL HEALTH (MH):
> Your resistance to psychological damage.
> MAX HAND SIZE:
> The maximum number of cards you can keep in your hand.
> MOVEMENT:
> The number of spaces moved with a single ‘Move’ action.
5.2 HP, WOUND, AND SAN TRACKS
The numbered tracks are used to track your status as you take damage and heal.
Physical Health (HP) and Wound Track
With each point of damage taken, move the red cube back that many spaces on the HP track.
---
Blue cube on 0: You are in a critical threshold. Max 2 actions per turn. Playing cards is impossible.
Heal to rise back above 0 and regain 3 actions per turn, as well as the ability to play cards (up to your maximum SAN).
The body fails, but the Depot is not done with you...
The noise... The noise is everywhere...
Once injured, you remain so PERMANENTLY until the end of the mission:
>You can restore your HP through healing, but never beyond your maximum value.
>Returning to full HP does not restore your passive.
Mental Health (SAN)
The blue cube tracks your Mental Health on its track.
When your SAN reaches 0, you do not die, but you enter a critical threshold:
>You only have 2 actions per turn.
>You can no longer play cards as long as you remain at 0 SAN.
When your HP reaches 0, you:
>Immediately lose your passive,
>Move your red cube to the Injury Bar with your starting HP value (for example, 7 HP again).
Always keep an eye on your tracks: they tell your story and guide every decision you make.
DAMAGE NEVER EXCEEDS THE TRACK:
If you take 2 damage when you only have 1 HP left, you lose that final HP, become injured, and then place your cube on the Injury Bar at its starting value; the «extra» point of damage is ignored. It does not carry over to the Injury Bar.
---
5.3 PASSIVE AND SURVIVAL
PASSIVE
Each Subject has two capability boxes. The first passive is dedicated to the Subject and disappears once they are injured. The second is triggered when your teammate is K.O. This passive remains active until the end of the mission, or until your teammate returns to the game if the scenario allows.
ACTION ICONS (QUICK REFERENCE)
The ACTIONS (3 PER TURN) bar at the bottom of the board serves as a reminder of everything a Subject can do.
These icons are a quick reference: details for each action are described in section ‘9. General Actions’.
6.1 READING THE SCENARIO PAGE
Mission Name
The scenario title and number (Mission 01, 02...).
Introduction Text
A short paragraph describing the situation. Read it aloud: it provides the narrative context for what is about to happen.
Setup Instructions
The «Setup» section lists the steps: which tokens to use, which cards to prepare, and which miniatures to place where.
Special Scenario Rules
A «Special Rules» box describes everything that modifies the general rules for this mission: new actions, unique terrain, obstacle effects, adjustments for the Guardian, etc.
6. MISSION SETUP - INITIALIZING THE DEPOT
If a scenario rule contradicts this rulebook, the scenario rule takes precedence.
---
Some missions contain secrets—try to complete side quests and interact with all terrain elements to obtain bonuses during your mission and/or during future games.
6.2 PLACING COMPONENTS IN THE DEPOT
Following the diagram and the instructions on the page:
- Place the Guardian miniature on its starting space.
- Place the Subject miniatures on their respective starting spaces.
- Place the other components on the spaces indicated.
- Position the Guardian’s Cores on the dedicated area of the board (1 to 4, depending on the mission’s requirements).
6.3 PREPARING THE GUARDIAN
Take the Guardian’s AI card deck used for this mission.
Apply the scenario instructions: number of cards to use, AI cards to remove, add, or replace.
- Shuffle the final deck and place it on the AI Draw Pile slot of the board, in the top left.
- AI Discard: Place resolved cards here.
- Verify that the Guardian miniature and its Cores are placed correctly as shown on the diagram.
- If the scenario uses additional Scenario cards, prepare them and place the main card on the Scenario slot (the third card slot in the top left).
The Guardian’s possible actions are described on its AI cards; if a specific detail is mentioned in the scenario booklet, it supplements or modifies what is written on the card.
Objectives and Defeat Conditions
A box clearly summarizes:
What you must do to win (e.g., destroy all Cores, reach the exit, protect the zone, etc.).
What triggers defeat (all Subjects are K.O., time runs out, zone compromised, etc.).
---
At the end of the final phase, if the mission is neither won nor lost, a new round begins by returning to the initial phase.
7. MISSION PHASE - A ROUND IN THE DEPOT
A mission is divided into rounds. Each round always follows the same structure in this order:
7.1 INITIAL PHASE
At the start of each round:
Apply all effects indicated ‘at the start of the round’ on Scenario cards or other game components.
Update any active counters or markers that trigger at the start of a round.
Some missions or Guardians may add, remove, or modify rules during this step (for example: increasing a threat, spawning an obstacle, moving a danger marker).
7.2 SUBJECTS PHASE
During this phase:
Each Subject plays a full turn, one after the other, in the order chosen by the players (redefined at the start of each round).
On their turn, a Subject spends their actions as described in the general rules (move, attack, interact, heal, play cards, etc.).
Effects indicating ‘during your turn’ or ‘as long as this card is in play’ apply normally during this phase.
Once all Subjects have played their turn, the Subjects phase ends.
6.4 BEFORE YOU BEGIN, MAKE SURE THAT...
Use this quick checklist:
- The mission is chosen and its name clearly identified.
- The introduction text has been read aloud.
- The victory objectives and defeat conditions are understood by both players.
- The board matches the rulebook diagram: Subjects, Guardian, Obstacles, Scenario specifications, Special zones, Objectives.
- The Guardian is ready: miniature in place, Cores positioned, AI deck built as indicated and shuffled on the AI Draw Pile slot.
- Your Subjects are ready: boards, HP/SAN cubes, decks of 15 cards (or more as the scenario progresses), miniatures in place.
- The Scenario cards specific to this mission are set up.
- All special rules on the page have been read (and reread if necessary).
ONCE THIS CHECKLIST IS COMPLETED, THE DEPOT IS INITIALIZED.
If, at the start of or during the game, the booklet instructs you to make a choice or read an event, simply follow the steps in order: the scenario is your script, the Bay handles the rest.
INITIAL PHASE
SUBJECTS PHASE
GUARDIAN PHASE
FINAL PHASE
---
7.3 GUARDIAN PHASE
During the Guardian Phase:
>Reveal the top AI card from the draw pile.
>Resolve all steps on the card in order: movements, target selection, attacks, terrain effects, special threats.
>Also apply any possible “start of the Guardian Phase” or “as long as this AI card is active” effects.
>Once the AI card is fully resolved, place it in the AI discard pile.
>If the AI deck is empty when drawing, apply the rules for Core loss / phase changes specific to the Guardian and the scenario.
>Occasionally, an AI card may be revealed before the Guardian Phase. In this case, it remains face-up on top of the deck without being discarded.
- Turn over the AI card.
- Resolve all card actions in order.
- Place the AI card in the discard pile.
7.4 FINAL PHASE
The final phase concludes the round:
This is when you resolve all effects indicated ‘at the end of the round’ (for example: ‘At the end of the round, lose 2 HP’, ‘At the end of the round, move this marker’, etc.).
Discard all temporary bonuses, penalties, statuses, or elements that only last “until the end of the round,” unless a specific rule extends them.
Update the mission status: verify whether a victory or defeat condition has been met.
Otherwise, a new round begins: return to the initial phase, where certain scenarios may still modify the rules or the situation before the Subjects play again.
Continue playing rounds until the mission is complete. The Depot never stops: every decision counts until the final turn.
8. SUBJECT TURN – 3 ACTIONS TO SURVIVE
On their turn, a Subject has 3 actions to spend in any order. Each action allows them to perform one specific thing: Move, Attack, Interact, Heal, Play a Card, or Draw.
A SUBJECT’S TURN ALWAYS FOLLOWS THIS SIMPLE STRUCTURE:
Choose an action from those available.
Fully resolve this action (die rolls, movement, damage, effects).
Apply all consequences, then proceed to the next action.
Once a Subject has used their 3 actions (or decides to end early due to an effect), their turn ends immediately.
All die rolls follow the general rules: standard success value, possible modifiers (cards, passives, terrain), and rerolls if an effect allows.
If the mission is won or lost, the game ends immediately, and you apply the corresponding section of the scenario booklet.
9. SUBJECT ACTIONS – WHAT CAN THEY DO?
Each action below generally costs 1 action of your turn, unless stated otherwise on a card or by a scenario rule.
9.1 MOVE
Moving allows you to change spaces on the board.
The Subject moves one space orthogonally (up, down, left, right) per movement point indicated for the action.
Spaces can impose restrictions:
>Dangerous zones (risk of damage or additional tests), occupied spaces (sometimes prohibited, sometimes limited, depending on the Guardian or scenario rules).
>Certain effects or cards may increase, reduce, or modify how you move (jumping a space, ignoring a danger, etc.).
---
9.2 ATTACK
Attacking allows you to inflict damage on the Guardian, various objects, enemies, or, depending on the scenario, terrain elements.
- The Subject declares a basic attack or an attack originating from a card.
- They check the range (melee or ranged) and line of sight if necessary.
- They roll the required test dice and compare the result to the success value.
On a success, they inflict the indicated damage (to the Guardian, a Core, or a mission target). Damage is applied immediately to the target of the attack. On a failure, the attack may have no effect, or trigger a penalty if a card specifies it.
- After inflicting 1 damage to the Guardian, remove the top card of its deck, turn the card face-up, and place it in its discard pile.
9.3 INTERACT
Interacting allows you to act upon key mission components. With an interact action, a Subject can, depending on the context:
> Act upon a component or accomplish a mission objective (placing or removing a marker, retrieving a key item, etc.).
> Interact with any other scenario elements described in the booklet (terminals, beacons, interactive zones, etc.).
REMINDER:
An “Interact” action cannot be used to attack, move, or heal. Each scenario specifies which interactions are possible, at what distance, and what tests are required.
EXAMPLES OF INTERACTIONS:
The Subject can interact with the Generator within 1 space.
GOOD TO KNOW:
Read the Scenario cards and card effects carefully: they can modify range, success value, damage, or even enable special interactions.
9.4 HEAL
Healing allows you to restore your Health Points (HP) and your Mental Health (SAN).
A heal action automatically restores 1 Health Point (HP) or 1 Mental Health (SAN). At the same time, roll a die; if you roll a 6, you gain +1 to your healing (6 = +1 HP or SAN, +2 HP or SAN in total).
It is not possible to split your healing to give yourself +1 HP and +1 SAN.
EXAMPLE: If the success is 4+: you succeed with a 4, 5, or 6. Otherwise: with a 3, 2, or 1, you fail.
The Subject is in range and can perform an attack.
EXEMPLE: Le Sujet dépense 1 action pour se déplacer.
REMINDER
Health Points (HP)
Mental Health (SAN)
---
CARDS WITH TOKENS
Certain cards, once played, require you to place them near your Subject board.
Place the requested number of tokens on the card. You will need to discard one or more tokens to activate the effects of this card.
After removing all tokens from a card, it returns to your discard pile.
Certain specific cards and abilities also allow you to heal.
General rules and cards may impose limits (maximum number of HP/SAN recovered per round, trigger conditions, target of the effect).
Some Subjects have healing synergies. Healing details are indicated on the cards or Subject boards: always refer to them before spending the action.
Healing effects can vary depending on the cards, special rules, or your Subject. Always check the specifics indicated on your cards or your Subject board.
9.5 PLAY A CARD
Playing a card allows you to use the Subject’s unique skills.
As a general rule, playing a card costs 1 action, unless the card’s text indicates it is free or played at another time (reaction, start of the round, etc.).
The card specifies its timing (“during your turn”, “at the start of the Guardian Phase”, etc.) and its effects (bonus, penalty, movement, damage, control, terrain manipulation...).
Once the card is resolved, it is generally discarded, unless it remains in play as long as a condition is met.
If a card contradicts a general rule, the card’s text takes precedence.
9.6 CARD TYPES AND COSTS
The cards in your Subject deck are divided into three distinct categories based on their resolution timing and action cost:
Action Cards (Cost: 1 Action):
These can only be played during your own turn. Playing such a card immediately consumes 1 of your 3 available actions for this turn.
Free Cards (Cost: Free):
These are played exclusively during your own turn. They trigger their effect instantly and do not consume any action from your pool (you keep your 3 actions intact).
Reaction Cards (Cost: Reaction):
These are played at any time (during your turn, an ally’s turn, or the Guardian’s turn) as soon as a specific event described on the card occurs (the trigger).
Playing a Reaction does not consume any action from your pool.
Limit: You can only play one Reaction card per trigger.
Always read cards carefully: their timing and effects can completely change the course of a game.
Certain effects allow you to reroll dice, add automatic successes, or modify damage.
9.7 DRAW
Drawing allows you to refresh your hand and your future actions.
Spend 1 action to draw one card from your Subject deck.
The hand has a maximum size: if the Subject exceeds this limit, they must immediately discard cards until they return to the allowed size.
After completely emptying your deck, shuffle your discard pile and form a new deck.
Managing your draw actions well is essential to avoid finding yourself without options at the wrong time.
ADVICE: Anticipate, manage your hand and your deck: survival also depends on your preparation.
IN SUMMARY: A Subject’s turn consists of 3 crucial decisions among these actions. It’s up to you to combine movement, attacks, interactions, healing, cards, and drawing to survive the Bay... and the Guardian.
10. INJURED SUBJECT - LOSS OF CAPABILITY
This section describes what happens to a Subject when their HP or SAN drops to 0, and how this impacts the current mission.
A clear distinction is made between the injured state and the K.O. state, as well as how to recover from them.
10.1 AT 0 HP: PHYSICAL INJURIES
When a Subject drops to 0 HP:
They immediately lose their character Passive, and any other permanent effect linked to their “healthy” state.
Remove the Physical Health cube from its health bar and place it on its Injury Bar, corresponding to its starting health points. For example, if they have 7 HP, the cube will be placed on the 7.
Some cards are single-use. After playing it, set the card aside until the end of the mission. It will return to your deck during the next mission.
---
Through healing, they cannot exceed their maximum HP limit and cannot return to the “healthy” state.
The Subject is considered K.O. if they take damage again and end up at 0 HP.
At 0 HP on their Physical Health bar: the Subject loses their unique passive ability and moves to the Injury Bar.
At 0 HP on their Injury Bar: the Subject is K.O.
10.2 AT 0 SAN: MENTAL EXHAUSTION
When a Subject drops to 0 SAN:
The Subject must immediately discard all cards in their hand to their discard pile.
They can no longer play or draw cards.
Their number of actions per turn is reduced by 1: they now have 2 actions instead of 3.
If a bonus allows them to gain additional actions, they must reduce that bonus by 1.
Example: if a character plays a card giving them 2 additional actions, they actually get: 3 base actions + 2 bonus actions - 1 mental penalty = 4 actions.
Other restrictions may apply depending on the scenario.
If any bonus would allow you to play or draw a card, ignore it: mental exhaustion overrides any form of bonus.
At 0 SAN: -1 action per turn and no cards in hand.
A Subject at 0 SAN is not K.O., but weakened. Once healed, they regain all their bonuses.
10.3 INJURED VS. K.O.
It is important to clearly distinguish between these two states:
INJURED:
> The Subject moves from their “Physical Health” bar to the Injury Bar.
> They can still act, be healed, protected, or moved by ally effects.
> They lose their unique passive ability and can no longer return to the “healthy” state.
K.O.
> The Subject is out of combat for the mission.
> They no longer play turns and can no longer be targeted.
> The second Subject gains the “Survival Passive,” giving them +1 action per turn.
Their state can trigger scenario effects (penalties, end of the mission, etc.).
Certain special cards or scenarios may allow you to return to the game; in this case, follow the instructions specified on the card or in the scenario. The second Subject immediately loses their “Survival Passive” bonus of +1 action per turn.
11 GUARDIAN’S TURN - AI DECK RESOLUTION
The Guardian never improvises: it acts by following its AI deck, which represents its cold logic of elimination.
Every Guardian turn, you reveal a card, read its instructions, and resolve them in order.
11.1 REVEALING AN AI CARD
At the start of the Guardian’s turn:
Draw the AI card located at the top of the Guardian’s draw pile.
Read the card aloud and execute its directives from top to bottom:
- Target (which Subject or Objective is the target)
- Guardian Movement
- Attack or Effect to resolve
- Optional events
EXAMPLE: SUBJECT AT 7 HP
Physical Health (HP)
Injury Bar (HP)
At 0 HP: move the cube to the Injury Bar, based on their starting health (7 HP in this example).
0 SAN = 2 Actions Max + No cards.
The Subject has 2 Actions per turn instead of 3. They can, however, obtain additional ones.
The Subject must discard all their cards and can no longer draw or play any.
IF SANITY REACHES 0
Mental Health (SAN)
Be aware that your actions, as well as your Physical and Mental health bars, can grant you various bonuses and penalties throughout your games.
Your choices and risk management today shape the future of your Subjects... and of the Depot.
---
11.2 RESOLVING CARD INSTRUCTIONS
Once the AI card is revealed:
Apply the instructions in the indicated order, from top to bottom.
• For each step, follow the specified targeting priorities (closest Subject, Subject with the lowest HP, closest intact Generator, etc.).
When the Guardian moves, verify:
>Its number of spaces, terrain restrictions, and any special mission rules (impassable zones, shortcuts, teleporters...).
>Unlike your attacks, the Guardian’s attacks hit automatically.
>Don’t forget to take into account any bonuses, penalties, and protections in play.
>Most of a Guardian’s cards have specific conditions depending on the character they are facing, and you will sometimes have choices to make when resolving an AI card.
>Once all steps of the AI card are resolved, place it in the AI discard pile.
The AI deck is the Guardian’s brain. Stay attentive to keywords, trigger conditions, and secondary effects that can change everything. Understanding its logic is the key to increasing your chances of survival.
The Guardian does not doubt. It executes.
11.3 PERMANENT CARDS
>Sometimes certain Guardian cards are permanent. In this case, place the card to the left of the AI Deck.
It remains in play and its effect is active until you perform a special action, which may be written on the card itself, or by triggering an event as indicated in the Scenario Booklet.
11.4 KNOCKDOWN AND REACTION (FALLING TO THE GROUND)
Certain attacks or effects can cause Subjects to lose their balance.
The fall: If an effect causes you to fall to the ground, immediately lay your miniature flat in its space.
While on the ground, you cannot perform any standard action (Move, Attack, Interact).
Stand up: On your turn, your very first action must be to “Stand up.” Spend 1 action, stand your miniature back up, and then perform your 2 remaining actions normally.
11.5 KNOCKBACK PHYSICS (REPULSION)
Rule: Being knocked back X spaces means moving your miniature in a straight line (orthogonally) directly away from the Guardian.
Obstacles: If your knockback path is blocked by a wall, an obstacle, or another character, your knockback movement ends immediately on the space preceding the obstacle.
The Subject is knocked back directly away from the Guardian.
---
SYSTEM ANOMALIES (ANOMALY TOKENS):
Anomaly tokens are used to physically represent the disruptions of the Depot on your game board.
Action Block (e.g., Move, Draw, Play): Place the Anomaly token directly on the icon of the corresponding action on your personal board. This action is locked and unusable for your next turn. Discard the token at the end of your turn.
Action Limitation: Place the Anomaly token on one of your 3 actions per turn slots. You will only have 2 actions (instead of 3) for your next turn. Discard the token at the end of your turn.
Guardian Bonus Reminder: Place the Anomaly token directly above the AI Draw Pile. When you draw the next AI card, apply the Guardian’s bonus (+1 Movement), then discard the token.
11.6 PHASE BONUSES AND NEUTRALIZED EFFECTS
Certain Guardians benefit from phase bonuses or recurring effects as long as a condition is met:
These bonuses can apply to each of the Guardian’s turns (for example: +1 damage, additional threat on certain zones, spawning of new tokens).
Sometimes certain characters or components can neutralize or reduce these bonuses: in this case, apply only what remains authorized by the neutralization effect.
Scenario cards can also add temporary modifications to the Guardian’s turn (changes to priority targets, new actions, movement restrictions).
11.7 EXHAUSTING THE AI DECK
When the AI deck is empty at the moment a new card must be drawn: A state change of the Guardian is triggered, associated with the destruction of a Core and a phase change (Phase 1 to Phase 2, etc.).
Apply the effects specified by the Guardian’s rules or by the mission:
> destruction of a Core,
> attack upgrades,
> modification of targeting priorities,
> spawning of new elements in the Bay,
> Reorganization of the AI deck (new draw pile, adding/removing cards).
Once these effects are resolved, form the new AI deck if necessary and resume normal play on the Guardian’s next turn.
11.8 THE GUARDIAN DOES NOT “THINK”... BUT IT ADAPTS
The Guardian never makes decisions “on the fly”: it does not think, the AI cards and scenario rules dictate each of its movements.
However, thanks to target priorities, phase changes, and mission effects, its behavior gives the impression of a coherent strategy, which evolves as the Depot malfunctions... or as you dismantle its Cores.
The Guardian does not doubt. It executes.
Understanding its logic is the key to increasing your chances of survival.
PHASE BONUS / NEUTRALIZED EFFECT
As long as the Guardian has at least 2 Cores: + 1 Damage
Effect canceled by the destruction of the Core
EXHAUSTING THE AI DECK
Destruction of a Core
Reorganization of the AI Deck
Modification of phase bonuses
BEHAVIOR EVOLUTION
AI Cards
Phase changes
New targeting priorities
Reorganization of the AI Deck
Spawning of new elements on the board
---
Tip: Print the “Campaign Sheet” located at the very end of the Scenario Booklet. This way, you can keep a written record of your progress close at hand.
11.9 HEALTH POINTS AND DEFENSE
The Generator has 2 Health points.
The Guardian / Subject has 2 Defense.
To make it easier to track the health of everything on the board, you will find “Health Point” tokens. Place them on the component in question to easily see how many health points it has left.
Example: If a Generator has 2 HP, place 2 “Health Point” tokens on the component, and remove 1 if you inflict 1 damage to it.
Do the same for Defense. Place a “Defense” token on the Subject, enemy, or terrain element that has Defense. Note that Defense is removed at the end of the round, during the “Final Phase”.
The Guardian has its own space on the board, to the right of the Scenario cards, for placing its tokens.
12. TARGET SELECTION - SUBJECT TARGETED BY THE GUARDIAN
Regarding the target selection on AI deck cards, it is clearly indicated on the first line of the card. If this description is not enough to select a priority Subject:
Example: “The Subject closest to the Guardian,” when both Subjects are at an equal distance from the Guardian.
The Subject with the lowest Health Points (HP) becomes the priority target. If both Subjects have the same number of Health Points, then you roll a die.
If the die result is odd, the “Odd” Subject (Subject 1, 3, 5, or 7) is targeted, and conversely, if you roll an even number (Subject 2, 4, 6, or 8), the “Even” Subject is targeted. As a reminder, each Subject has a number on the back of their board.
13. WINNING OR LOSING - VALIDATION OR ARCHIVAL
At the end of each mission, you check whether you have met a victory condition or if a defeat condition has occurred.
Depending on the outcome, read the corresponding section in the Scenario Booklet.
13.1 VICTORY CONDITIONS
Victory conditions are indicated on the mission page in the Scenario Booklet.
They may, for example, require destroying all of the Guardian’s Cores; accomplishing one or more objectives (protecting a zone, escorting a Subject, activating Generators, using the Console, etc.); surviving a certain number of rounds; or fulfilling a specific narrative condition unique to the mission.
As soon as one of these conditions is met, stop the game immediately: you have won this mission.
13.2 DEFEAT CONDITIONS
Similarly, defeat conditions are always specified in the scenario.
Among the most common are:
All Subjects K.O. or in a state making the continuation of the mission impossible; failure of a critical objective (objective destroyed, zone lost, key resource depleted); any other specific trigger (Guardian escape, collapse of the Bay, emergency protocol activated...).
As soon as a defeat condition is met, the mission stops immediately: you have lost this mission, even if you had potential actions or turns remaining.
13.3 READING THE VICTORY / DEFEAT SECTION
Once the outcome is determined:
> If you win, read the “Victory” section of the mission page.
> If you lose, read the associated “Defeat” section.
These sections are indicated by numbered sequences and describe narratively what happens after the mission (consequences for the Depot, the Guardian, the Subjects), as well as rewards and potential penalties.
---
13.4 RECORDING CAMPAIGN INFORMATION
Depending on your decisions, whenever the Scenario Booklet instructs you to do so, you must take the “Campaign Sheet” located at the very end of the Scenario Booklet and check your choices. Just like in a legacy game where each session leaves a permanent trace.
This information will influence subsequent missions, overall difficulty, the state of the Depot, and sometimes even access to certain scenarios or variants.
THINGS TO REMEMBER:
Always check the exact victory conditions on the mission page or the Scenario card before concluding the game.
Take the time to carefully read the section corresponding to the outcome of your mission before continuing the campaign.
Be meticulous when writing down your notes on the “Campaign Sheet”: they will have a direct impact on the rest of your campaign.
14. REST PHASE - BETWEEN TWO CYCLES
Once a mission is over (victory or defeat), you enter the Rest Phase. This is a downtime between two cycles of the Depot, during which you obtain rewards based on your past and future choices.
During this phase, you:
> Recover all your HP and SAN (whether they are injured or K.O.).
> Receive various rewards (explained in the Scenario Booklet).
> Check your choices from the completed mission on the “Campaign Sheet”.
> Make choices that will determine the upcoming mission.
The Rest Phase is also when the campaign progresses and evolves:
You will be able to learn more about your character as well as the history of the Depot. You will also have to make one or more choices that will modify the next mission. This step gives the campaign its evolving nature: the Depot will not be exactly the same from one mission to the next.
At the end of each mission, always finish the Rest Phase by consulting the Scenario Booklet:
> Follow the instructions of the section corresponding to your mission and its outcome (victory or defeat).
> Indicate step-by-step everything requested: boxes to check, texts to read, cards to add/remove, scenario paths to follow.
Once all the steps of the Rest Phase are resolved and noted, you can choose and prepare the next mission:
A new cycle in the Depot awaits you.
15. SPECIFIC SUBJECT TOKENS
Each Subject has a set of 5 exclusive tokens unique to them (listed below). These tokens represent their unique skills on the game board or on their active cards.
The Personal Reserve:
At the start of each mission, place your 5 tokens next to your Subject board.
These tokens constitute your personal reserve.
Placement and Activation:
A Subject token cannot be placed on the board, on a card in play, or on a Subject board unless the effect of a card or an active passive explicitly demands it. As long as a token is positioned, its effect continuously applies according to the rules of the card that generated it.
Return to Reserve:
As soon as the effect associated with a Subject token is resolved, canceled, or the card supporting it is discarded, the token is immediately removed and returned to your personal reserve. It thus becomes available for future effects.
Strict Component Limit:
> The personal reserve is strictly limited to 5 tokens. If your 5 tokens are already positioned on the board or on cards, you cannot place new ones until one of them is returned to your personal reserve.
List of Tokens:
DRIVER TOKENS (DRIVING)
REPAIRER TOKENS (REPAIR)
DRIFTER TOKENS (DRIFT)
UNCLASSIFIABLE TOKENS (MARGIN)
WHISPERER TOKENS (RESONANCE)
CHRONICLER TOKENS (TEMPO)
LIGHTNING ROD TOKENS (IMPACT)
INTRUDER TOKENS (INTRUSION)
---
SUBJECT STATUS: PENDING VALIDATION
The Bay’s signal has just begun. Don’t stay alone in the dark.
Claim your Prize: Enter the giveaway to win box #1, #2, or #3 (hand-signed by the team).
ENTER THE GIVEAWAY
Join 300+ Subjects: Follow the project to get the launch alert.
Remember: only 1,500 units available.
FOLLOW ON GAMEFOUND
Become an Expert: Check the official database and support us on BGG.
VISIT BOARDGAMEGEEK
©Durden’s Game
The Depôt 2026
---
Why ask BoardGamesBot
Instead of flipping through the whole manual- Accurate answers Based exactly on this manual, with the source page.
- Save time Find the rule in seconds, without flipping 22 pages.
- Anytime Settle rules mid-game, straight from your phone.
- 100% free Create your free account and start using it now.
How it works
Three steps to the answer- 1 Ask your question Type your question about this game's rules.
- 2 Create your free account Takes 20 seconds — it only saves your history.
- 3 Get the answer The AI finds the exact rule and cites the manual page.
Other Games You'll Like
Based on mechanics and theme



Manual published by the publisher · for rules reference only. More about the game on BoardGameGeek and Ludopedia .