
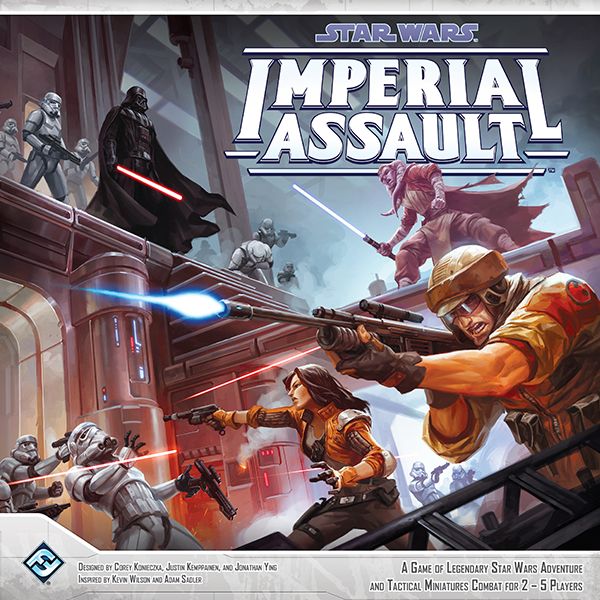
How to Play Star Wars: Imperial Assault
Fantasy Flight Games, Asterion Press, Edge Entertainment · Board game · 2014What do you want to do now
Ask anything about Star Wars: Imperial Assault: rules, setup, components, complexity, price, or whether it fits your group.
Video: How to Play
Start here, then follow the written guide
Step by step
Objective of the Game
Welcome, Rebel Scum and Imperial Loyalists, to the galaxy-spanning conflict of Star Wars: Imperial Assault! Your ultimate goal in a campaign is to win the finale – the climactic last mission. Throughout the campaign, you'll embark on various missions, earning rewards like Item cards, Class cards, Agenda cards, and even allies that will empower you for that final showdown. The choices you make and the missions you resolve will even shape the narrative, leading you to one of several possible finales. The side that triumphs in the finale claims victory for the entire campaign!
If you're diving into a quick Skirmish, the objective is simpler: be the first player to accumulate 40 Victory Points (VPs). Defeating enemy figures and achieving mission objectives will net you those precious VPs. But beware, if all your figures are defeated, you lose immediately, regardless of your VP count!
Preparation (Setup)
Let's get ready to rumble! Setting up Star Wars: Imperial Assault depends on whether you're playing a grand Campaign or a swift Skirmish.
Campaign Setup
- Choose Your Side: First, decide who will be the Imperial player. All other players will be Rebel heroes. These roles are set for the entire campaign.
- Hero Rewards: If playing with 2 heroes, each gets a Legendary Reward card. With 3 heroes, each gets a Heroic Reward card. If only one Rebel player, they control two heroes.
- Rebel Hero Selection: Each Rebel player chooses a Hero sheet, their matching Class deck, and their hero figure. Place basic Item cards (no XP cost) from your Class deck faceup in front of you.
- Imperial Player Selection: The Imperial player chooses 1 Imperial Class deck. Place the basic Class card (no XP cost) faceup.
- Build the Agenda Deck: The Imperial player takes all Agenda cards, sorts them into sets of 3, and chooses 6 sets. Shuffle these 18 cards to form the Agenda deck.
- Build the Side Mission Deck: Rebel players sort Side Mission cards by color. Create the deck by shuffling together:
- Each red Side Mission card corresponding to their heroes.
- 4 green cards of the heroes’ choice (cannot choose more than one that rewards the same ally).
- 4 random gray cards (keep these secret!).
- Start the Introductory Mission: Begin with the introductory mission from the Campaign Guide.
Mission Setup (Campaign)
The Imperial player handles most of this, keeping some information secret from the Rebels:
- Assemble the Map: Use map tiles as shown in the mission's diagram. Place all tokens as indicated.
- Dials & Cards: Set the threat dial to 0 and the round dial to 1.
- Sort Deployment Cards:
- Initial Groups: Place listed Deployment cards faceup. Deploy the corresponding figures on the map.
- Reserved Groups: Secretly put listed Deployment cards in a facedown pile. Figures deploy when the mission dictates.
- Open Groups: Secretly choose a number of listed Deployment cards as a secret hand. These can be used to deploy figures during the Status phase. Unique (•) cards and allies must be earned as mission rewards before being used.
- Special Setup: Perform any specific instructions listed in the mission.
- Deploy Imperial Figures: Deploy figures on the map as indicated. Figures with a gray or black border correspond to a gray Deployment card.
- Shared Components: Place all dice, Condition and Supply decks, damage tokens, strain tokens, and condition tokens within reach.
- Mission Briefing: The Imperial player reads the "Mission Briefing" aloud to the Rebel players. Point out any named map tiles. Keep the rest of the mission rules secret for now!
- Rebel Deployment: Each Rebel player chooses the Item cards they'll bring. Place their hero figure in an empty space as close to the entrance token as possible. If they've earned an ally, they may deploy it now, placing its figures near the entrance token.
- Activation Tokens: Each hero receives 1 activation token, green side faceup. Heroes with Legendary or Heroic Reward cards might get more.
Skirmish Setup
- Build Armies: Each player needs an army of up to 40 points worth of Deployment cards and a deck of exactly 15 Command cards. Place Deployment cards faceup and shuffle Command cards.
- Determine Initiative: The player with the lowest total cost of Deployment cards chooses who gets the initiative token. Ties are random. The player with initiative chooses deployment zones and activates first in Round 1.
- Set Up Skirmish Mission: The player with initiative shuffles their Skirmish Mission deck and draws 1 card. This card details the mission name, special rules, and map. Build the map using the diagram and place only the A or B tokens matching the card's letter.
- Deploy Units: The player with initiative chooses a red or blue deployment zone and deploys all their figures there. The opponent deploys in the other zone. If you can't fit all figures, fill as many spaces as possible, then deploy remaining figures in the closest spaces to your zone.
- Draw Command Cards: Each player draws 3 cards from their Command deck.
The Turn of Play
Whether you're fighting for freedom or crushing the Rebellion, gameplay in Imperial Assault revolves around alternating activations.
Activation Phase
Play alternates between players. In a campaign, Rebel players start. In a skirmish, the player with initiative starts.
Hero Activation (Campaign)
When a hero activates:
- Start of Activation: Ready all of the hero’s exhausted Class and Item cards.
- Perform Actions: The hero performs any combination of up to 2 actions: move, attack, interact, rest, and special.
- Move: A figure gains MPs (Movement Points) equal to its Speed. Moving to an orthogonally or diagonally adjacent space costs 1 MP. MPs can be spent before or after an action. Heroes can suffer 1 strain (up to twice per activation) to gain 1 MP.
- Friendly/Neutral figures: Move into their space at no additional cost.
- Hostile figures: Spend 1 additional MP to enter their space.
- Cannot end movement in a space with another figure.
- Walls (black line), Impassable (dotted red line), Blocked (red line), Doors (door token): These restrict movement and/or Line of Sight (LOS).
- Difficult terrain (blue line): Costs 1 additional MP to enter.
- Attack: A hero can use both actions to attack.
- Declare Target: Choose an eligible hostile target. Melee attacks target adjacent figures/objects. Ranged attacks target adjacent figures/objects in LOS. LOS requires tracing two straight, uninterrupted lines from two different corners of the attacker's space to two different corners of the target's space, avoiding walls, blocked terrain, figures, or diagonal wall/blocked terrain intersections.
- Roll Dice: Attacker rolls attack dice (from weapon Item card). Defender rolls defense dice (from Hero sheet).
- Rerolls: Resolve dice reroll effects. Each die can only be rerolled once per attack.
- Apply Modifiers: Evade cancels one result. Dodge makes the attack a miss.
- Spend Surges: Attacker can spend Surge icons to trigger special abilities. A hero can spend up to 1 Surge to recover 1 strain.
- Check Accuracy (Ranged Only): The sum of accuracy icons and modifiers must be equal to or greater than the distance to the target. If not, it's a miss.
- Calculate Damage: Target suffers damage equal to attack icons minus block icons. If a miss, 0 damage.
- Interact: Figures can interact with a token in their space or an adjacent space.
- Crates: Heroes can interact to draw 1 Supply card and claim the crate token.
- Doors: Figures can interact to open a door (return to box). Doors cannot be voluntarily closed.
- Special: Other tokens as per mission rules. May require an attribute test (roll dice, need 1 success).
- Rest: Only heroes can rest. Recover strain equal to their endurance. If strain recovered exceeds current strain, recover damage equal to the excess.
- Special: Abilities on Class cards, other abilities, or mission rules with a special action icon allow special actions. Some require both actions. Each special action can only be performed once per activation.
- Move: A figure gains MPs (Movement Points) equal to its Speed. Moving to an orthogonally or diagonally adjacent space costs 1 MP. MPs can be spent before or after an action. Heroes can suffer 1 strain (up to twice per activation) to gain 1 MP.
- Mark Activation: Flip the hero's activation token to the red side. If a hero has 2 activation tokens, their second activation cannot occur until all heroes have had their first activation.
Imperial Player Activation (Campaign)
The Imperial player chooses 1 deployment card to activate. The number of bars below the card’s deployment cost indicates the number of figures in its deployment group. Perform up to 2 actions with each figure in the group, resolving both actions for one figure before moving to the next. When the last figure from a Deployment card is activated, exhaust the card (rotate 90º). These figures cannot be activated again this round.
Skirmish Activation
Starting with the player with initiative, players take turns activating deployment groups and performing actions with their figures. Once all Deployment cards are exhausted, proceed to the Status Phase. If one player has more ready Deployment cards, the other player can choose to pass their activation.
- In Skirmish, heroes function like other figures; their Hero sheets are not used. They can only use 1 action to attack per activation, and are removed from the map when defeated.
- Figures cannot rest or interact with crate tokens for Supply cards.
- Strain works differently: for each strain suffered, the player can discard 1 Command card from their deck to prevent it. Figures cannot recover strain.
Status Phase
After all figures have activated, the game moves to the Status Phase, which differs between campaigns and skirmishes.
Campaign Status Phase
Before the next round begins:
- Increase Threat: The Imperial player increases the threat dial by the threat level listed on the campaign log.
- Ready: The Imperial player readies all exhausted Class and Deployment cards. Each hero readies all activation tokens (green side faceup).
- Deploy and Reinforce: The Imperial player may spend threat to deploy additional groups of figures or reinforce individual figures at green deployment points.
- Deploy a Group: Choose a Deployment card from your hand, spend its deployment cost, place the card faceup, and place figures on the map equal to its group limit, near a green deployment point.
- Reinforce: Choose a Deployment card already on the table, spend its reinforcement cost, and place 1 figure from that group near a green deployment point.
- End of Round Effects: Resolve any abilities or mission rules triggered at the end of the round. If playing with 3 heroes, a hero with 2 activation tokens must give one to another hero of their choice.
- Advance Round Dial: Advance the round dial by 1.
Skirmish Status Phase
- Ready Cards: Both players ready their Deployment cards.
- Draw Command Cards: Each player draws 1 Command card, plus 1 additional card for each terminal they control (meaning they are the only player with a figure on or adjacent to it).
- End of Round Effects: Resolve any abilities or mission rules triggered at the end of the round.
- Pass Initiative: The player with the initiative token passes it to their opponent.
End of Game and Scoring
Campaign End
Each mission has specific end conditions. As soon as an end condition is met, the Imperial player resolves the "End of Mission" section of the mission rules. This includes reading story text aloud and distributing listed rewards, followed by any additional rewards.
The campaign itself ends when players resolve the finale mission. The players who win the finale are the ultimate victors of the campaign!
Post-Mission Cleanup (Campaign)
- Wounded heroes flip their Hero sheets to the healthy side. Heroes recover all damage and strain.
- Shuffle all Supply cards back into the deck.
- Heroes gain 50 credits for each crate token claimed during the mission, then discard the tokens.
- Return the just resolved Mission card to the box.
- If the introductory mission was just resolved, shuffle the Side Mission deck, then draw 2 cards and place them faceup as active missions. If an active, non-agenda Side Mission was just resolved, shuffle the Side Mission deck and draw 1 card as an active mission.
Campaign Structure (After a Mission)
After a mission, you enter a structured upgrade phase:
- Mission Stage:
- Choose Mission: Rebel players consult the campaign log to choose their next mission (Side Mission or Story Mission).
- Resolve Mission: Play the chosen mission.
- Post-Mission Cleanup: As detailed above.
- Rebel Upgrade Stage:
- Spend XP: Each hero can spend XP to purchase any number of cards from their Class deck.
- Spend Credits: Rebel players draw 6 cards from each Item deck listed on the campaign log and collectively decide which to purchase using shared credits. Unpurchased cards are shuffled back. Players can sell owned Item cards for half their cost (rounded up to the nearest 25), or 50 credits if no cost is listed.
- Imperial Upgrade Stage:
- Spend XP: The Imperial player can spend XP to purchase cards from their Class deck.
- Spend Influence: The Imperial player draws 4 cards from the Agenda deck and may purchase any by spending influence. Unpurchased cards are shuffled back without revealing them to Rebels.
Skirmish End
The game ends as soon as one player accumulates 40 VPs. The player with the most VPs wins. If all your figures are defeated, you lose immediately, regardless of VPs.
Scoring VPs (Skirmish)
- Defeating Figures: When the last figure in a group is defeated, the opposing player scores VPs equal to that group’s deployment cost.
- Card and Mission Effects: Skirmish Mission cards, and some Command or Deployment cards, list additional ways to gain VPs.
Tips for Victory
- Master Your Actions (Campaign Heroes): As a Rebel hero, you get two actions per activation. Don't waste them! Consider if you need to move into a better position, attack a key enemy, interact with an objective (like a crate for a Supply card), or even rest to recover vital strain or damage. Sometimes, suffering 1 strain for an extra MP can be the difference between reaching an objective or falling short.
- Imperial Threat Management (Campaign): Imperial players, your threat dial is a powerful resource. During the Status phase, you gain threat, which you can spend to deploy new groups or reinforce existing ones. Knowing when to hold threat for a big deployment and when to spend it to maintain pressure on the Rebels is crucial. Don't let the Rebels get comfortable!
- Skirmish Focus: VPs and Objectives: In Skirmish mode, remember that the goal is 4
More videos
More rules explanations from the community
In English
-
 How to Play Imperial Assault: Legends of the Alliance
-
 Sorastro's Star Wars Imperial Assault Painting Guide Ep.35: The Rancor
-
 Harsh Rules - Let's Learn to Play Star Wars: Imperial Assault - Campaign Rules
-
 Sorastro's Star Wars Imperial Assault Painting Guide Ep.36: Jabba The Hutt
-
 Imperial Assault Guide - Campaign setup + side missions
-
 Sorastro's Star Wars Imperial Assault Painting Guide Ep.45: Vinto
-
 Sorastro's Star Wars Imperial Assault Painting Guide Ep.42: MHD-19
-
 Sorastro's Star Wars Imperial Assault Painting Guide Ep.39: Obi-Wan Kenobi
-
 First ever miniature painting - Wampa
-
 Sorastro's Star Wars Imperial Assault Painting Guide Ep.38: Capt. Terro
-
 Sorastro's Star Wars Imperial Assault Painting Guide Ep.44: Ahsoka Tano
Rules manual
Official PDF file
Frequently Asked Questions
Quick answers about the rules
