
How to Play Archipelago
Ludically · Board game · 2012Video: How to Play
Start here, then follow the written guide
Step by step
Game Objective
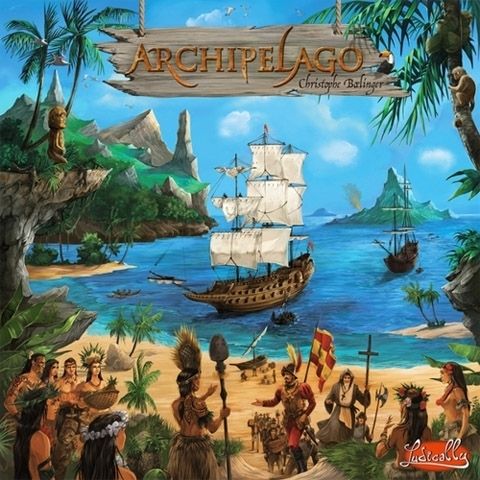
In Archipelago, players are European explorers tasked with discovering, colonizing, and exploiting islands between 1492 and 1797. The mission is peaceful: to meet the needs of the local population while generating commercial returns for the continent. Players must find a balance between expansionism and humanism, commercial success and respect for local values, shared knowledge and industrialization. The goal is to make the archipelago a happy and productive colony. Otherwise, careless exploitation may lead to chaos and revolt. To complicate matters, a separatist or pacifist may be among the players, seeking to tip the game toward chaos/revolt or absolute peace.
The game ends in two ways: through an independence war (rebellion marker surpasses the population marker) or when the endgame condition of one of the players' objective cards is met. If there is an independence war and no player has the Separatist card, everyone loses. If a player has the Separatist card, they win alone. If the game ends due to an endgame condition, all players count their Victory Points (VP) to determine the winner.
Setup
- Place the 4 boards (I to IV) at one end of the table.
- On the domestic market board (I), place 6 resource cubes, one of each color, in the corresponding zones, in the top-left corner of each zone.
- On the colony stability board (III), position the population markers and rebellion markers on their respective icons (both at the zero mark).
- On the excess workers board (IV), place the excess workers marker on its icon (at the zero mark).
- The remaining resource cubes, florins, port/market tokens, and temple/city tokens form the bank of available resources, money, and buildings.
- Assemble and place the evolution track near the game box. Shuffle the 48 evolution cards (all with the same side and orientation face-up, showing the archipelago balance information) and place them in the box in the designated spot.
- Place the open sea hexagon in the center of the table.
- Store the explorer tokens in 3 stacks of 8 inside the box.
- Each player chooses a color, takes the player aid screen, 1 ship, 2 citizens, 3 action discs, and the turn order marker of the chosen color.
- The player places their ship on the open sea hexagon (without covering fish icons) and the other pieces in front of their screen. They receive 10f, which must be placed behind the screen.
- The player's remaining pieces stay in the box.
- Place the action wheel within reach of all players, with the appropriate side for the number of players (2-4 or 5).
- Randomly determine the player order for this round. Each player places their turn order marker on the evolution track, on the icon corresponding to their position.
- Shuffle the 24 region hexagons and deal 3 to each player.
- Initial Exploration (Round #0): In the order indicated on the evolution track, each player chooses one of the 6 regions in their hand and places it adjacent to the open sea hexagon, respecting landscape continuity (water with water, field with field, mountain with mountain). From the second player onward, hexagons can be adjacent to those already placed, as long as they are also adjacent to the open sea and respect the landscape on all contact sides. If a player cannot fit any of their 3 hexagons, they discard them and draw 3 more.
- After placing their first region, the player moves their ship from the open sea to the new region, takes the first explorer token from the first stack in the box, and hides it behind their screen.
- The player's 2 citizens disembark from the ship onto the new land, on land areas, without covering resource icons. The population marker advances 2 points on the colony stability board (III).
- If the new region has huts, increase the excess workers marker according to the number of huts.
- If the new region has resource icons, the player selects one of the produced resources, transfers the corresponding cube from the bank to the first available space on the domestic market board. If there are other resources in the region, the player takes a cube of their choice from the bank and places it behind their screen. If the region has only one resource, it goes to the domestic market.
- Once all players complete the first exploration, they return the 2 remaining (and discarded) hexagons to the hexagon pile, which is shuffled and placed back in the tray.
- Flip the top 5 evolution cards and place them along the evolution track.
- Shuffle the trend cards and randomly select one, placing it face-up on the table.
- Separate the objective cards into stacks of 10 by duration. Select a stack based on the desired game length. Shuffle the chosen cards, and each player secretly selects one, placing it face-down behind their screen. Unused cards return to the box.
- The first round can now begin (skip phases 3 and 4 in the first round).
Game Flow
Each round is divided into 6 phases, played in this order:
- Phase 1: Unlink
- Flip the progress cards and character cards under your control (rotate 90 degrees counterclockwise).
- In each region, citizens and anchored ships from the previous round must leave the resource icons.
- Rebel citizens (lying down) must be placed upright.
- This phase is skipped in the first round.
- Phase 2: Turn Order
- Each player secretly bids an amount in florins (f). Bidding nothing is allowed.
- All reveal their bids simultaneously. All bid money goes to the bank.
- The player with the highest bid decides the turn order for all, and may change the position of the turn order markers on the evolution track. Negotiations and bribes are encouraged.
- If no one bids, the order remains unchanged.
- If there is a tie for the highest bid, the money goes to the bank, and the tied players bid again. In case of another tie, the order remains unchanged.
- Phase 3: Population Effects
- Apply population effects on each board (I to IV), in order, moving the excess workers marker and the rebellion markers.
- Board I: Domestic Market: The bottom-right row of the cube in each of the 6 resource zones indicates how much to move the excess workers markers or rebellion markers.
- Board II: Export Market: Adjust the excess workers marker using the same method as Board I.
- Board III: Colony Stability: The row of the population marker indicates how much to move the excess workers markers and rebellion markers.
- Board IV: Excess Workers: The row of the excess workers marker indicates how much to move the rebellion marker (forward or backward).
- This phase is skipped in the first round.
- Phase 4: Archipelago Balance
- The nature of crises is determined by the backs of the card on top of the evolution card pile. Both crises must be resolved. Ignore red zones in this phase.
- Domestic Consumption Crisis: The top half of the card indicates the resource type and how many citizens one cube sustains. All citizens of all players are laid down. Starting with the first player, each provides resources from the domestic market (I) or from behind their screen. Consumed resources return to the bank. For each cube consumed, the player stands up the corresponding number of citizens of their choice (including other players'). Negotiations are allowed. If citizens remain lying down, they become rebel citizens, and the rebellion marker advances.
- Export Consumption Crisis: The bottom half of the card indicates the number and type of resources for the export market. Starting with the first player, each provides resources from the export market (II) or from their own resources. Consumed resources return to the bank. If the required number is not met, the rebellion marker advances 1 space for each missing resource.
- Event: If the card shows an event (not red), it is resolved here. Example: move the rebellion marker 2 spaces back for each temple in the archipelago. If the card remains visible for multiple rounds, the event is resolved in each Phase 4.
- This phase is skipped in the first round.
- Phase 5: Actions
- Starting with the first player, each player takes a turn by placing one of their action discs on the action wheel and executing the corresponding action.
- Players continue until all have used their action discs or cannot play.
- At the start of the game, each player has 3 action discs. When the first stack of explorer tokens is empty, each player receives a fourth action disc. When the second stack is empty, each player receives a fifth action disc.
- Unlimited action zones: 6 actions for resource harvesting, recruitment, construction, transaction, and migration. Discs can be stacked.
- Limited action zones: Taxes, reproduction, and exploration. Discs must be placed on the colored circles.
- Port and Market are not action zones; they receive florins.
- During this phase, players may negotiate, trade, sell, give, or lend anything except units or action discs. Revealing the secret objective card is prohibited.
- Phase 6: Evolution Card Purchase
- All used action discs return to the players. The 1f coins in the port and market zones of the action wheel go to the bank.
- The evolution track always has 5 cards available.
- Starting with the first player, each may:
- Buy an evolution card and rotate one of the remaining ones, OR
- Rotate two different cards.
- To buy, pay the cost indicated by the red triangle to the bank, take the card, and place it in front of you.
- To rotate a card, turn it 90 degrees clockwise. The cost may change. If the red triangle points to the skull, the card is discarded.
- Empty spaces on the evolution track are filled with cards from the pile, face-up.
- If a newly revealed card has a red zone on the back, the corresponding crisis or event must be resolved immediately, following the rules of Phase 4. Non-red zones are ignored and come into play in Phase 4 of the next round.
Actions and How to Play
Actions are executed in Phase 5: Actions, by placing an action disc on the action wheel.
Resource Harvesting
- Choose a resource to harvest (fish, exotic fruit, livestock, stone, wood, iron).
- The active player places as many active units and unlinked units as desired on unoccupied resource icons of the chosen type, one unit per icon.
- Each unit must remain in the region (hexagon) it occupied.
- Fish resources can only be harvested by ships. Other resources, by active citizens.
- For each unit placed, the player takes the corresponding resource cube from the bank and places it behind their screen. There is no limit to the number of cubes.
- A harvesting action can only harvest one type of resource.
- Participating units become "linked" and remain on the icon until the next unlinking phase.
- Resources cannot be harvested in a region controlled by another player without permission (see "Cities").
- Note: Resource cubes are limited in the bank.
Taxes
- Action limited to a number of times per round.
- Move the rebellion marker one space forward each time this action is executed.
- For each active citizen, ship, city, and temple under their control, the active player receives the amount in florins indicated on the tax table (on the player aid screen).
- Rebels do not contribute money.
Transactions
- Buy or sell a resource cube in the domestic market or the export market.
- If a resource session is full in a market, that resource cannot be sold there.
- To buy, take the cube positioned farthest to the right and bottom in the chosen resource zone.
- To sell, place the cube in the leftmost, topmost available space in the corresponding resource zone.
- The price is determined by the row from which the cube is taken or placed. The amount is paid to or received from the bank.
Exploration
- Action limited to a number of times per round.
More videos
More rules explanations from the community


Frequently Asked Questions
Quick answers about the rules
