
/pic7301915.jpg)
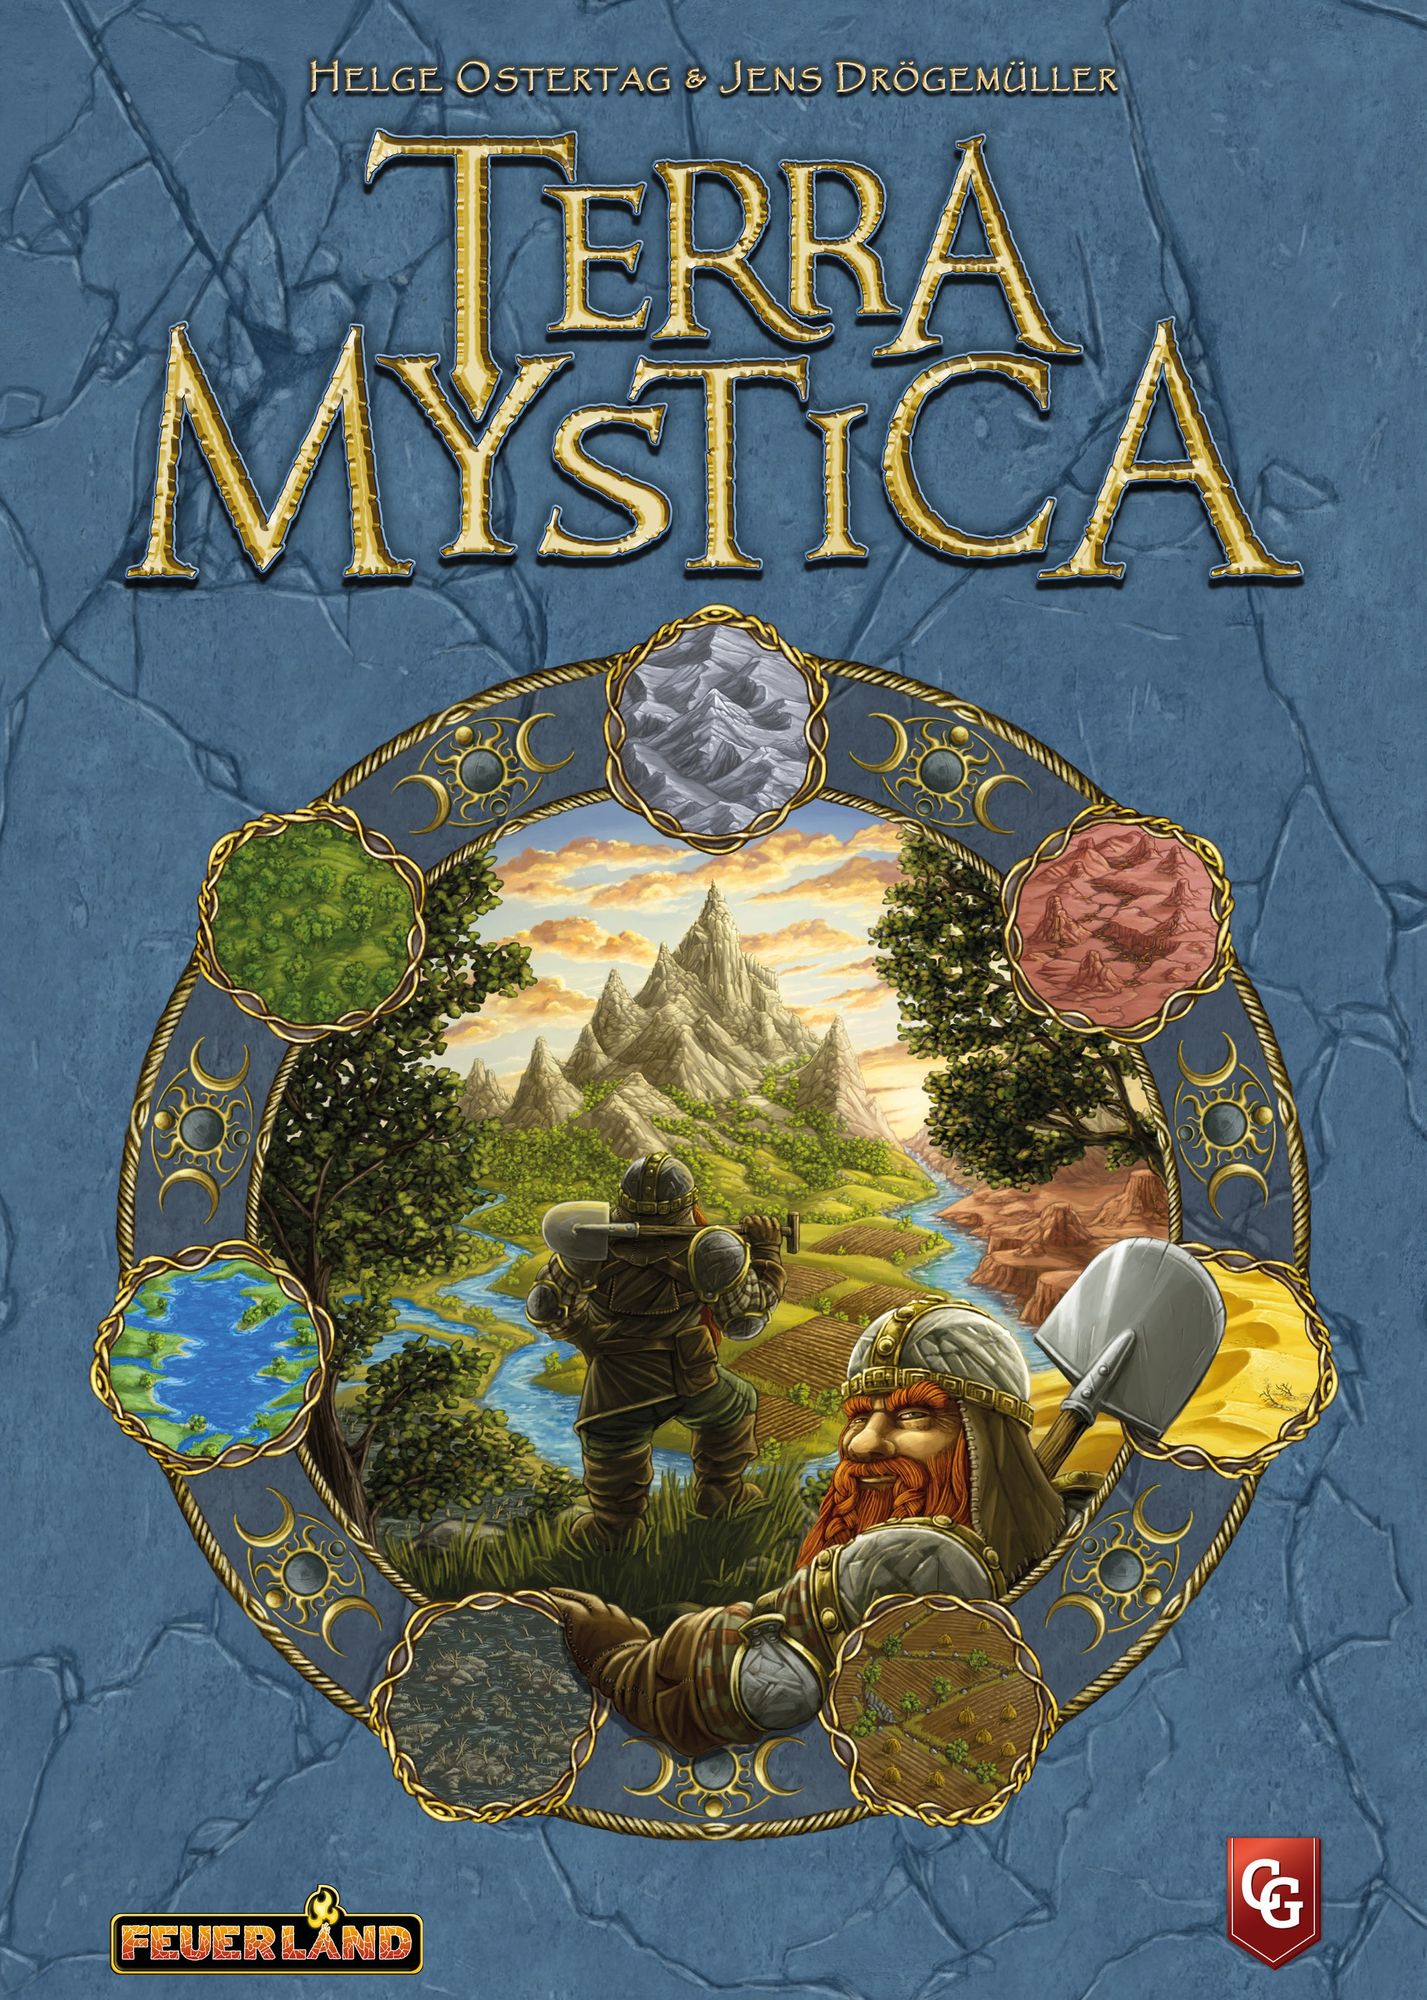
What is your question about Terra Mystica: Merchants of the Seas?
Ask before downloading the manual: the assistant was trained on this file and answers instantly, citing the exact page.
Ask questions about the game
Ask anything about Terra Mystica: Merchants of the Seas: rules, setup, components, complexity, price, or whether it fits your group.
Write your question first. You will create your free account to see the answer — it takes 20 seconds.
Full rulebook
Browse the manual or download the original PDFFull manual text available to read Open text
Credits
Original Terra Mystica Design: Helge Ostertag and Jens Drögemüller
Expansion Design: James Ataei with Eduardo Andrade
Lakes Map Design: Jason Counihan
Fjords Map Design: Jordan Lewis
Rulebook Writing: Bastian Winkelhaus
Rulebook Editing: Christof Tisch
Art: Dennis Lohausen
Editing: Frank Heeren
Proofreading: Johannes Grimm
Playtesters: Aaron Gibbison, Alban Thomas, Alex Peters, Alicia Duncombe, Anders Foller Füchtbauer, Andreas ‘Druen’ Lund Jørgensen, Andy Brunstein, Bastian Winkelhaus, Ben Ward, Chris Harris, Christof Tisch, Christoph Sander, Christopher Bizzell Clough, Clay Arnett, Dan Be Bokkan, DocCool, Filippo Bortolo, Florian Schlusnus, Frank Pier, Grant Wilson, Haley Stritzel, Helen Engelhardt, Helge Ostertag, Inga Keutmann, Jack Spirio, Jacob Baran, Jan Henry, Jan-Michael Frey, Jannosch Sachse, Jason Counihan, Jason Parish, Jenny Mulholland, Jens Drögemüller, Jerry Corstens, Johnna Jackson, Jordan Lewis, Joseph Appel, Justin Lang, Karthik Tiruthani, Kenny Siu, Kevin Alexander Schmitz, Kevin Whaley, Krištof Bodrič, Leon Bauer, Leon Serenčeš, Liam Gaudet, Luis Terrones, Maikel Putman, Maja F. T. Gundersen, Mike Zankle, Mikkel Basse Nielsen, Mitch Harding, Morten Lind, Nicholas Piedra de Godoy Lopes, Olaf Darge, Quin Mese, Ron Dempsy, Ruth Feinstein, Scott McNulty, Sean Shrader, Simon Agner Holm, Steve Mendez, Thomas Sloth Jørgensen, Tom Eccles, Victor Uriarte, Wit Paszkowski.
Special thanks to Juho Snellman for assistance with map development, and from James to Alban Thomas for creating the original prototypes.
Z-Man Games Team
Producer: Michael Sanfilippo
English Technical Editing: Andrea Dell’Agnese & Julia Faeta
Publisher: Steven Kimball
Sails appear on the horizon, heralding a new era of trade and expansion in the world of Terra Mystica. The factions build shipyards and launch ships on the rivers, eager for the benefits of commerce. The Fakirs and Dwarves are not natural sailors, but they refuse to be left behind, sending their merchants out to make their fortunes on land. The world is changing, and the people of Terra Mystica must change with it...
1995 County Road B2 W
Roseville, MN 55113 USA
(651)-639-1905
info@ZManGames
®
Feuerland Spiele
Wilhelm-Reuter-Str. 37
65817 Eppstein-Bremthal
www.feuerland-spiele.de
PUBLISHED BY
© 2019 Feuerland Spiele. Z-Man Games is a ® of Z-Man Games. Actual components may vary from those shown.
---
2
1 double-sided Game board
7 Canals
1 Final Scoring tile
CONTENTS
1 Merchants Power Action board
4 Shipping Overview tiles
12 Scoring tiles
10 double-sided Shipyard boards
105 Trade markers, 15 each in 7 colors from the base game, with Fire & Ice colors on the backs
2 Range tiles for Fakirs and Dwarves
6 Merchants
3 in 2 faction colors
9 Shipyards
1 in each faction color, including the factions from Fire & Ice
12 Favor tiles
27 Ships
3 in each faction color, including the factions from Fire & Ice
4 Bonus cards
* Replaces the corresponding card from the base game (see page 3)
5 Dock markers
Double-sided, with Storehouses on the backs
4 Town tiles
CONTENTS
---
3
INTRODUCTION
Terra Mystica: Merchants of the Seas is the second expansion for Terra Mystica. The Terra Mystica base game is required to
play. Merchants of the Seas is fully compatible with the Fire & Ice expansion and the mini-expansion, but neither are required to
use this expansion.
This expansion includes a new double-sided game board, with 2 new maps (Lakes and Fjords), Ships allowing factions to trade
with their neighbors, Shipyards on faction board extensions, new Favor tiles, Scoring tiles, Town tiles, and Bonus cards. All these
elements combine with new abilities and dynamic faction balancing to create an exciting new Terra Mystica experience! The Fakirs and Dwarves do not command Ships on the seas; instead they have traveling Merchants. They also do not use a Shipyard
or Dock, but have a Market and a Storehouse instead. Merchants, Markets, and Storehouses follow most of the rules for Ships,
Shipyards, and Docks, with a few exceptions. Unless otherwise specified, all rules for Ships, Shipyards, and Docks also apply to
Merchants, Markets, and Storehouses.
THE MERCHANTS GAME BOARD
The two new maps on the Merchants game board can be used instead of the maps from the base game or Fire & Ice. You can use
these maps with or without the additional content in this expansion. To account for the advantages certain factions may have on
specific maps, each map now has a corresponding Victory point table, giving new starting Victory point spaces for each faction
when playing on that map. See Appendix VIII for details.
NEW SETUP RULES
Set up the game as normal, with the following changes:
Place the new Power actions board below the game board.
For each Cult, add a stack of new Favor tiles below the
corresponding existing Favor tiles.
Place the new Town tiles with the existing town tiles.
Before drawing the initial Bonus cards, return the
Bonus card providing 4 Victory points when passing
with Stronghold and/or Sanctuary to the game box,
and replace it with the shown Bonus card with the same
effect that also includes the Shipyard. Shuffle the new
Bonus cards with the other Bonus cards, then draw
Bonus cards as normal.
Return the base game Round Scoring tiles to the game
box. Shuffle the new Round Scoring tiles together and
place 6 tiles on the boards, as normal. As in the base game, a
Scoring tile depicting a Spade on its left side cannot be placed
on spaces 5 or 6. If you draw 3 tiles, not including the round 6
tile, with Cult Bonuses for the same Cult, set aside the last of
those tiles you drew and draw another Round Scoring tile to
replace it instead.
If you are playing with Final Scoring tiles
from Fire & Ice, shuffle the new Final
Scoring tile together with the existing tiles
before drawing. You do not need to play with
Final Scoring tiles to use this expansion. If you have the 2 town tiles that add 1 to Shipping
from the Terra Mystica mini expansion, do not
use those tiles when playing with this expansion.
There should be a total of 2 of those town tiles in
the game, not 3. All other elements in the mini expansion
can be used with this expansion.
---
4
For the Fire & Ice map, place 1 Canal in the middle of the northern half of the board to connect the two rivers, as shown.
For the new Fjords map, place 1 Canal on the mountain peninsula on the western half of the board, as shown.
For the new Lakes map, place all 7 Canals, as shown.
Based on the map you use, place 1 or more Canals on the Game board. The locations of Canals on the maps are shown below. Canals do not separate directly adjacent Terrain spaces; these spaces are still considered directly adjacent. Ships can move through Canals (see page 6).
For the Base game map (or the Revised base map from Fire & Ice), place 1 Canal on the western half of the board to connect the upper and lower arm of the river, as shown.
NEW FAVOR TILES
After adding the new Favor tiles in the expansion, each Cult will have 2 Favor tiles each giving 1 influence in that Cult.
For each Cult, you can obtain only 1 influence tile that gives 1 influence in that Cult.
• If you have already obtained a Favor tile that gives you 1 influence in a Cult, you cannot obtain the other Favor tile that gives 1 influence from the same Cult.
• In a 4- or 5-player game, each faction now has the opportunity to obtain a Favor tile that gives 1 influence in each Cult.
To play using more content from this expansion, you can draw 2 new Bonus cards before drawing the remaining cards from the existing Bonus cards. You can also use the new Final Scoring tile instead of drawing randomly.
Example: Because the Giants have already obtained this Favor Tile (A) which gives 1 influence in the Cult of Earth, they cannot obtain the other Favor Tile (B) which also gives 1 influence in the Cult of Earth.
A B
---
5
NEW FACTION COMPONENTS
After choosing your faction, take these additional components:
• Your faction’s Shipyard board. Place the Shipyard board to
the left of your Faction board. Some factions gain additional
special abilities when playing with this expansion. These
abilities are shown in the top-left corner of the Shipyard
board, and are explained in detail in Appendix VII.
• 1 Shipyard Structure in your faction color. Place it on the
corresponding space on your Shipyard board.
• 3 Ships in your faction color. Place your Ships in your
supply with your Priests and Bridges.
• 15 Trade markers in your faction color.
• 1 Shipping Overview tile. The Shipping Overview tile
shows the rewards for trading with different Structures.
• 1 Dock marker
NEW RULES FOR FIRST STRUCTURE PLACEMENT
Immediately after all factions have placed their initial Dwellings,
before choosing Bonus cards, each player places their new Dock
marker. Beginning with the Starting player and proceeding in
turn order, place your Dock marker under one of your riverside
Dwellings, Dock side faceup. A riverside Dwelling is a Dwelling
directly adjacent to at least 1 River space. If none of your
Dwellings are directly adjacent to a River space, do not place the
Dock marker at this time and set it aside. You must immediately
place your Dock marker under the first riverside Dwelling you
build during the game. You need your Dock or your Shipyard on
the board in order to obtain Ships.
SHIPS
Ships are new pieces that can be used in three different ways, as shown on your Shipping Overview tile:
1. You can trade
by moving a Ship
onto a space with
another faction’s
Structure. Trading
gives you Victory
points and other rewards,
but also gives the other
player the opportunity to
gain Power. You can trade
with each individual
Structure only once, even
if that Structure is later upgraded.
2. You can transform
and build on spaces
directly adjacent to
one or more of your
Ships, even if they are
beyond your Shipping
value.
3. When building a
Dwelling on a space
adjacent to a Ship,
you can remove that
Ship instead of
paying the cost to
build that Dwelling.
When playing with this
expansion, the Auren start the
game with 1 key, which allows
them to reach space 10 of 1
Cult without the need to found
a town first. The Shipyard space
shows the rewards gained for
building the Shipyard.
After placing their initial Structures as shown, the players place
their dock markers. Because the Chaos Magicians start the game
with only 1 Dwelling, they must place their Dock marker under
that Dwelling. The Swarmlings have only 1 initial Dwelling
directly adjacent to a river, so they must place their Dock marker
under that Dwelling. Both of the Aurens’ initial Dwellings are
directly adjacent to rivers, so they could place their Dock marker
under either Dwelling.
The Halflings do not have any Dwellings directly adjacent to a
river, so they cannot place their Dock marker during this step. If
the Halflings use an action to transform and build on a riverside
space, they must immediately place their Dock Marker under that
new Dwelling.
---
6
Obtaining Ships
You can obtain Ships A) as Income, B) from Power or Special actions, or C) as one-time rewards. When you obtain a Ship, place it on a River space directly adjacent to a space with your Dock marker or your Shipyard. If you do not have your Dock marker or Shipyard in play, you cannot obtain Ships.
A River space can hold any number of Ships from any number of players. You can never have more than 3 Ships on the game board, and you cannot obtain new Ships if you already have all 3 of your Ships on the board. When you would obtain a Ship, you cannot move or remove a Ship from the board in order to place it elsewhere.
Moving Ships
You can take this Special action to move all of your Ships, positioning them to expand your influence and moving them onto other players’ Structures to trade with them. Each of your Ships can move a number of spaces up to your current Shipping value. Additionally, each time you take this action, for each of your Ships on the board, you can spend 1 Power to move that Ship 1 additional space.
A Ship can move:
• Onto a directly adjacent River space
• Through an adjacent canal onto the River space on the other side of the canal
• Onto a Terrain space with a Structure of another faction that does not already have one of your trade markers or one or more of your Ships on it. Place the Ship on top of the Structure on that space. After moving onto a Terrain space, the movement of that Ship ends and it cannot move further.
The Cultists have a Shipping value of 3 and move 1 of their Ships (A) 3 spaces onto the Nomads’ Temple to trade with that Temple. They already traded with the Nomads’ Stronghold, so they cannot trade with that Structure again. They move their other Ship (B) through the canal to the northern part of the river, so that they can build a Dwelling on the Plains space there in with a future action. They have to spend 1 power in order to reach the 4th space.
The trade with that Structure is resolved after all of your Ships have moved. You cannot move two Ships onto the same Structure.
The Special action to move Ships on your Shipyard board is available to use from the beginning of the game. You do not need to build the Shipyard in order to use it.
Although Ships can move through Canals, you cannot use Canals for indirect adjacency using your Shipping value.
Using Ships to Trade
After moving one of your Ships onto a Structure belonging to another faction that does not have one of your trade markers, a trade occurs. You receive a reward for the trade, based on the type of Structure you trade with, as shown on your Shipping Overview.
Each reward gives you Victory points, plus an additional reward. If the additional rewards are separated by a slash, you can choose only one of those rewards. If the additional rewards are separated by a “+”, you receive all of these rewards.
The owner of the Structure you traded with can gain Power equal to the power value of that Structure, but they must lose a number of Victory points equal to 1 fewer than the number of Power gained (in the same way as gaining Power for a build or upgrade action). The owner can choose not to pay any Victory points, and not gain any Power. Even if they decide not to gain Power, you still receive your trade rewards. If multiple trades occur after moving your Ships, resolve the trades in the order of your choice.
After resolving trades, place one of your trade marker under each Structure you traded with, then return each Ship that traded to your supply. Each faction has 15 trade markers, meaning you can trade with a maximum of 15 Structures. Once a marker is placed on the board, it cannot be moved. If you do not have any trade markers remaining, you cannot move a Ship onto a Terrain space for the rest of the game. Each Structure can trade with each other faction, so there can be trade markers from multiple factions underneath the same Structure. Place the trade markers such that all the colors are visible. If a Structure is upgraded, any trade markers that were underneath the original Structure remain under the upgraded Structure.
trade marker under each Structure you traded with then return each Ship that traded to your supply Each faction has 15 trade markers meaning you can trade with a maximum of 15 Structures Once a marker is placed on the board it cannot be moved If you do not have any trade markers remaining you cannot move a Ship onto a Terrain space for the rest of the game Each Structure can trade with each other faction so there can be trade markers from multiple factions underneath the same Structure Place the trade markers such that all the colors are visible If a Structure is upgraded any trade markers that were underneath the original Structure remain under the upgraded Structure
Using Ships to Transform and Build
If your Ship is on a River space, all Terrain spaces directly adjacent to it count as being indirectly adjacent to one of your Structures for the purposes of building a Dwelling. Thus, when you can transform and build on a Terrain space during the action phase of a round (Phase II), you can choose a Terrain space adjacent to one of your Ships. The Ship does not move.
Whenever you build a Dwelling on a Terrain space directly adjacent to one of your Ships on a River space, you can return that Ship to your supply instead of paying the building cost.
If you get a Spade as a Cult bonus during Phase III, you can also use that Spade on a Terrain space adjacent to one of your Ships. You still cannot build a Dwelling there during that Phase.
A B C
1
1
2
2
3
3
4
A
B
---
THE SHIPYARD
When you take the “Upgrading a Structure” action, you can upgrade one of your Trading houses on a riverside space to your Shipyard. You can upgrade a Trading house with a Dock marker. The Shipyard has a Power value of 3, the same as the Stronghold and the Sanctuary. Because you can only place new Ships adjacent to your Dock or your Shipyard, it is preferable to build the Shipyard in a location far away from your Dock, so that your Ships can cover a wider area of the board.
As a reward for upgrading one of your Trading houses to the Shipyard, you receive one or more one-time rewards, as shown underneath the Shipyard space on your Shipping board. One of the rewards for most factions is a one-time reward of obtaining 1 Ship. You must place this Ship directly adjacent to your Shipyard. Additionally, you receive an income of 1 Ship starting next round. After building your Shipyard, you can place Ships you obtain directly adjacent to either your Dock or your Shipyard.
After upgrading to your Shipyard, you also gain access to the new “Build Ship” Special action. This Special action allows you to obtain 1 Ship from your supply for the shown costs. You cannot use this Special action until you have upgraded one of your Trading houses to your Shipyard.
The Chaos Magicians take an action to move their Ships. Their Shipping value is 1, so each Ship can move 1 space for free. They move the first Ship onto the Witches’ Dwelling. They must spend 1 Power in order to move the second Ship 2 spaces onto the Halflings’ Stronghold, and 1 Power to move the third Ship 2 spaces next to the eastern Desert space.
After moving all of their Ships, the Chaos Magicians resolve 2 trades. First, they trade with the Witches’ Dwelling and receive 1 Victory point and 1 Worker. The Witches choose to gain 1 Power, losing 0 Victory points. Then, they trade with the Halflings’ Stronghold and receive 2 Victory points, 2 Coins, and a “Transform and Build” action with 1 free Spade. The Halflings could gain 3 Power at the cost of losing 2 Victory points, but choose not to lose Victory points and decline to gain any Power.
The Chaos Magicians use the action to transform the Desert space directly adjacent to their third Ship into a Wasteland and build a Dwelling there. The Chaos Magicians decide to build the Dwelling by spending the normal cost, and choose not to remove their neighboring Ship instead.
After all trades have been resolved, the Chaos Magicians place 1 of their Trade markers underneath each of the Structures they traded with and return the Ships from those Structures to their supply. The third Ship remains on the board. During the Chaos Magicians’ next turn, they could use that Ship to build onto the Wasteland space to the west of that Ship.
The Alchemists upgrade their Trading house to their Shipyard. They immediately obtain 1 Ship, which they must place on one of the River spaces adjacent to their new Shipyard, and advance once on their Shipping track (receiving 3 Victory points for reaching Shipping value 2 as normal). From now on, they can use the “Build Ship” Special action to pay 1 Worker and 2 Coins to obtain 1 Ship. Finally, from the next round on, they receive an income of 1 Ship during Phase I of every round. From now on, any time they obtain a new Ship, they can decide to place it next to their Shipyard or next to their Dock.
2
1
1
1
2
---
8
NEW RULES FOR FAKIRS AND DWARVES
The Fakirs and Dwarves do not have Ships.
Instead, they have Merchants who travel
across the land. Instead of a Dock, they have a Storehouse
(shown on the reverse side of their Dock marker), and instead
of a Shipyard, they have a Market (represented by the same
wooden piece). The rules for the Fakirs’ and Dwarves’ pieces
are the same as those for the corresponding pieces from other
factions, with exceptions detailed below.
When you choose one of these two factions, you take the 3
Merchants in that Faction’s color instead of 3 Ships. Additionally,
you take a Range tile, which shows the range of both your
Merchants and your faction’s Special ability (Carpet Flight or
Tunneling). Place the Range tile on your Faction board, on top of
the location where the Shipping track would be.
Range Tile
During setup, place one of your Markers on the leftmost space,
showing “1”, on the top track of your Range tile. The upper track
on this tile shows the Range value of your faction’s Special
ability (Carpet Flight or Tunneling), and the lower track shows
the Movement range of your Merchants. The new Range value
does not show the number of spaces that can be skipped by your
ability. Instead, it shows the maximum number of spaces to
fly or tunnel from one of your Structures to a new location. For
example, if your current Range value is at 2, you can use your
Carpet Flight or Tunneling ability up to 2 spaces away (skipping
1 space and targeting the second one, as in the base game).
You still receive 4 Victory points for using your Special ability,
regardless of the number of spaces you skip. You still cannot use
your Special ability on a neighboring space.
Unlike factions with a Shipping track, you cannot advance your
Range value as an action. Whenever you would receive a free
Shipping track advancement from a Town, Favor, or Scoring tile,
or from building your Market, move your Marker on the Range
tile 1 space to the right instead. When the Fakirs build their
Stronghold, they move their Marker on the Range tile 1 space
to the right, instead of gaining the ability from the base game.
Moving your Range marker does not give you Victory points.
At the beginning of the
game, the Dwarves can
move each of their
Merchants 1 space with
an action, and then, for
each of them, can
spend 1 Power to move
that Merchant 1 space further. Their Tunneling ability has a
range of 2, allowing them to skip 1 space when taking the
“Transform and Build” action, as in the base game. When
they found a town, the Dwarves decide to take one of the new
Town tiles, allowing them to advance their Shipping value by
1. For the Dwarves, this effect means that they can move their
Marker on the Range tile 1 space to the right instead. They
move their Marker to the second space on the track. From
now on, their Merchants can move up to 2 spaces (or up to 3
spaces if they spend Power). Their Tunneling range does not
change yet. If the Dwarves advance their Range value at least
one more time, their Tunneling ability would increase as well,
allowing them to skip up to 2 spaces to build on a space which
is up to 3 spaces away from one of their Structures.
If the Fakirs or Dwarves take the Bonus card that
provides a temporary increase to their Shipping
value, they treat their Range tile as if their Marker was 1 space
to the right instead. If their Marker is already at the highest
value on their Range tile, this Bonus card does not provide any
additional bonus.
If the Fakirs or Dwarves take the Bonus card from the mini-
expansion that gives 3 Victory points for each advancement on
the Shipping track when passing, they receive Victory points
equal to their current sail value on the Range tile times 3 when
passing instead.
Merchants
During setup, the Fakirs and Dwarves must place their
Storehouse marker under a starting Dwelling, instead of placing a
Dock marker. They can place their Storehouse marker under any
of their starting Dwellings; they do not need to place it under a
riverside Dwelling.
The Fakirs and Dwarves can upgrade any of their Trading
houses to their Market. It does not have to be a riverside
Trading house.
Whenever the Fakirs or Dwarves would obtain a Ship, they
obtain a Merchant instead. Whenever the Fakirs or Dwarves
obtain a new Merchant, they must place that Merchant on the
same space as their Storehouse or Market.
When the Fakirs and Dwarves move their Merchants, each
Merchant is moved one at a time. Each Merchant can move a
number of spaces up to the Movement value shown on their
Range tile. For each Merchant, you can spend 1 Power to move
that Merchant 1 additional space, as with Ships.
A Merchant can move:
• Onto a directly adjacent River space as long as that
Merchant does not end its movement there. The Merchant
must have enough movement left to leave that space during
the same movement.
• Onto a Terrain space with a Structure of another faction
that does not have one of your trade markers. The
Merchant does not have to end its movement in that space, but
if it does, place that Merchant on top of that Structure. A trade
with that Structure is resolved after finishing the movement of
all your Merchants.
• Onto a Terrain space with a Structure of your own faction,
or with a Structure of another faction that already has one of
your trade markers under it.
• Onto a Terrain space with no Structure. If a Merchant ends
its movement such a space, you can transform and build on
that space with a future action. You cannot transform and
build in an adjacent space using a Merchant.
When you build a Dwelling on a space with one of your
Merchants on it, you can choose to pay the normal cost to build
a Dwelling, or return your Merchant to your supply instead of
paying the normal cost. When transforming and/or building on
a space with one of your Merchants on it, you cannot also use
your Carpet Flight or Tunneling ability to gain Victory points.
The presence of a Merchant does not alter the occupied/
unoccupied status of a space. If another faction builds a
Dwelling on a space with one of your Merchants, your Merchant
immediately trades with that Dwelling. If you have multiple
Merchants on a space, only 1 Merchant trades with that Dwelling.
When you build a Dwelling on a space with one of your Merchants on it you can choose to pay the normal cost to build a Dwelling or return your Merchant to your supply instead of paying the normal cost When transforming and or building on a space with one of your Merchants on it you cannot also use your Carpet Flight or Tunneling ability to gain Victory points The presence of a Merchant does not alter the occupied unoccupied status of a space If another faction builds a Dwelling on a space with one of your Merchants your Merchant immediately trades with that Dwelling If you have multiple Merchants on a space only 1 Merchant trades with that Dwelling
---
9
NEW FINAL SCORING TILE
When playing with the Final Scoring tiles from Fire & Ice, add
the new Final Scoring tile to the existing Final Scoring tiles
before shuffling and drawing a tile.
The Final Scoring tile from this expansion can also be used
independently, using the following rules:
Place the Final Scoring tile faceup next to the game board.
It will be scored at the end of the game, immediately after
resolving Area Scoring.
Most Trade Markers
Each player counts the number of Trade
markers they placed during the game. These
markers do not need to be connected in any
way, unlike Area Scoring or other Final
Scoring tiles. The player who placed the
most Trade markers gets 18 Victory points,
the player who placed the second most gets 12, and the third
most gets 6. In the event of a tie, add up the Victory points for
the respective tiers, and divide them evenly among the tied
players (rounding down if necessary).
1
2
3
1
2
1
2
A
C
B
APPENDICES
Appendix I: New Power actions
By moving 4 Power
tokens from Bowl III to
Bowl I, you can move any
number of your Ships.
This action follows the
same rules as the action on
your Shipyard board.
By moving 4 Power tokens from
Bowl III to Bowl I, you can obtain
1 Ship.
By moving 5 Power tokens from
Bowl III to Bowl I and returning
1 Priest to your supply, you can
take 1 Favor tile, following the
rules for taking a Favor tile when
building a sacred Structure. This
does not count as building a sacred Structure, so the Chaos
Magicians take only 1 Favor Tile when using this Power action,
not 2.
The Dwarves have 3 Merchants on the board: 2 (B, C) at their
Market and 1 (A) at their Storehouse. The Range value of their
Merchants is 2 since they have built their Market.
The Dwarves use an action and move their first Merchant (A)
from their Storehouse to the west onto the adjacent Trading
house, then onto the Halflings’ Stronghold. Then, they move
their second Merchant (B) onto the adjacent Temple, then
onto the empty Wasteland space behind it. Finally, they move
their third Merchant (C) through the Halflings’ Trading
house and the empty Lakes space onto the empty Forest
space in the northwest. For the third Merchant movement,
they have to spend 1 power. After finishing all their Merchant
movements, they trade with the Stronghold.
They receive 2 Victory points, 2 Coins
and a “Transform and Build” action
with 1 free Spade. The Halflings can lose 2 Victory points to
gain 3 power. With the action and the Spade, the Dwarves
transform the space in the northwest with their Merchant on
it into a Mountain space, and build a Dwelling there,
returning their Merchant to their supply instead of paying the
normal cost. Finally, the Dwarves place 1 of their trade
markers underneath the Halflings’ Stronghold, then return
that Merchant to their supply.
A
B
C
---
Appendix II: New Favor Tiles
Immediately receive a one-time bonus of your choice: either advance your Shipping value by 1 and take 1 Worker, or send 1 Priest from your supply to the Order of a Cult and receive 4 Coins. You can choose not to place a Priest from your supply and advance only 1 space in the Cult of your choice instead.
In Phase I “Income,” obtain 1 Ship.
When you trade with a Dwelling, Trading house, or Temple, immediately get 1 additional Victory point. When you trade with a Stronghold, Sanctuary, or Shipyard, immediately get 2 additional Victory points.
When you pass, immediately get 2/3/4/5 Victory points for 1–3/4–6/7–9/10+ total Trade markers you placed on the Game board.
Appendix III: New Scoring Tiles
Action phase: Get 2 additional Victory points for each trade you resolve.
Action phase: Get 2 additional Victory points for each advancement on either your Shipping or Exchange track. This also applies to Fakirs and Dwarves for each advancement on their Range tile.
Action phase: Get 5 additional Victory points when building your Stronghold, Sanctuary or Shipyard.
Action phase: Get 4 additional Victory points when building a Temple.
End of the round: Get 1 free Shipping advancement for every 5 spaces you have advanced in the Cult of Earth.
End of the round: Obtain 1 Ship for every 4 spaces you have advanced in the Cult of Water.
Appendix IV: New Bonus Cards
Get 1 additional Victory point for every trade resolve. During Phase II “Actions”, as a Special action, you can obtain 1 Ship.
In Phase I “Income,” collect 1 additional Worker and 1 additional Coin.
When returning this card after passing, get 3 Victory points for each of your Ships on the Game board.
In Phase I “Income,” obtain 1 Ship.
During Phase II “Actions”, as a Special action, you can move all of your Ships.
In Phase I “Income,” collect 2 additional Workers. When returning this card after passing, get 4 Victory points for each of your Stronghold, Sanctuary, and/ or Shipyard on the Game board. This Bonus card replaces the corresponding card without the Shipyard from the base game.
Appendix V: New Town Tiles
When taking this Town tile, get 4 Victory points and 1 Shipping advancement, or Range advancement for Fakirs and Dwarves.
When taking this Town tile, get 3 Victory points and obtain up to 2 Ships.
---
11
Appendix VI: Trading Rewards
Whenever you trade with a Structure belonging to another
faction, you receive different rewards based on the type
of Structure you traded with, as shown on the Shipping
Overview tiles. You cannot trade with the special terrain tiles
from the mini-expansion.
Dwelling: Get 1 Victory point and 1
Worker.
Trading house: Get 1 Victory point
and 1 Coin, and gain 2 Power.
Temple: Get 1 Victory point and either
gain 3 Power or 1 advancement in a
Cult track of your choice.
Sanctuary: Get 2 Victory points and
either gain 2 advancements in 1 Cult
track of your choice or 1 Priest.
Stronghold: Get 2 Victory points, 2
Coins and a “Transform and Build”
action getting 1 free Spade.
You can acquire additional Spades by paying Workers only if
that free Spade is not enough to transform the chosen space
into your Home terrain. If you trade with multiple Strongholds
in the same action, you receive multiple free Spades, but two
restrictions similar to the “2 Spades” Power action apply: first,
you can still build only 1 Dwelling during a single action;
second, you can use additional Spades gained from trades on
other Terrain Spaces only after completely transforming the
original space(s) into your Home terrain.
Shipyard: Get 2 Victory points and
either: obtain the Ship you used for
this trade rather than returning it to your supply, or remove the
Action token from your “Ship movement” Special action so
that you can use it again later in the same round. If you obtain
the Ship as the reward, you cannot move it again during the
same action. All trades are resolved after all movements have
been completed.
Appendix VII: New Faction Special Rules
AUREN
You start the game with 1 additional key, allowing you to
advance to the 10th
space of 1 Cult track without founding a
Town first. When you build your Shipyard, advance 2 steps
on a single Cult track of your choice as a one-time bonus (in
addition to any other bonuses).
HALFLINGS
After building a Dwelling, if you returned your Ship to your
supply instead of paying the normal cost to build that Dwelling,
you receive 1 Worker.
CULTISTS
Your Special ability applies only when you build or upgrade
a Structure. It is not triggered when an opposing faction gains
Power as a consequence of a trade.
SWARMLINGS
When you spend 1 Power to increase the Movement range of 1
of your Ships, you can move the Power from Bowl II to Bowl I,
instead of spending power normally.
GIANTS
When you trade at a Stronghold, you receive 2 free Spades
instead of just 1. When another Faction trades at your
Stronghold and receives a free Spade as a reward, they cannot
use that Spade to transform a Wasteland terrain.
FAKIRS
When you build your Stronghold, move your marker on the
Range tile 1 space to the right. This replaces the base game
Fakir Stronghold ability.
NOMADS
You can use your Stronghold special action (Sandstorm) on
Terrain spaces directly adjacent to one of your Ships, but you
must build a Dwelling there with the same action, and you must
return the Ship to your supply instead of paying the normal cost
for building that Dwelling.
YETIS
You can use the ability of your Stronghold on a Power action
on the new Power action board only if you have built both your
Stronghold and your Shipyard. Your faction’s Special ability to
pay 1 fewer Power when you take a Power action does apply
also to the Power actions on the new Power action board.
DRAGONLORDS
When you trade at a Stronghold, instead of receiving 1 free
Spade, you place 1 new Power token from the general supply
into your Bowl I.
ACOLYTES
When you trade at a Stronghold, instead of receiving 1 free
Spade, you advance up to 2 spaces in 1 Cult track of your
choice.
SHAPESHIFTERS
Your Special ability applies only when you build or upgrade
a Structure. It is not triggered when an opposing faction gains
Power as a consequence of a trade.
When you build your Shipyard, you can immediately change
your Home terrain once, as if you used your Stronghold action.
This change is free, and you can do this even if you have not
built your Stronghold yet.
RIVERWALKERS
When you spend 1 Power to increase the Movement range of 1
of your Ships, you can move that Ship up to 3 additional spaces
instead of 1.
---
Appendix VIII: New Starting Victory Points
The factions of Terra Mystica exist in a delicate balance, but they do differ in strength on different maps due to the varying distribution of terrain. When playing Terra Mystica, with or without any expansions, use the tables below to set each faction’s starting Victory points, instead of starting all factions at 20 Victory points. Do not use these Victory point tables when playing with the optional Factions for Auction rules from Fire & Ice.
Terra Mystica Base Game
30 Fakirs Giants
25 Acolytes Auren Alchemists
20 Ice Maidens Yetis Nomads Riverwalkers Shapeshifters Dragonlords Dwarves Mermaids
Swarmlings Halflings Chaos Magicians Witches
15 Engineers Cultists Darklings
Revised Base Game (Reverse side of Fire & Ice)
30 Alchemists
25 Ice Maidens Yetis Fakirs Acolytes Auren Giants
20 Riverwalkers Shapeshifters Dragonlords Dwarves Engineers Swarmlings Halflings
Cultists Chaos Magicians Witches
15 Nomads Mermaids Darklings
Fire & Ice
30 Dwarves
25 Ice Maidens Yetis Shapeshifters Fakirs Acolytes Halflings Swarmlings Auren Giants
Alchemists
20 Nomads Riverwalkers Dragonlords Engineers Witches
15 Mermaids Cultists Chaos Magicians Darklings
Lakes
30 Dwarves
25 Yetis Fakirs Swarmlings Giants
20 Ice Maidens Shapeshifters Dragonlords Acolytes Halflings Mermaids Auren Witches
Chaos Magicians Alchemists
15 Nomads Riverwalkers Engineers Cultists Darklings
Fjords
25 Fakirs Riverwalkers Shapeshifters Acolytes Halflings Auren Giants Alchemists
20 Ice Maidens Yetis Engineers Dwarves Dragonlords Mermaids Swarmlings Chaos Magicians
15 Nomads Witches Cultists Darklings
---
Why ask BoardGamesBot
Instead of flipping through the whole manual- Accurate answers Based exactly on this manual, with the source page.
- Save time Find the rule in seconds, without flipping 12 pages.
- Anytime Settle rules mid-game, straight from your phone.
- 100% free Create your free account and start using it now.
How it works
Three steps to the answer- 1 Ask your question Type your question about this game's rules.
- 2 Create your free account Takes 20 seconds — it only saves your history.
- 3 Get the answer The AI finds the exact rule and cites the manual page.
Expansion for
Published additional content
Manual published by the publisher · for rules reference only. More about the game on BoardGameGeek and Ludopedia .
