How to Play Fields of Arle
Feuerland Spiele, 999 Games, Filosofia Éditions · Board game · 2014
1–2 · best 2
Solo
60–120 min
Weight 3.9/5
8.9
rating
Ludopedia
8.0
rating
BGG
What do you want to do now
Ask questions about the game
Ask anything about Fields of Arle: rules, setup, components, complexity, price, or whether it fits your group.
Example questions
Continue this chat in the Assistant
Game page
Prices, ratings and our review
Rules manual
Official PDF file
Video: How to Play
Start here, then follow the written guide
Fields of Arle Walkthrough
Step by step
Objective of the Game
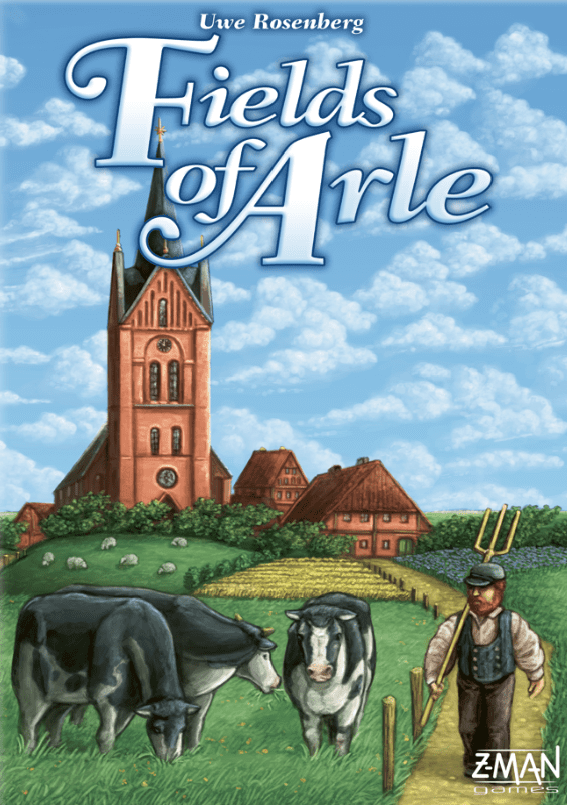
Welcome to the picturesque lands of East Frisia! In "Fields of Arle," you're not just playing a game; you're stepping into the boots of a flax farmer in the thriving village of Arle. Your ultimate goal? To become the most prosperous farmer by accumulating the most **Victory Points (VP)** over nine half-years. Will you focus on cultivating the finest flax, breeding animals, or reclaiming land from the moor? Perhaps you'll build prestigious structures like the village church, develop a robust vehicle fleet, or establish workshops and inns. Every decision shapes your farm and your path to prosperity. At the end of the game, a single scoring will reveal which player has made the most of their four and a half years in Arle!Preparation (Setup)
Getting your farm ready for action is a breeze! Here's a step-by-step guide to setting up "Fields of Arle":- Attach Stickers: Before your first play, attach the stickers to the 12 **Goods Indicators** and 8 **Workers**. You can also make your white **Cattle tokens** "black pied" with the spot stickers.
- Place the Supply Board: Position the **Supply Board** between players. Place the depicted tiles on their appropriate spaces as indicated on the board. This includes **Fields**, **Plows and Peat Boats**, **Vehicles**, **Clothing**, **Stalls and Depots**, **Stables and Double Stalls**, and **Forests and Parks**. (Don't worry if your table is small; you can just stack tiles nearby.)
- Place the Game Board: Place the large **Game Board** next to the **Supply Board**.
- Half Year Counter: Put the orange **Half Year Counter** on space 1 of the **Half Year Track**.
- Choose Colors & Tools: Each player chooses a color and takes their round **Tool Indicators**. Place one of each on the leftmost space of the 10 **Tool Tracks** on the **Game Board** (e.g., Fish Traps, Fleshing Beams).
- Starting Player: Randomly determine the **Starting Player**, who receives the **Starting Player Marker**.
- Workers on Months: Place 1 **Worker** of each color on each of the spaces "July" to "October" on the **Game Board**, with the **Starting Player's** tokens on top.
- Distribute Buildings: Place the **Building** tiles on the matching colored spaces on the **Game Board**. If there are more buildings than spaces for a color, randomly select which ones to place and which to remove from the game. For your first game, use the 4 light green **Building** tiles.
- Home Boards: Each player takes a **Home Board** and places it on their side of the table below the **Supply Board**. Place the depicted components on your **Home Board** as indicated, including certain tiles, 1 **Horse**, 4 **Peat Tokens**, and 6 **Goods Indicators**.
- Travel Destinations and Barn: Each player also receives a "Travel Destinations and Barn" **Storage Board** and a set of **Travel Destinations** in their player color. Place these **Travel Destinations** on the appropriate spaces of your **Storage Board** (your **Barn** starts empty below them).
- Overview Sheets: Each player receives an **Overview Sheet** detailing the game's actions.
- Initial Resources: Each player takes 4 **Wood**, 4 **Clay**, and 3 **Peat**, placing them next to their **Home Board** in their personal supply.
- Remaining Components: Sort the remaining **Building Materials** (**Wood/Timber** and **Clay/Brick** tiles), as well as the wooden **Animal** and **Peat** tokens, and place them within easy reach.
- Scoring Pad: The **Scoring Pad** won't be needed until the end of the game.
The Turn of Play
A game of "Fields of Arle" unfolds over nine half-years, alternating between summer and winter. Each half-year consists of three exciting phases:Phase 1: Preparations
At the beginning of each new half-year (except the very first, as workers are already placed), you'll reset your **Workers**. Place 4 **Workers** on the four **Month Spaces** ("July" to "October" for Summer, "January" to "April" for Winter), with the **Starting Player's** workers on top. The **Starting Player Marker** can change hands via a "Special Action" during the **Work Phase**.Phase 2: Work Phase
This is where the magic happens! Players take turns placing their **Workers** on empty **Action Spaces** of the current half-year.- Worker Placement: You'll take your **Workers** from left to right off the **Month Spaces**. In each month, the **Starting Player** goes first.
- Seasonal Actions: Be mindful of the seasons! **Summer Action Spaces** are only available in odd-numbered half-years, and **Winter Action Spaces** in even-numbered ones. There are 15 different **Action Spaces** to choose from each half-year.
- Immediate Actions: As soon as you place a **Worker** on an **Action Space**, you immediately carry out the corresponding action.
- Blocked Spaces: Each **Action Space** can only be occupied by a single **Worker** until the end of the current **Work Phase**.
- Passing: You're not forced to place a **Worker**! You can remove a **Worker** from its **Month Space** and do nothing on your turn if you wish.
- The Laborer: This special **Action Space** allows you to use an already occupied **Action Space** again, as long as it belongs to the current half-year.
- Costs: Spaces with a white/blue Frisian pattern on the **Game Board** indicate costs. You must pay the depicted goods to:
- Get the **Building** below that space.
- Move one of your **Tool Indicators** one space to the right.
- Use the action on that **Action Space**.
- Special Action: Once per half-year, one of your 8 **Workers** can use an **Action Space** from the *opposite* season (e.g., a Summer action in Winter). If you do this, your opponent receives the **Starting Player Marker** for the next half-year. If no one uses this, the marker changes hands automatically.
- Anytime Actions: You can perform these actions at any point during the **Work Phase**, even after placing all your **Workers**:
- Load Vehicles: Load your **Vehicles** with **Building Materials** (to upgrade to **Timber/Bricks**), **Fabrics** (to upgrade to **Clothing**), or **Travel Destination Tiles** (to receive **Food**).
- Rearrange Animals: Move your **Animals** around your **Home Board** according to the **Animal Husbandry** rules.
- Peat Boat Exchange: If you own a **Peat Boat**, you can exchange **Peat** for goods on the **Goods Track** at a 1:1 ratio, any number of times.
Phase 3: Inventorying
The **Work Phase** ends when all 8 **Workers** have been used and both players declare the end of the phase. This happens in November (after a Summer/Fall half-year) and May (after a Winter/Spring half-year). You'll then take stock of your belongings:- Empty Vehicles:
- Place **Timber**, **Bricks**, and **Clothing** from your **Vehicles** into your personal supply.
- Place **Travel Destination Tiles** from your **Vehicles** face down on your **Travel Experience Track** (on your **Home Board**). The first tile goes at the bottom, and subsequent tiles are placed above, indicating your **Travel Experience VP**.
- Milking (November only): Receive **Food** based on the number of **Sheep** and **Cattle** on your **Home Board** (up to 6 **Food** total).
- Harvest (November only): Receive 1 **Grain** per **Grain Field** and 1 **Flax** per **Flax Field** on your **Home Board**. Also, receive 1 **Wood** per **Forest** (not **Parks**).
- Baby Animals (May only): **Animals** breed!
- In each **Stall** with exactly 2 **Animals** of the same type, receive a third **Animal**.
- In each **Stable** with 2, 3, or 5 **Animals** of the same type, receive another **Animal**.
- In **Stables** with exactly 4 **Animals** of the same type, receive 2 **Animals**.
- **Double Stalls** count as two separate **Stalls**.
- Shearing (May only): Receive **Wool** based on the number of **Sheep** on your **Home Board** (up to 3 **Wool** total). Newborn **Sheep** count!
- Sustenance:
- November: Pay 3 **Food** and 2 **Peat** (as fuel for winter). If you're short on **Food**, pay 1 **Grain** instead. If out of **Grain**, pay 1 **Animal** per missing **Food**. If short on **Peat**, pay 1 **Wood** (or **Timber**) instead. Missing items cost 2 **VP** each.
- May: Pay 3 **Food**. If short, pay 1 **Grain** instead. If out of **Grain**, pay 1 **Animal** per missing **Food**. Missing **Food** costs 2 **VP**.
End of Game and Scoring
The game concludes after a total of nine half-years, specifically after the November **Inventorying** of the last Summer half-year. Your **Animals** won't breed anymore. Before final scoring, if you own a **Peat Boat**, you can use it to exchange any remaining **Peat** for other goods that might provide **Victory Points** on the **Goods Track**. Use the **Scoring Pad** to tally your **Victory Points** in the following categories:- Clothing Tiles and Building Materials:
- **Bricks**, **Linen**, **Woolen**, and **Leather** are each worth 1 **VP**.
- **Summer Wear**, **Winter Wear**, and **Leather Wear** are each worth 2 **VP**.
- Each **Timber** is worth ½ **VP** (do not round).
- Equipment in the Barn: Add up the **VP** from your **Plows**, **Peat Boats**, and **Vehicles**. Subtract 3 **VP** unless you have at least one **Large Vehicle** in your **Barn**.
- Travel Experience: The first empty space (from the bottom) on your **Travel Experience Track** indicates your **VP** for traveling (up to 10 **VP**).
- Tools: Add up the **VP** from your **Tools** on the 10 **Tool Tracks** on the **Game Board**.
- Goods Track:
- Each **Goods Indicator** on space 15 is worth 3 **VP**.
- On spaces 11-14, 2 **VP**.
- On spaces 7-10, 1 **VP**.
- VP on Home Board: Add up **VP** from your **Buildings**, **Stalls**, **Stables**, **Forests**, and **Parks**. Subtract 4 **VP** for each hydrated **Moor Section**, 1 **VP** for each dehydrated **Moor Section**, and 1 **VP** for each **Tidal Flat Space** (of the top row) left on your **Home Board**.
- Animals on Home Board: This is a unique scoring category!
- Each **Animal** of the type you have the *least* of is worth 2 **VP**.
- Each **Animal** of the type you have the *second least* of is worth 1 **VP**.
- **Animals** of the third type are not worth any **VP**.
- Supply Bottlenecks: This category tracks **VP** losses from missing **Food** and **Fuel** during **Inventorying**. No additional **VP** are lost here during final scoring.
Tips for Winning
To truly thrive in Arle, consider these strategies:- Balance Your Animal Husbandry: The scoring for **Animals** heavily rewards diversity. Aim to have a relatively even number of **Sheep**, **Cattle**, and **Horses** to maximize their **VP**. Don't just focus on one type!
- Strategic Land Reclamation: Both **Dike Building** and **Cutting Peat** grant you valuable **Land Spaces** for expansion. Prioritize these actions early to open up more opportunities for **Fields**, **Stalls**, and **Buildings**. Remember, unfinished **Dikes** and hydrated **Moor Sections** cost **VP** at the end of the game!
- Tool Upgrades are Key: Many actions, especially those involving resource collection and conversion, scale with the number of **Tools** you possess. Investing in **Tool Indicators** via the **Master** action can significantly boost your efficiency throughout the game.
More videos
More rules explanations from the community


Rules manual
Official PDF file
Prefer the Official PDF?
Download the official Fields of Arle rulebook or browse it online with our AI rules assistant.
View Rulebook PDF
Frequently Asked Questions
Quick answers about the rules
What is the objective of Fields of Arle?
Welcome to the picturesque lands of East Frisia! In "Fields of Arle," you're not just playing a game; you're stepping into the boots of a flax farmer in the thriving village of Arle. Your ultimate goal? To become the most prosperous farmer by accumulating the most **Victory Points (VP)** over nine half-years. Will you focus on cultivating the finest flax, breeding animals, or reclaiming land from the moor? Perhaps you'll build prestigious structures like the village church, develop a robust…
How do you set up Fields of Arle?
Getting your farm ready for action is a breeze! Here's a step-by-step guide to setting up "Fields of Arle": Attach Stickers: Before your first play, attach the stickers to the 12 **Goods Indicators** and 8 **Workers**. You can also make your white **Cattle tokens** "black pied" with the spot stickers. Place the Supply Board: Position the **Supply Board** between players. Place the depicted tiles on their appropriate spaces as indicated on the board. This includes **Fields**, **Plows and Peat…
How do you play Fields of Arle?
A game of "Fields of Arle" unfolds over nine half-years, alternating between summer and winter. Each half-year consists of three exciting phases: Phase 1: Preparations At the beginning of each new half-year (except the very first, as workers are already placed), you'll reset your **Workers**. Place 4 **Workers** on the four **Month Spaces** ("July" to "October" for Summer, "January" to "April" for Winter), with the **Starting Player's** workers on top. The **Starting Player Marker** can change…
How does Fields of Arle end, and how do you score?
The game concludes after a total of nine half-years, specifically after the November **Inventorying** of the last Summer half-year. Your **Animals** won't breed anymore. Before final scoring, if you own a **Peat Boat**, you can use it to exchange any remaining **Peat** for other goods that might provide **Victory Points** on the **Goods Track**. Use the **Scoring Pad** to tally your **Victory Points** in the following categories: Clothing Tiles and Building Materials: **Bricks**, **Linen**…
What are some tips for winning Fields of Arle?
To truly thrive in Arle, consider these strategies: Balance Your Animal Husbandry: The scoring for **Animals** heavily rewards diversity. Aim to have a relatively even number of **Sheep**, **Cattle**, and **Horses** to maximize their **VP**. Don't just focus on one type! Strategic Land Reclamation: Both **Dike Building** and **Cutting Peat** grant you valuable **Land Spaces** for expansion. Prioritize these actions early to open up more opportunities for **Fields**, **Stalls**, and…
Want to compare prices and check reviews?
Find where to buy at the lowest price, price history, and our full game review.
View Fields of Arle
Expansions
Published additional content

Other Games You'll Like
Based on mechanics and theme