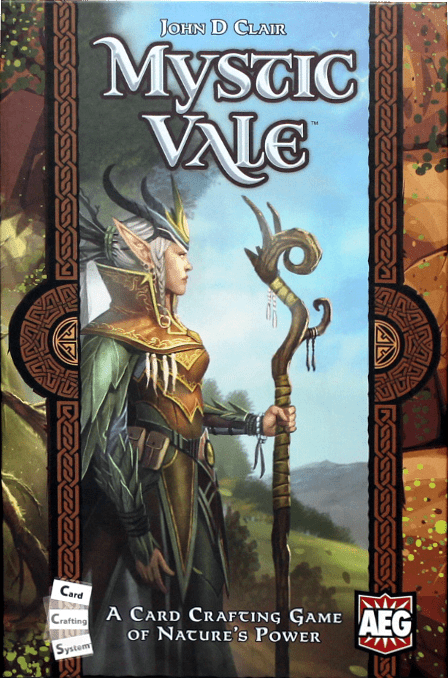
How to Play Mystic Vale: Vale of Magic
Alderac Entertainment Group · Board game · 2016- Players
- 2–4 · best 2
- Play Time
- 45–60 min
- Weight
- Weight 2.2/5
- Year
- Year 2016
- Minimum age
- Minimum age 14+
What do you want to do now
Ask anything about Mystic Vale: Vale of Magic: rules, setup, components, complexity, price, or whether it fits your group.
Step by step
Game Objective
The objective of the game is to accumulate the highest number of victory points. Players are trying to develop their lands and harvest resources to achieve victory. The Vale of Magic expansion does not introduce new rules, it only adds more advancements and vale cards to be incorporated into the base game.
Preparation (Setup)
To set up the game, follow these steps:
- Player Decks: Each player shuffles their deck and places it face down in front of them.
- The Commons:
- Separate all Fertile Soil advancements and place them in a separate deck.
- Separate all other advancements into decks according to their level symbols (Level 1, Level 2, Level 3).
- Shuffle all Level 1 advancements and count a number of advancements to form a deck based on the number of players:
- 2 players: 12 advancements
- 3 players: 15 advancements
- 4 players: 18 advancements
- Flip over the top 3 Level 1, Level 2, and Level 3 advancements.
- Vale Cards: Shuffle both vale decks and flip 4 cards face up from each deck.
- Setup VP Tokens: Place the tokens in a pile based on the number of players:
- 2 players: 23 tokens
- 3 players: 28 tokens
- 4 players: 33 tokens
- Setup Fields: Each player sets up their starting field until they have two Cursed Lands in their field and a third as on-deck.
- Determine Starting Player: Place the tokens with the active side face up and shuffle them. Each player randomly draws a token and flips it over. The player with the starting player symbol will be the starting player for this game.
Players are now ready to begin the game!
Game Flow
The game progresses in turns, and each turn is divided into the following phases, in order:
- Planting Phase
In this phase, you must choose between pass or push:
- If you choose to pass, immediately skip to your Harvest Phase.
- If you choose to push, place your on-deck card into your field, to the right of any previously played cards. Resolve that card's "When Played" abilities (if any), then flip the top card of your deck and place it back on top of your deck face up as your new on-deck card.
- Determine if you Spoiled.
- If you did not Spoil, return to step A and repeat.
- Harvest Phase
If you chose to end your Planting Phase before Spoiling, you now complete your Harvest Phase (again, only if you did not Spoil). In this phase, you may:
- Count your mana and spirit symbols (mana, mana, mana, mana).
- Resolve "Harvest" abilities on cards in your field.
- Score victory points.
- Buy up to 2 vale cards.
- Buy up to 2 advancements.
All of this can be done in any order.
- Discard Phase
In this phase, you must:
- Envelope each advancement you bought (if any).
- Replenish the vale cards and advancements in the commons.
The next player may now begin their turn.
- Prep Phase
While your opponent is starting their turn, prepare your field until you have three or more visible mana (in your field and your on-deck card).
Actions and How to Play
During the game, players perform various actions and interact with different card types:
- Pass or Push: During the Planting Phase, you must choose between passing (ending the phase and going to the Harvest Phase) or pushing (placing your on-deck card into your field and revealing a new on-deck card).
- Spoil: Refer to the manual for details on this section.
- "When Played" Abilities: These abilities are resolved when a card moves from being your on-deck card to being placed in your field.
- Goldenwing Gryphon: If your token is face down (the token you flip face up when you Spoil), you may flip it face up so the active side is revealed.
- Lifetap Oracle: For each mana on this card, you search your deck for any card and may place it into your discard pile (you will likely want to choose a Cursed Land). Then, shuffle the cards in your deck (do not shuffle your discard pile into your deck) and reveal your next on-deck card. If Lifetap Oracle was the bottom card of your deck, such that playing it results in no cards in your deck, first shuffle your discard pile to create a new deck, then resolve Lifetap Oracle's ability.
- "Harvest" Abilities: These abilities are resolved during your Harvest Phase, if the card is in your field. You cannot resolve these abilities if you Spoil.
- Canopy Explorer: For each mana on this card, you may take the top card of your deck (the first face-down card below your current on-deck card) and place it face up into your field as the rightmost card. If there are 2 mana on the card, you would take the top 2 face-down cards below your on-deck card and place them at the end of your field (you must take exactly 2 cards). If you do not have enough cards in your deck to fully resolve this effect, shuffle your discard pile and it becomes your deck, then complete the effect.
- Ley Line Overflow: You may resolve Harvest abilities whenever you want during your Harvest Phase. Typically, you will want to resolve this ability last. For example, you will usually want to count all the regular mana you get from your cards, gain mana from your token if desired/possible, gain mana from Harvest effects on your cards and your vales. Then, last, use Ley Line Overflow's ability to double the total. If you have multiple Ley Line Overflows, you resolve them one after another.
- Manadew Meadow: Once each Harvest Phase, you may choose 1 card in your field. For each mana on that card, you may gain 1 mana.
- Vale of Magic: Once each Harvest Phase, you must gain 1 mana.
- "Discard" Abilities: These abilities are triggered during your Discard Phase.
- Hatchery: If the Hatchery card is the "first" card in your field (i.e., the leftmost card), then you discard it normally with all other cards in your field. However, if it is in any position other than first, you may choose not to discard it. In this case, you would discard all other cards in your field, place the Hatchery card as the "first" (leftmost) card in your field, then during your Planting Phase, play cards to the right as the second card, third card, fourth card, etc.
- "When Bought" Abilities: These abilities are triggered at the moment the card is bought and can be ignored for the rest of the game.
- Amberwood, Direwolf Burrow, Shimmercliff Rookery: If your token is face down (the token you flip face up when you Spoil), you may flip it face up so the active side is revealed. You may flip your token face down to gain 1 mana at any time during your Harvest Phase.
- Earth Cradle: Gain 1 victory point for each vale you own. This includes Earth Cradle and any other vales you may have bought this turn.
- Fauna Hollow: You gain 2 extra mana to spend this turn on buying advancements (or resolving other effects, if possible).
- Sunwell Temple: Take the top card of the Level 1 vale deck and add it to the vales you own. If the card has a text effect, you cannot use the effect this turn. If the card has a "When Bought" effect, you do not gain the benefit.
- Wood Sprite Hoard: Look at the top three face-down cards of your deck (your on-deck card is not considered part of your deck, so it is not one of the three cards). You may place any of those three cards into your discard pile. The remainder must be placed back, face down, in the same order you drew them. If there are only 0, 1, or 2 cards remaining in your deck, look at all of them and discard any of your choice.
- Aether Tree: This ability is available for use during your Planting Phase (or, more rarely, your Prep Phase). During your Planting Phase, if you "push", and the new on-deck card you reveal would result in you Spoiling, instead of Spoiling, you may discard Aether Tree (place it back in the game box and it is considered out of the game). If you do so, choose one card in your field; all mana on that card, except for that from a Cursed Land, is canceled. If this results in you no longer Spoiling, then you continue your turn normally, choosing between passing or pushing.
End of Game and Scoring
Refer to the manual for details on this section.
Tips for Winning
- Ley Line Overflow: You will generally want to resolve the Ley Line Overflow ability last during your Harvest Phase to double the total mana you have accumulated from other sources. If you have multiple Ley Line Overflows, resolve them one after another to quadruple your total mana.
- Hatchery: Use the Hatchery ability to keep an important card in your field for an extra turn by placing it as the first (leftmost) card during your Discard Phase. If you have two or more cards with Hatchery, you can choose the order to resolve them, allowing a card to remain in your field for two extra turns.
- Sporeling Reclaimer: Remember that the effect of Sporeling Reclaimer only matters in the total point count at the end of the game. It grants 1 victory point for each mana on cards in your deck, which means all advancements you own, not just the remaining cards in your draw deck.
Rules manual
Official PDF file
Frequently Asked Questions
Quick answers about the rules
What is the objective of Mystic Vale: Vale of Magic?
How do you set up Mystic Vale: Vale of Magic?
How do you play Mystic Vale: Vale of Magic?
How does Mystic Vale: Vale of Magic end, and how do you score?
What are some tips for winning Mystic Vale: Vale of Magic?
Expansion for
Published additional content