
/pic5968932.jpg)
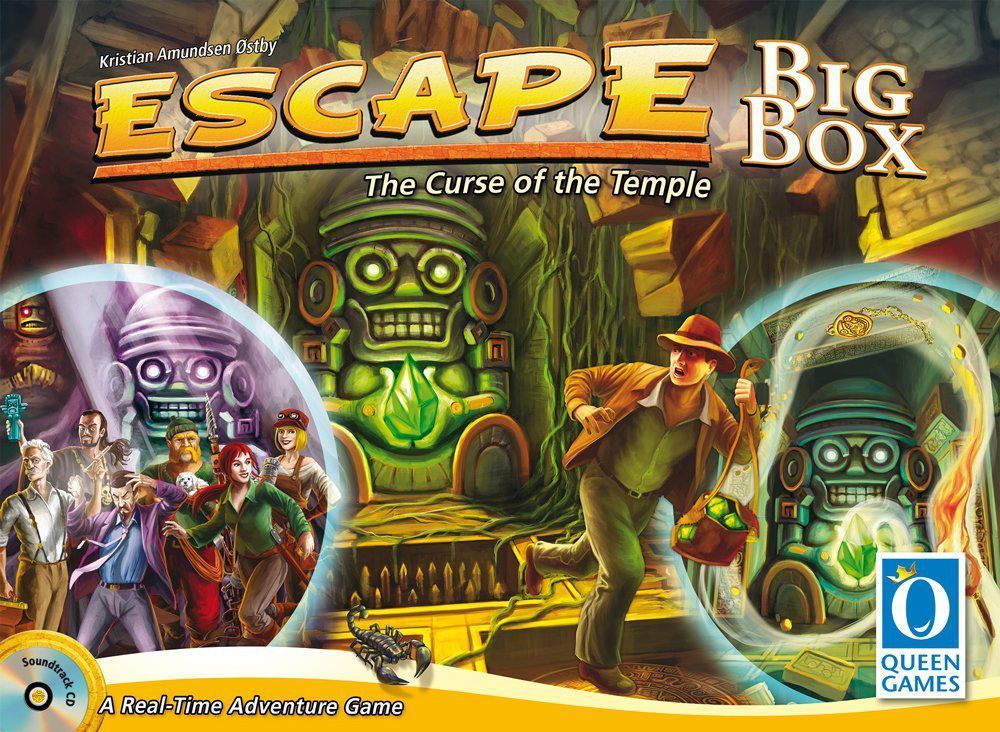
What is your question about Escape: The Curse of the Temple – Big Box 2nd Edition?
Ask before downloading the manual: the assistant was trained on this file and answers instantly, citing the exact page.
Ask questions about the game
Ask anything about Escape: The Curse of the Temple – Big Box 2nd Edition: rules, setup, components, complexity, price, or whether it fits your group.
Write your question first. You will create your free account to see the answer — it takes 20 seconds.
Full rulebook
Browse the manual or download the original PDFFull manual text available to read Open text
Kristian Amundsen Østby
ESCAPE
The Curse of the Temple
2nd Edition
BIG
BOX
---
Escape – The Curse of the Temple 4
Basic Game: Set-up 5
Module 1: Curses 10
Module 2: Treasures 10
Escape – Illusions – Expansion 1 12
Module 3: Illusion Chambers 12
Module 4: Special Chambers 14
Escape – Quest – Expansion 2 16
Module 5: Quest Chambers 17
Module 6: Characters 20
Escape – Traps – Expansion 3 22
Module 7: Trap Chambers 22
Module 8: Time Chambers 24
Queenie: The Pit 26
Queenie: Doomed 26
Queenie: The Fountain 27
Queenie: Quest Chambers 28
Queenie: The Maze 29
Queenie: New Characters 30
Queenie: The Maya Calendar 32
Queenie: Exchange Chamber & Teleport Chamber 34
Queenie: Totem Chamber 35
Queenie: The Cursed Gems 35
Index
2
---
Module 1: Curses
Module 2: Treasures
Module 3: Illusion Chambers
Module 4: Special Chambers
Module 5: Quest Chambers
Module 6: Characters
Module 7: Trap Chambers
Module 8: Time Chambers
6 Main Chambers (Basic Game)
13 Basic Chambers (Basic Game)
The Pit: 1
The Fountain: 1
Quest Chambers: 3
The Maze: 2
New Characters: 2
The Maya Calendar: 1
Exchange & Teleport Chambers: 2
Totem Chamber: 1
13 Queenie Chambers: 3
13 Chambers for
---
• 6 main chamber tiles
• 13 basic chamber tiles – without purple mask and/or
treasure icon
• 1 gem depot (for the magic gems)
• 25 magic gems
• 25 dice - 5 for each adventurer
• 5 adventurer figures - 1 of each player color
• 5 adventurer tokens - 1 of each player color
• 1 CD containing soundtrack and audio introduction
• 1 Rule book
Game components for the basic game
You must activate the magic gems in the temple
chambers in order to banish the curse, and you have only
ten minutes to do so before the temple collapses. Don‘t sit still for a
second – start running now and you might just escape!
Starting
chamber
Exit Gem chamber
x2 (key)
Gem chamber
x 2 (torch)
TorchKeyAdventurer Black
mask
Golden
mask
You need the chambers
with a purple mask and/
or treasure icon only if
you want to play with the
expansion modules.
A game by Kristian Amundsen Østby for 1 - 5 players
Summary and object of the game
Escape is a real-time board game. Instead of playing the
game in rounds, each player rolls his five dice as quickly
and as often as he can without waiting for his teammates!
Players have only ten minutes to escape from the col-
lapsing temple, so don’t dawdle. Every second you delay
brings you a step closer to being entombed. While search-
ing for the exit, the players will discover new chambers
– but they’ll need the right combination of adventurer, key
and torch icons to enter and explore these chambers. Some
chambers contain magic gems, and players must use their
dice to activate as many gems as possible in order to break
the curse blocking the exit.
The sooner they find the exit chamber and the more magic
gems they activate, the easier it will be for them to escape.
Watch out, though, as twice during the game a gong will
sound throughout the temple heralding a countdown. Hurry
back to the starting chamber as only this location is
guaranteed to be safe. Fail to make it back in time, and you
lose one of your precious dice. Be sure to coordinate your
actions and look out for one another as some tasks can be
completed only collectively. What’s more, even if only one
player fails to escape the temple in time, all of you have
lost the game!
4
---
1. You will need the 6 main chambers and the 13 basic chambers (that is, all the chambers without the purple mask and/or treasure icon). Set aside the starting chamber and exit. Mix the remaining chamber tiles face down, then stack them as a draw pile. Place the starting chamber in the center of the playing area, then place 2 randomly drawn chamber tiles next to it, as shown in the illustration below. Finally, take the top 4 tiles of the draw pile, shuffle them together with the exit tile, then place them on the bottom of the draw pile.
Exception: If you are playing alone or with a second player, insert the exit tile in the middle of the draw pile.
2. Use the chart at right to determine how many magic gems to place into the gem depot. Then place 2 additional magic gems next to the depot.
1 & 2 players........7 gems
3 players.............11 gems
4 players.............14 gems
5 players.............16 gems
Set-up of the basic game
The stairway on each tile must touch the starting chamber.
Starting chamber
draw pile
Gem depot
3. Each player selects his color, then takes 5 dice as well as the appropriately colored adventurer figure and adventurer token. All players place their figure on the starting chamber and keep their token in front of them. This will help you to identify your fellow players quickly.
Exception: If you are playing alone, take 7 dice instead of 5.
The CD contains an audio introduction to the game (in 3 languages) and 2 versions of a ten-minute soundtrack. The audio introduction provides a summary of Escape, and we suggest you listen to it before your first game. When playing the game, choose the version of the soundtrack at random or select the one that you prefer. Your soundtrack choice will not affect the length of the game as the playing time on both is identical. For your first game, we recommend track 1.
Alternatively, you can download the soundtrack from the website www.escape-queen-games.com and listen to it on any device of your choice.
Place all components not needed for the basic game back in the game box.
5
---
The die icons
The temple chambers
Adventurers who are in the same chamber may help one
another. For example, if a player rolls a golden mask and
doesn’t use it for himself, one other player may use it to
break the spell on up to two of his accursed dice.
Adventurer (x2): You need this if you want to
move from chamber to chamber or discover
new chambers.
Each chamber of the temple has different features:
Magic gem icon
One or more players must roll the indicated number of die
icons in order to activate the magic gem.
Some chambers have no gem icons, while others show 1
or 3 gem icons.
Entrance
A new chamber from the draw pile must be placed next to
an entrance on a face-up tile.
Die icons with a red frame
A player must roll these icons if he wants to enter this
chamber.
Stairway entrance
This is the chamber’s entryway; when this tile is added
to the temple, the stairway must connect this tile to the
temple.
Each die shows five different icons:
Black mask: If you roll a black mask, you are
under a spell and the die is accursed. Place this
die aside; you may use it again only after the spell
has been broken.
Golden mask: A golden mask breaks the spell
on up to two black masks. With the spell
broken, the player may now use these dice again.
Key and torch: You may enter certain
chambers only by rolling keys or torches;
you will also need these icons to activate the magic gems.
Note: With each golden mask, you can help only one other
player. Helping one another this way does not change ownership
of the dice!
Example: Ani has rolled two black masks and must place both dice
aside. For the time being, she has only three dice left to roll.
Example: Ani has rolled a golden mask and may now add her two
dice with the black masks to her next roll.
Example: Ani (red) has rolled one golden and one black mask.
Because Frank (blue) is also in this chamber and worse off, she
decides to let him use the golden mask. On his next roll, Frank rolls
all five of his dice, while Ani can roll only four.
Entrance
Magic gem
icon
Entrance
Stairway
entrance
Die icons with
red frame
6
---
The actions
Using various dice combinations, the players may perform
different actions.
1. Enter a chamber
2. Discover a new chamber
3. Activate magic gems
4. Escape
5. Provoke a turn of fate
After a player has performed one action, he must re-roll all dice used for this action.
A player may put aside any dice not used for an action and
use them for a later action.
At any time, a player may re-roll any dice he set aside previously (other than black masks, which can be used again
only with the help of a golden mask).
The actions in detail:
A player may enter a chamber only if its entrance is not
blocked.
A player inside a chamber with one or more unblocked
entrances that don’t already connect to other chambers
may discover a new chamber.
1. Enter a chamber
2. Discover a chamber
In order to enter a chamber, the player must roll the icons
shown in a red frame inside the new chamber.
A player must roll two adventurer icons in order to draw
one new chamber from the draw pile and place it next to his current chamber. The new chamber’s entrance
must join the current chamber’s entrance.
Example: Frank may enter only the chamber shown on top because
the left entrance is blocked by a wall and there is no adjoining
chamber at the right entrance – at least not yet.
Example: Frank is inside a chamber that has two entrances with-
out an adjoining chamber. Therefore, he could discover two new
chambers.
Example: Frank uses two adventurer icons and connects the stair-
way entrance of the top chamber from the draw pile to one of the
entrances of his current chamber.
Example: Frank has rolled his dice and uses the two adventurer
icons to enter the next chamber.
Blocked
entrance
Open
passage
Entrance
Open
passage
Open
passage
Entrance
Entrance
7
---
After a player has escaped, he no longer needs all of his tools, so he can give one of his dice to any adventurer still inside the temple. This adventurer may use the die immediately.
4. Escape
In order to escape, a player must roll as many keys as the number of gems in the gem depot plus one. Each player must roll the required number of key icons by himself!
Example: Frank has rolled the 3 keys required and thus can escape from the temple.
Example: Frank has managed to escape and gives one of his dice to Ani (red), who can use it immediately.
Exit chamber
Note: You may cooperate to activate 1 gem. You must cooperate to activate 2 or 3 gems.
You will find two types of chambers in which you can activate magic gems:
Several adventurers inside a chamber containing one or more magic gem icons may join forces in order to obtain the required number of key or torch icons.
3. Activate magic gems
A player inside a chamber containing one or more magic gem icons must roll the required number of torch or key icons in order to activate the number of magic gems shown. After a gem has been successfully activated, take a gem from the gem depot and place it on the appropriate gem icon.
If at least one of a chamber’s gems has been activated, no adventurer may activate any further gems inside this chamber.
Chamber with 1 gem icon Chamber with 3 gem icons
Example: Frank has rolled 4 torch icons and activates the magic gem inside his current chamber. He removes one gem from the depot and places it inside the chamber.
Example: Ani (red) and Frank (blue) together have rolled 7 keys and decide to activate 2 magic gems. They place 2 gems from the depot on the corresponding gem icon inside their chamber.
Example: Two of this chamber’s gems have been activated, so players cannot activate any more gems here.
A player can escape only if he is inside the exit chamber.
8
---
During the soundtrack, you will hear 3 countdowns. The first starts with the bang of a gong and ends with a door being slammed. The second countdown starts with two bangs of a gong and ends with a door being slammed. These two countdowns indicate that you need to rush back to the starting chamber. Any adventurer who doesn’t make it to the starting chamber before the door slams shut loses one of his dice for the rest of the game. Return any such lost dice to the game box. After the door slams shut, you can continue to explore the temple, proceeding from the chamber where you're currently located. The third countdown starts with three bangs of a gong and ends with the sound of the temple collapsing; this signals the end of the game after exactly 10 minutes.
When all players are prepared to begin, insert the CD into your CD-player and start playing one of the soundtracks (see page 3). After a short introduction, the game begins with the command “Escape!” Immediately start rolling your dice and do not forget that you have only 10 minutes to escape!
The game ends after 10 minutes – that is, at the end of the third countdown. If any adventurer is inside the temple when it collapses, then all players have lost the game!
Players may agree before the start of the game to increase the number of gems in the gem depot.
There are two variants:
If there are too many accursed dice in play, players may transfer one of the two gems lying next to the depot to the depot.
Then, all adventurers may re-roll all of their accursed dice (black masks). Players must reach this decision unanimously!
A turn of fate can be provoked only twice during the course of the game.
If all players manage to escape from the temple before it collapses, they have won the game as a team!
Experts: 3 additional magic gems.
Professionals: 6 additional magic gems. The action “Provoke a turn of fate” is no longer available.
The soundtrack
The adventure starts
End of the game
For a more challenging game
Note: Do not use the turn of fate too lightheartedly because each additional gem makes it harder to escape.
Example: With black masks slowing their progress and hastening their doom, the adventurers take a chance with fate, freeing their black masks from the curse while decreasing their odds of making it out alive. One additional gem is placed on the depot, then all players may re-roll their black masks.
5. Provoke a turn of fate
Hint: For an easy start, we recommend playing your first game without the soundtrack for a few minutes in order to get accustomed to the mechanisms of the game.
Example: Ani (red) came close but failed to make it into the starting chamber before the door slammed shut. Thus, she must play with one less die for the remainder of the game. (If Ani doesn‘t make it back to the starting chamber in the second countdown, she will lose a second die.)
9
---
Module 1: Curses
Additional game components for the modules “Curses” and “Treasures”
A game of Escape is even more exciting and varied when you include one or both of the following modules.
Module 1: Curses
Module 2: Treasures
Each time you discover a new chamber (2. Discover a new chamber) that shows a purple mask, draw the top card from this pile and place it in front of you, face up.
Example: Frank discovers a chamber with a purple mask. He draws the top card from the curse cards pile and places it in front of him.
Example: Frank uses 2 keys to claim a treasure tile.
Example: Frank has rolled the dice icons required to lift the curse and removes the card from the game.
Note: Ignore any purple masks revealed during set-up at the start of the game.
Example: Frank discovers a chamber with a treasure icon and places the top tile from the treasure tiles stack on the treasure icon.
Curses have a variety of effects. If a player rolls the dice combination shown on the curse card all by himself, he has lifted the curse and removes the card from the game.
For Module 1: Curses & Module 2: Treasures
• 13 curse and treasure chambers
For Module 1: Curses • 14 curse cards
For Module 2: Treasures • 13 treasure tiles
Note: If a player draws a curse card identical to one already in front of him, he discards the newly drawn card without any further effect.
Module 2: Treasures
Each time you discover a new chamber (2. Discover a new chamber) that shows a treasure icon, draw the top tile from this pile and place it face down on the treasure icon.
During set-up, shuffle the treasure tiles and stack them face down in easy reach of all players.
During set-up, shuffle the curse cards and place the pile face down in easy reach of all players.
Any adventurer inside this chamber who rolls two keys may claim the treasure tile as an action. He keeps the tile face up in front of him until he uses it.
Once used, the tile is discarded in most cases.
3x
2x
2x
2x
3x
2x
2x
2x
2x
2x
2x
3x
To use “Curses”, “Treasures” or both modules, return the 13 basic chamber tiles to the box during set-up and use these 13 curse and treasure chamber tiles instead.
All of these chambers show a purple mask, a treasure icon, or both.
10
---
The treasure tiles
Healing mask:
All adventurers may re-roll all of their black masks immediately. You may use this treasure only once.
Secret passage:
Place the secret passage so that it overlaps two adjacent chambers that have no open passage between them. This secret passage can be used by all adventurers until the end of the game.
Double torch:
This treasure serves as two torch icons. You may use this treasure only once.
Teleport:
Move your adventurer figure to any other chamber containing at least one other adventurer. The two chambers do not need to be next to each other. You may use this treasure only once.
Double key:
This treasure serves as two key icons. You may use this treasure only once.
Extra gem:
Take a magic gem from the depot and place it on the treasure tile. This gem is considered activated; keep the tile in front of you until the end of the game.
The curse cards
Trap:
You may not enter or discover a chamber.
Silence:
You are not allowed to talk.
Broken die:
Place one of your dice on this card. Retrieve the die only after you have lifted the curse.
Lost dice:
Each die of yours that falls off the table is permanently lost. Return the die to the game box.
Mask:
After rolling a golden mask, you (or the player of your choice in the same chamber as you) may re-roll only one black mask.
Cursed hand:
You must place one hand on top of your head and keep it there until this curse is lifted.
All curse cards interfere with players during the game. All treasure tiles provide advantages to players during the game.
11
---
Module 3: Illusion chambers
Spielmaterial
The expansion 1 contains components for a 6th adventurer, a new curse card, a new treasure tile, and two new game modules:
Module 3: Illusion chambers
Module 4: Special chambers
Each module can be used individually or combined with any or all of the other modules, providing numerous ways to play, explore and escape. Create your own adventure and get going!
You must own the „Escape“ basic game to use this expansion.
Except for the following modifications, the rules of the basic game remain unchanged.
Module 3: Illusion chambers
• 6 Illusionskammern
Module 4: Special chambers
• 3 linked chambers
• 2 double chambers
• 1 treasure chamber and 1 chalice
The 6th adventurer
• 1 adventurer figure
• 1 adventurer token
• 5 dice
New curse card & new treasure tile
• Treasure tile
• Curse card
When playing without module 1: Curses
Remove the 6 chambers showing only one magic gem from the 13 basic chambers and replace them with the 6 illusion chambers.
When playing with module 1: Curses
Remove the 6 chambers showing only one magic gem from the 13 enhanced chambers and replace them with the 6 illusion chambers.
The remaining set-up is not changed.
Note: During the game, ignore the purple masks inside any illusion chamber added to the temple.
Changes during set-up
2x
2x
3x
3x 3x 3x
3x 3x 3x 3x
12
---
Immediately after both the first and the second countdown, remove all discovered illusion chambers from the temple and place them on the bottom of the draw pile (example 1). This may result in gaps within the temple, so in order to continue exploring, the players must fill these gaps by discovering new chambers (example 2).
Replace – Before removing illusion chambers, place any magic gems that players have activated on these tiles back in the box (example 3). Thus, activating these gems will still help you escape! In addition, place any adventurers on these chambers on the starting chamber; since these players did not make it to safety in time, they must lose one of their dice (example 4).
Special features of the illusion chambers:
The adventure starts
Example 1: After the countdown ends, the players remove all illusion chambers in the temple and place them face down under the draw pile.
Example 4: Ani (red) is still inside an illusion chamber at the end of the countdown. Her adventurer returns to the starting chamber, and she loses one die.
Example 3: The players remove the magic gem from the illusion chamber and place it back in the box.
Example 2: If the players want to leave the starting chamber through the exit to the right, they must first discover a new chamber to fill in the gap. Will it connect to the chamber on the other side...?
13
---
To activate magic gems in the linked chambers, players must have discovered at least two of these tiles. What’s more, at least two of these chambers must have at least one adventurer on them at the same time trying to roll the icons required to activate the gems. Once the players have achieved this, they simultaneously activate 1 gem in each of these linked chambers (example 1). The linked chambers can be used like this only once during the game. Thus, if players manage to activate magic gems in 2 linked chambers, they cannot later activate the magic gem in the third linked chamber (example 2).
If players want to activate the magic gems in a double chamber, they must enter that chamber through its rear entrance (example 1). To do this, players need to place new chambers to create a path to the rear entrance (example 2).
Note: Before entering the back of a double chamber, a player must roll the icons shown in this tile‘s red frame, just as if he were entering the tile through any other entrance.
Note on Module 2: Treasures: You cannot use the „secret passage“ treasure tile to pass through the inner wall in a double chamber.
Example 2: Frank (blue) has managed to enter the double chamber by its rear entrance and can now attempt to activate the magic gems.
Example 1: Frank (blue) enters a double chamber by its entrance. However, he can activate the magic gems only if he enters the chamber by its rear entrance.
Module 4: Special chambers
After you have set aside the starting chamber and exit, mix the remaining chamber tiles face down with the special chamber tiles, making for a larger draw pile that usual. Continue with the basic set-up from this point.
Changes during set-up
Changes during: The actions
Example 2: Later, Frank (blue) discovers the third linked chamber. The magic gem in that chamber can no longer be activated because the two other linked chambers have already been used.
Example 1: Both Ani (red) and Frank (blue) are inside two different linked chambers at the same time. They manage to roll the required icons and activate 1 magic gem in each chamber.
Special features of linked chambers:
Special features of double chambers:
3. Activate magic gems
Rear entrance
3rd linked chamber
Entrance
14
---
Large torch:
Place the large torch face-up in your current chamber. This chamber now serves as an additional starting chamber for all players until the end of the next countdown. After the countdown, remove this tile from the game.
Soul exchange:
Choose another player and exchange adventurer tiles with him.
Until the curse is lifted, you each control the adventurer of the other player. Do not change their locations in the temple when exchanging tiles.
With 6 players, place 18 magic gems into the gem depot during set-up. Otherwise, set up the game as usual.
Changes during set-up
The 6th adventurer – now you can enjoy this adventure with six players!
1.
2. 3.
New curse card & treasure tile
The treasure chamber holds an additional challenge for the adventurers. Only the most audacious adventurers will escape the temple with its stolen treasure!
Are you bold enough to try it?
Note on Module 2: Treasures
You cannot use the „teleport“ treasure tile to teleport the chalice with your adventurer.
If an adventurer is in the same chamber as the chalice, he can pick it up and carry it to the next chamber. While carrying the chalice, he must roll a torch icon in addition to the red-framed icons in the adjoining chamber he wants to enter. Once he does this, he moves both his adventurer and the chalice into this chamber.
As soon as the chalice reaches the exit chamber, remove it from the game. The adventurers have recovered the treasure! Now they just need to save themselves...
Any adventurer can attempt to move the chalice as long as he‘s in the chamber where the chalice is located.
As soon as the treasure chamber is discovered (2. Discover a new chamber), place the chalice on this tile. The adventurers must now carry the chalice to the exit in order to recover the treasure before the temple collapses. Even if all players manage to escape in time, if the chalice remains inside the temple, then they have lost the game.
Particular case during set-up: If the treasure tile is drawn during set-up before the game begins, insert this tile face down in the middle of the draw pile, then draw a replacement tile and place it next to the starting chamber.
Special features of the treasure chamber:
Example: Frank (blue) has carried the chalice to the exit chamber. The treasure has been recovered and is therefore removed from the game.
Example: Frank (blue) has rolled a torch in addition to two adventurer icons, so he moves to the next chamber with the chalice.
Example: Both Ani (red) and Frank (blue) can try to pick up the chalice and carry it to the next chamber.
15
---
New components
This expansion contains 2 new modules:
Module 5: Quest chambers
Module 6: Characters
You may use these modules individually, together, or in any
combination with other modules for “Escape”, whether from
the basic game, the “Illusions” expansion, or elsewhere. Compose
your own adventure, then start exploring!
You must own the “Escape” basic game to use this expansion. The
rules of the basic game remain unchanged except as detailed below.
Module 6: Characters
• 5 Quest chambers
• 3 Quest markers
• 1 Ghost
• 12 Character cards – 2 cards for each character (1x permanent, 1x activatable)
• 6 Task tiles
• 3 Gem tiles
Module 5: Quest chambers
Altar chamber Task chamber Ghost chamber Tree of Life Obelisk chamber
Doc Muscleman Priest Mechanic Mentalist
Discoverer
Back side
Back side
Front sides
permanentActivatable
16
---
When the players complete a task on a quest chamber, they move one quest marker from the gem depot onto the corresponding chamber.
Each task can be completed only once. As long as at least one quest marker is on the gem depot, the players cannot escape.
In order to complete this task the players must sacrifice 2 dice. If a player is inside the altar chamber, he may sacrifice 1-2 dice, placing them on the altar. If a player sacrifices only one die, a second die must be placed on the altar by a different player in order to complete the task.
Note: The dice do not have to be sacrificed simultaneously.
Though Micha has rolled the keys needed to escape from the temple, he cannot do so because one quest marker remains on the gem depot.
Micha is the first player to sacrifice a die and places it on the altar chamber.
Ani sacrifices the second die and places it on the altar, together with a quest marker.
Altar chamber:
The quest chambers in detail:
Shuffle the quest chambers face down; draw 1, 2 or 3 of them; then place the remaining quest chambers in the box out of play.
Shuffle these quest chamber tiles into the draw pile, then draw four tiles, shuffle them together with the exit tile, then place them on the bottom of the draw pile.
Next, place as many quest markers on the gem depot as the number of quest chambers in the game. Shuffle the task tiles face down, then place them next to the gem depot, along with the ghost and the 3 gem tiles. Proceed with the set-up as normal.
Note: If you own the treasure chamber from Expansion 1: Illusions, treat it as a quest chamber from now on.
Set-up modifications
The adventurers have agreed to use 3 quest chambers, thus they place 3 quest markers on the gem depot.
Module 5: Quest chambers
The quest chambers offer new challenges. Each chamber confronts you with a task that you must master before you can escape from the temple. At the start of the game, all players must agree on how challenging they want this adventure to be. The more quest chambers you include in the game, the more difficult it will be to escape.
Quest chambers
17
---
Once this chamber is discovered, place the ghost inside the starting chamber. The players must force this ghost to return to the ghost chamber. Any player in the same chamber as the ghost can “push” the ghost into an adjoining chamber by rolling two torches. The ghost can be moved only through open entrances, not through walls. Once the ghost is inside the ghost chamber, the players have completed this task. Note: The adventurers cannot enter the ghost chamber.
Once this chamber is discovered, the players stack 4 of the 6 task tiles face down inside this chamber. When an adventurer first enters this chamber, he reveals the top tile. Each tile shows a distinctive combination of icons that must be rolled by one or more adventurers who are inside this chamber. As soon as these icons have been rolled, remove that tile from the game and reveal the next one. After all 4 task tiles have been removed from the game, this task is complete.
Micha rolls the icons needed and removes the top tile. Ani comes running to help Micha. Together they roll the icons needed for the second tile.
Micha rolls 2 torches and pushes the ghost into the next chamber, towards the ghost chamber.
Ghost chamber:
Task chamber:
18
---
Once this chamber has been discovered, place it with the blocked stairway entrance next to an open entrance, then place the 3 gem tiles on the gem depot and a quest marker on the obelisk chamber. This task is complete, but the gem tiles count as additional magic gems. To remove them from the gem depot, the obelisk chamber must be surrounded; for each of the 3 walls of the obelisk chamber adjacent to another chamber, the adventurers can move one gem tile from the gem depot to the corresponding space on the obelisk chamber.
Note: The adventurers cannot enter the obelisk chamber. They cannot remove gem tiles by activating magic gems, but only by enclosing the obelisk chamber with other chambers.
The tree of life is dying, and the adventurers must take steps to heal it.
While inside this chamber, one or more players must roll twice as many golden masks as the number of total players. Once the required number of golden masks has been reached, the tree is healed and the players have completed this task.
Micha discovers the obelisk chamber and places it adjacent to one wall already. He places the quest marker and 1 gem tile inside the obelisk chamber.
Ani places another chamber next to the obelisk chamber and moves one more gem tile to the chamber.
Four adventurers are inside the temple, and together Micha, Ani and Alex roll the 8 golden masks they need.
Obelisk chamber:
Tree of Life:
4 Adventurers x 2 = 8 golden masks
Enclosed wall
19
---
Module 6: Characters
Set-up modifications
Each player chooses one of the six characters and gains that character’s special ability for this game.
Each adventurer chooses one character and takes the two corresponding character cards, one of which shows a permanent
ability, the other an activatable ability. Each player chooses one of their two cards and places it face-up in front of them.
Remove the non-chosen cards from the game, then proceed with the usual set-up.
A permanent ability can be used by the player at any time during the game and as often as allowed by the rules.
An activatable ability must be activated by rolling the icons shown on the card.
Once the ability is used, the adventurer flips the card to its back side.
After the end of the next countdown (i.e., the door being slammed shut), the adventurer flips the card face up and can activate it once again.
Permanent and activatable abilities:
Characters and their abilities:
Micha has used his ability and flips the card to its back side. He must wait until the end of the next countdown before he can use his ability again.
Micha activates his ability so Ani can reroll all of her black masks.
Permanent: When performing action 2. Discover a new chamber you may place the drawn chamber (after having looked at it) on the bottom of the draw pile and draw a new chamber instead; you must place this new chamber next to your current chamber.
Permanent: Your own golden masks allow you to reroll up to three black masks. If you give a golden mask to another player, that adventurer can also reroll up to three black masks.
Activatable: If you roll 3 adventurers, you can move your own adventurer up to 3 chambers.
Activatable: If you roll 2 golden masks, you can allow another adventurer to reroll all of her black masks, no matter where she’s located.
Discoverer
Doc
20
---
Ani uses 1 golden mask as a key and activates the magic gem.
Due to his ability Micha can enter the chamber with his 2 rolled adventurers.
Micha has black masks only. He moves to Ani’s chamber so she can help him with golden masks.
Ani has already rolled 4 keys. Micha uses his ability and contributes 3 more keys.
Together they activate 2 magic gems.
Note: You can also use this ability to simply reroll 3 black masks.
Note: You cannot pass through the walls of the double chambers in Escape: Illusions.
Micha enters the starting chamber through the wall.
Permanent:
You may use your golden masks as keys.
After using a golden mask as a key, you must reroll the die immediately.
Permanent:
Each of your own rolled torches counts as 2 torches.
Permanent:
If all of your dice show black masks, you can move your adventurer to any chamber that contains at least one other adventurer.
Note: You are not allowed to reroll the black masks immediately.
Permanent:
When performing action 1. Enter a chamber you can enter any adjoining chamber with 2 rolled adventurers.
Activatable:
If you roll 2 keys, you can use them to move your adventurer to any chamber that contains at least one other adventurer.
Activatable:
If you roll 2 torches, you may use them to rotate any chamber of your choice other than the starting chamber.
Activatable:
If you roll 3 black masks, you can use them to contribute either 3 keys or 3 torches in order to activate magic gems in any chamber in the temple.
Then reroll the 3 black masks.
Activatable:
If you roll 2 adventurers, you may use them to enter an adjoining chamber through a wall.
Mentalist
Muscleman
Priest
Mechanic
Ani activates one magic gem with 2 torches.
21
---
Module 7: Trap chambers
Game components
Expansion 3 for Escape contains two new modules:
Module 7: Trap chambers
Module 8: Time chambers
Variety is guaranteed as all modules in Escape can be played
individually or combined in any way that suits your tastes. Arrange
your adventure, and off you go!
The “Escape” base game is required when playing with this expansion.
The rules of the basic game remain unchanged
except for the following adjustments.
• 5 Trap chambers
• 8 Time chambers
• 2 Sand timers
1 x Green (30 seconds),
1 x Blue (1 minute)
• 2 Time tokens
Module 7: Trap chambers
Module 8: Time chambers
2x Cliff
2x Lava chamber
1x Invocation
chamber
4x Prohibition
chamber
1x Slide trap
1x Torch chamber
1x Moving platform
1x Sacrifice chamber
Changes during set-up
Mix the 5 trap chambers face down, draw 2, 3 or 4
chambers, then set them near you without looking at them.
Remove the remaining trap chambers from the game.
Shuffle the trap chambers in front of you with the draw pile,
then take five chambers at random from the pile, shuffle
them with the exit tile, and place them on the bottom of the
draw pile.
Whenever a player has discovered a trap chamber and connected
it with its stairway entrance, they immediately place
their adventurer inside the trap chamber.
All trap chambers have different effects:
Changes during game play
22
---
The player lifts this chamber together with their adventurer and moves it clockwise around the temple without changing its orientation, testing each empty space adjacent to an existing tile in the temple until the entrance stairway on the moving platform connects to a door on another chamber in the temple.
If no such entrance currently exists to which the moving chamber can connect, the player must wait until the other players have discovered and placed a chamber that allows for the moving platform to move. Until this happens, the player cannot move their adventurer.
Moving platform:
The player cannot leave this chamber via the tilted staircase entrance, but must instead try to find a way out by discovering and placing new chambers.
Other players can enter this chamber using the tilted stairway entrance if they want to, but they also can no longer leave this chamber via the stairway.
Slide trap:
In addition to placing their own adventurer in the invocation chamber, the player must also immediately move all other adventurers to this chamber. The players must now move onward from this chamber.
Once the invocation chamber has been discovered and placed, a player may use its effect to summon all adventurers to this chamber. To do so, a player must roll 3 key icons while their adventurer is in this chamber.
Invocation chamber:
The player places their adventurer on the cliff above the bricked area and cannot leave this chamber until they have rolled 3 torch or 3 key icons, depending on the chamber.
Once they do, they place their adventurer on the bricked area and can now leave this chamber normally.
Other players can enter the cliff chamber to help the trapped adventurer, but they can pass only golden masks to free this player’s dice. The trapped adventurer must roll the 3 torch or 3 key icons on their own.
Cliff:
23
---
Module 8: Time chambers
Changes during set-up
Mix the 8 time chambers face down, draw 2, 3 or 4
chambers, then set them near you without looking at them.
Remove the remaining time chambers from the game.
Shuffle the time chambers in front of you with the draw pile,
then take five chambers at random from the pile, shuffle
them with the exit tile, and place them on the bottom of the
draw pile. Place the 2 sand timers and 2 time tokens next to
the draw pile.
As soon as a player has discovered a time chamber and
connected it with its stairway entrance, they activate the
chamber by placing the appropriate sand timer onto the
chamber and letting the sand trickle down (prohibition
chambers = green sand timer, all other time chambers =
blue sand timer).
Depending on the time chamber, all players must now either
solve a task before the sand timer runs out or refrain from
taking certain actions until the time has passed. Once sand
has run out in the timer, place it next to the draw pile again.
If a time chamber is discovered and the sand timer
needed for it is already in use, place time token #1 on
this new chamber. Once the sand timer has run out,
immediately flip it and place it on this chamber, returning
the time token to the draw pile.
In the rare case that two new time chambers are discovered
while the sand timer is still in use, place time token #2
on this second chamber. Place the sand timer on the
chamber with time token #1 first, then on the chamber
with time token #2.
Changes during game play
Activate the chamber by placing the green sand timer on
the upper sand timer icon.
As soon as time has expired, flip the sand timer and place
it on the lower sand timer icon .
Once time has expired a second time, place the sand timer
next to the draw pile.
Players cannot perform an action depicted next to a sand
timer icon as long as the sand is running in a timer next
to this space.
Prohibition chambers:
• Magic gems: Players cannot activate magic gems.
• Golden masks: Players cannot use golden masks in order to re-roll blocked dice.
• Movement: Players cannot enter any chambers.
• Starting chamber: Players cannot enter the starting chamber.
24
---
Activate the chamber by placing the blue sand timer on the sand timer icon. Each player must immediately place one die in this chamber.
Each player now has 1 minute in which to enter this chamber; if they do, they immediately retrieve their one die.
Any player who fails to retrieve their die in time loses it, returning it to the game box out of play.
Sacrifice chamber:
Activate the chamber by placing the blue sand timer on the sand timer icon.
Players now have 1 minute in which to enter this chamber and collectively roll 7 torch icons on their dice.
If the players fail to achieve this result in time, two players each lose one die, returning them to the game box out of play.
Lava chamber:
Activate the chamber by placing the blue sand timer on the sand timer icon.
Players now have 1 minute in which to enter this chamber and collectively master the 3 tasks one after the other.
First, they must master the task next to the sand timer. If they do, move the sand timer down 1 space (without flipping it) and face the second challenge. If they solve this problem as well, move the sand timer down 1 space and try to fulfill the final task.
If the players manage to complete all 3 tasks within 1 minute, nothing happens.
However, if they don’t manage to complete this chamber in time, they suffer the consequences next to the task that they failed to fulfill.
Torch chamber:
• Roll 5x torch or lose 3 dice total from any combination of players
• Roll 5x torch or else add 3 magic gems to the gem depot
• Roll 4x key or lose 2 dice
• Roll 4x key or else add 2 magic gems
• Roll 3x adventurer or lose 1 die
• Roll 3x adventurer or else add 1 magic gem
25
---
Game components and changes during set-up
The new chamber “The Pit”
Queenie: The Pit
Only playable with the basic game. The rules of the basic game remain unchanged.
After you have set aside the starting chamber and exit, mix the Pit with the remaining chamber tiles.
If a player enters the Pit, he can try to collect 5 black masks by himself in order to activate 2 magic gems.
During set-up, shuffle the new curse cards with the other curse cards.
• 1 chamber: The Pit
• 4 curse cards (2x Lost treasure, 2x Really cursed)
New curse cards
Lost treasure:
You must discard one of your treasure tiles immediately without using it, then discard this curse.
If you possess no treasures, you‘re already in bad shape, so just discard this curse.
Really cursed:
Each time you have to draw a new curse card, draw two instead.
Note: Player should enter the Pit together, because once the gems are activated, one player will need the help of the golden masks.
Game components and changes during set-up
New treasure tiles
Queenie: Doomed
Only playable with the basic game. The rules of the basic game remain unchanged.
During set-up, shuffle the new treasure tiles with the other treasure tiles.
During set-up, shuffle the new curse cards with the other curse cards.
• 2 treasure tiles (2x Counterspell)
• 2 curse cards (1x Doomed, 1x Stand up)
Counterspell:
Discard one of your curse cards. You may use this treasure only once.
The rest of the set-up stays the same.
The rest of the set-up stays the same.
26
---
New curse cards
Doomed:
You may not escape from the
temple until you have lifted this
curse.
Stand up:
You must stand up
immediately and remain standing until you have lifted this
curse.
Game components and changes during set-up
The new chamber “The Fountain”
Queenie: The Fountain
Only playable with the basic game. The rules of the basic game remain unchanged.
After you have set aside the starting chamber and exit,
mix the Fountain with the remaining chamber tiles.
During set-up, shuffle the new curse cards with the
other curse cards.
• 1 chamber:
The Fountain • 4 curse cards (2x Poison, 2x Strangle vines)
New curse cards
Poison:
If the first or second countdown
ends and you have the poison curse, then the following happens:
• If you are inside the starting chamber, you still
lose one of your dice.
• If you are not inside the starting chamber, you
lose two of your dice.
Strangle vines:
Each time you roll an adventurer,
you cannot use it for an action and
must reroll the die on your next
roll.
If a player enters the Fountain, he can regain one of
his lost dice by rolling 2 golden masks by himself.
A player may regain only one die per game.
The rest of the set-up stays the same.
27
---
Queenie: Quest Chambers
Only playable with the basic game and the quest expansion.
Game components and changes during set-up
New Quest Chambers
• 6 Curses (2x mind control, 2x pitfall, 2x magical bond)
• 3 Quest Chambers (1x chaos chamber, 1x constellation chamber, 1x snake pit)
Shuffle the 3 new quest chambers with the rest of the quest chambers before you draw 1, 2 or 3 of them. Place the snake tokens next to the draw pile.
Shuffle the new curses with the rest of the curses and place them as a stack next to the draw pile.
Chaos chamber:
In order to complete this task all adventurers have to be in this chamber at the same time and draw one curse each. When everybody has drawn a curse, this task is complete.
• 5 Snake tokens
Snake pit:
The player who discovers the snake pit takes one snake token for every other adventurer and puts one token in front of each adventurer figure. In order to complete this task, every snake token has to be defeated by rolling 2 torches while in the same chamber as the token. When every token is defeated, players finally have to fight the mother snake in the snake pit by rolling 5 torches.
Once the mother snake is defeated the task is complete.
Chambers:
Players: Constellation Start 3 Gems Single Gems Exit
2 players X X
3 players X X X
4 players X X X X
5/6 players X X X X X
Constellation chamber:
In order to complete this task, depending on the number of players, the group has to be in certain chambers inside the temple at the same time.
Once every player is in the right chamber, the one inside the constellation chamber has to roll 2 key symbols to complete the task.
Note: When you play with 6 players, one player does not have to be in a specific spot.
28
---
Mind control:
You are not allowed to touch your adventurer figure, the draw pile or the gems on the gem depot. Better get some other player to help you move those pieces.
Pitfall:
When you draw this curse, immediately place your adventurer figure back in the starting chamber. Then discard the curse.
Magical bond:
You have to touch another player with one hand at all times as long as you have this curse.
Queenie: The Maze
Only playable with the basic game. The rules of the basic game remain unchanged.
Game components and changes during set-up
• 4 Curses (2x weakest link, 2x misinformation)
• 2 Chambers (1x mirage chamber, 1x gear chamber)
• 6 Treasures (2x short cut, 2x time out, 2x genie lamp)
After you have placed 2 randomly drawn chamber tiles next to the starting tile, shuffle the new chambers with the rest of the chambers. Shuffle the new curses with the rest of the curses and place them as a stack next to the draw pile. Shuffle the new treasures with the rest of the treasures and place them as a stack next to the draw pile.
New Chambers
Mirage chamber:
The player who discovers this chamber has to swap it with the starting tile keeping the orientation. Then he must place the starting tile next to the chamber he is standing in. This way the starting chamber has moved.
Note: You are not safe at the end of a countdown standing in the mirage chamber.
Gear chamber:
Once discovered, players can roll 2 torches to activate the gears while standing in the gear chamber. When activated the player can choose a whole row or column of chambers and slide all of them one chamber further in any direction they choose.
Note: All chambers of the selected row or column have to be moved in the same direction one chamber further.
New curse cards
29
---
Weakest link:
This curse cannot be removed. If you are not back in the starting chamber at the end of the first or second countdown all of you lose the game immediately.
Misinformation:
This curse cannot be removed. Every time you discover a new chamber you have to yell “I found the exit” twice.
Short cut:
When you discover a new chamber you can use this treasure to look through the whole remaining draw pile and pick a chamber you like and discover this one. Shuffle the draw pile afterwards.
Time out:
Use this treasure to hit pause on your music player to get some time and discuss your next steps. Nobody is allowed to roll while the music is paused. Once you figured out your next steps hit play and start rolling again.
Genie lamp:
Use this treasure and look through the top 3 treasures from the treasure stack and chose whichever one you like. The rest are returned to the bottom of the stack.
New curse cards
New treasure tiles
Queenie: New Characters
Only playable with the basic game and the quest expansion.
• 4 Character cards (2x void runner 2x trickster)
• 2 Chambers (1x dungeon, 1x narrow gauge)
After you have placed 2 randomly drawn chamber tiles next to the starting tile, shuffle the new chambers with the rest of the chambers. The 2 new characters offer more choices for the players at the start of the game.
Shuffle the new treasures with the rest of the treasures and place them as a stack next to the draw pile.
• 4 Treasures (2x portal, 2x clone)
New Chambers
Dungeon:
The dungeon is placed with the grey entrance slide connecting to the current chamber’s entrance. Players can enter the dungeon through every entrance, but they cannot leave the dungeon through the grey entrance slide. So be careful when entering the dungeon, you may never find your way back.
Game components and changes during set-up
30
---
Trickster
Void Runner
Portal:
Use this treasure to place your adventurer in an adjacent chamber. You can chose any adjacent chamber, even the diagonal ones.
Clone:
Use this treasure to double all your rolled key and torch symbols for one action.
Narrow gauge:
In order to enter this chamber players have to roll 3 torches.
Players can activate a gem and find a treasure in this chamber.
New treasure tiles
New Character Cards
Permanent:
You can physically exchange dice with other adventures while in the same chamber.
Note: You can only exchange evenly, meaning you will have the same number of dice as before the trade.
Activatable:
You can physically exchange dice with one other adventurer anywhere in the temple. You can only exchange evenly, meaning you will have the same number of dice as before the trade.
Permanent:
While you are standing in a chamber with open entrances you can roll 2 adventurer icons to step outside the game board and then chose any other chamber that has also open entrances and place your adventurer figure on that chamber.
Activatable:
You can perform your permanent ability one time, but take every other adventurer with you, who is in the same chamber as you.
31
---
+ =
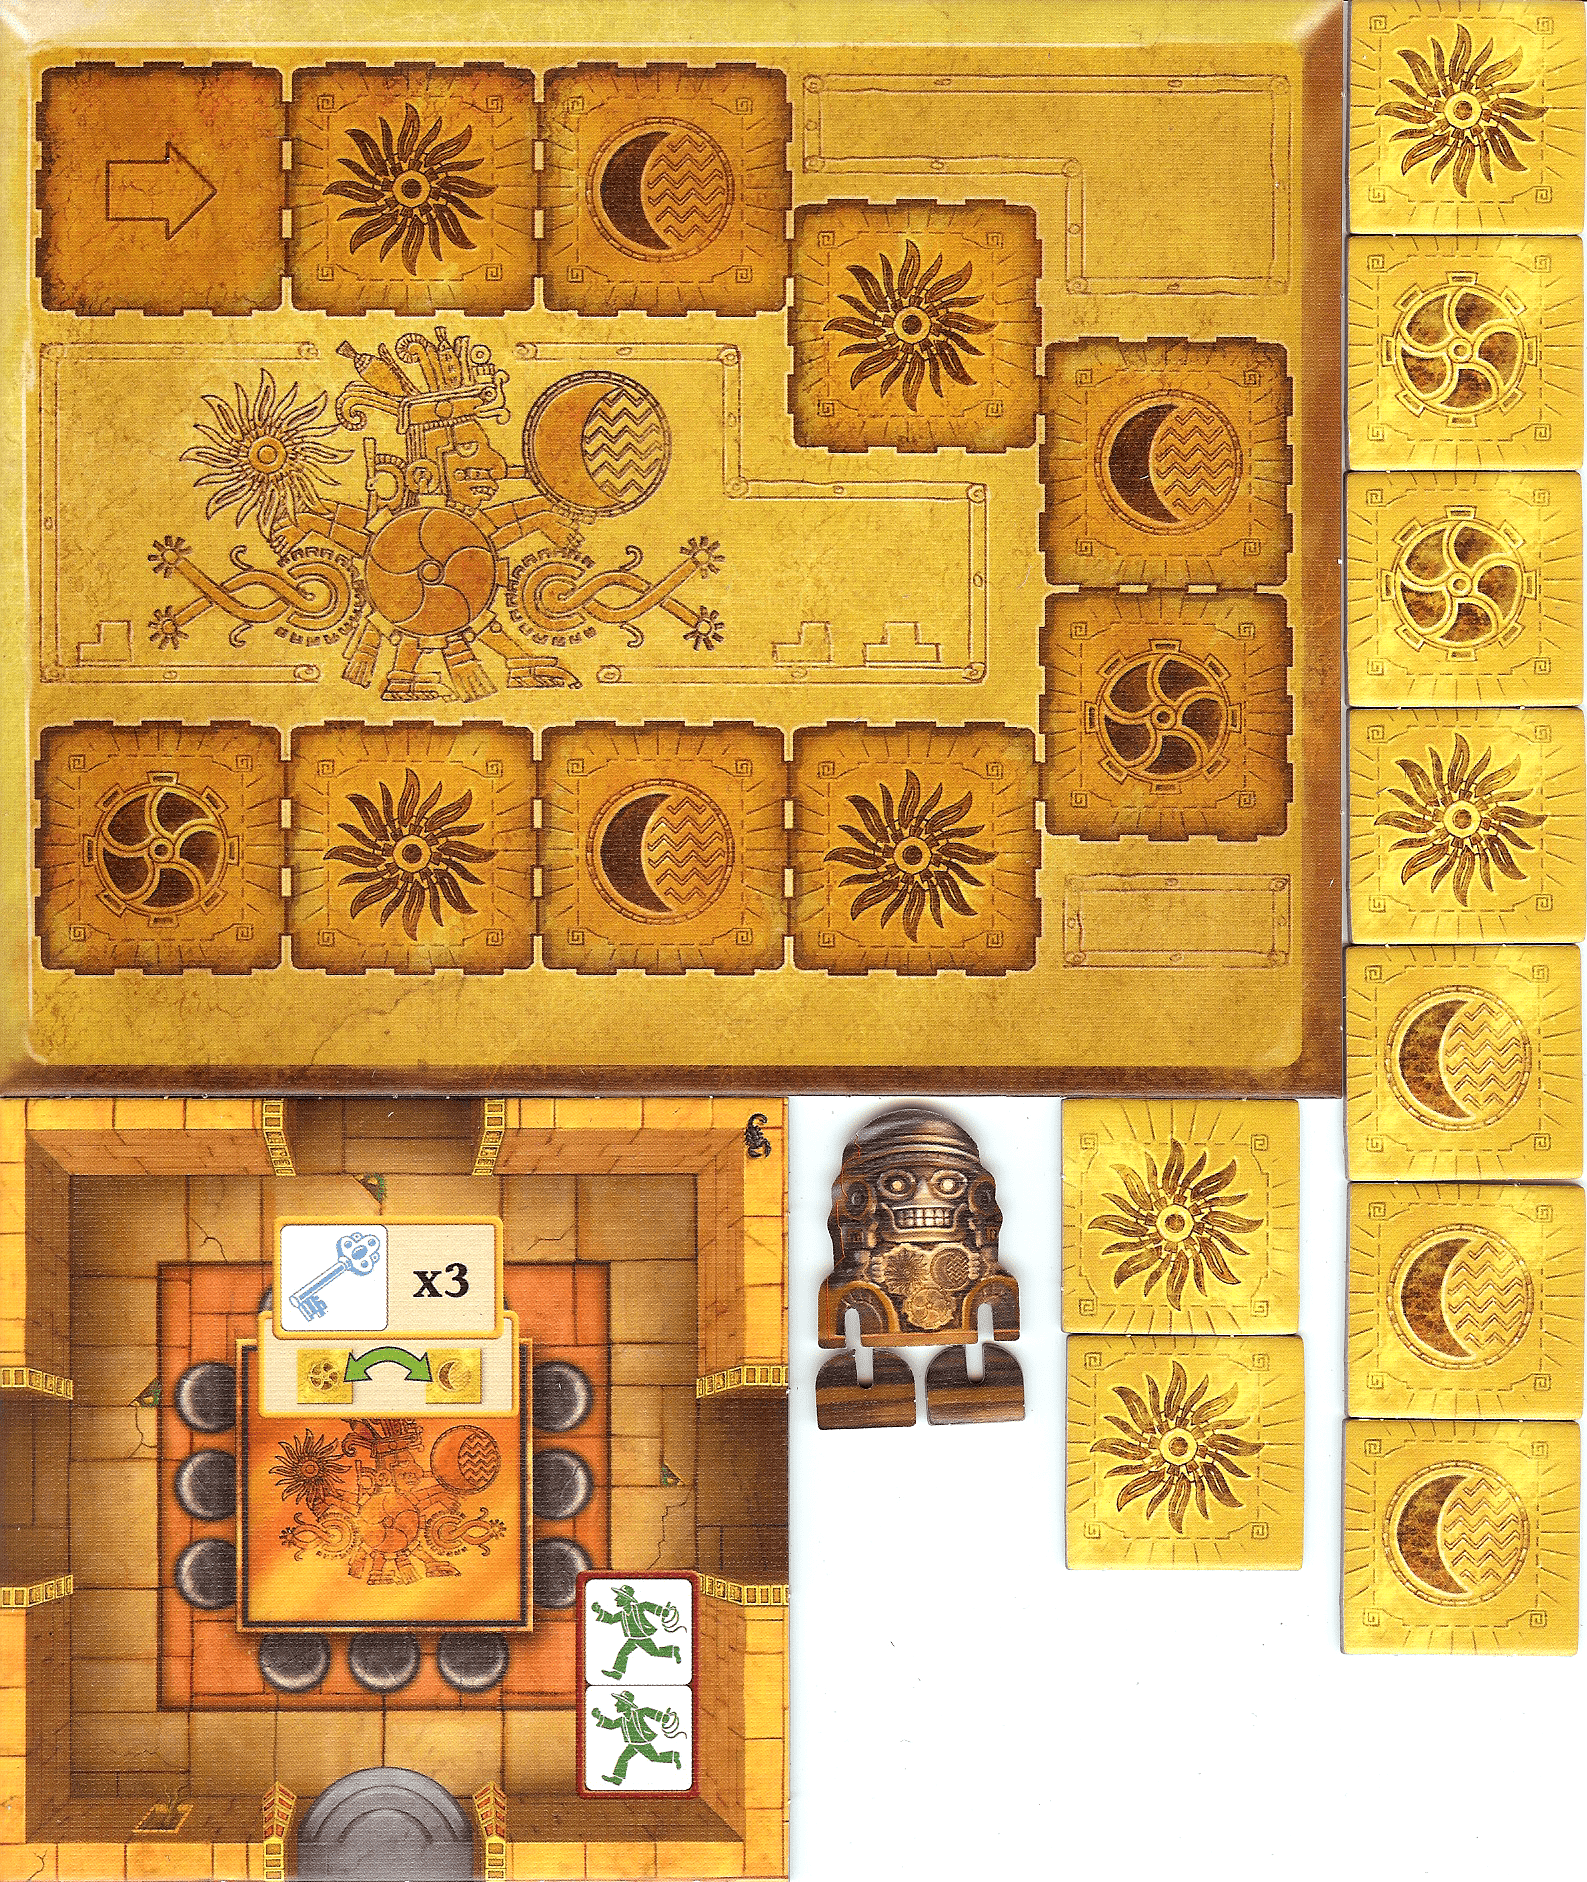
As if escaping the temple isn’t hard enough, the ancient gods decided to give you yet another task! You have to activate the gems as dictated by the old Maya calendar or face the consequences.
• 1 Calendar Chamber
• 9 Calendar tiles
• 1 Maya figure
• 1 Maya Calendar Board
Double-sided: Eternal calendar Doomed calendar
Queenie: The Maya Calendar
Only playable with the basic game. The rules of the basic game remain unchanged.
Game components and changes during set-up
4x Sun 3x Moon 2x Gear Backside
Place the Maya calendar board next to the draw pile. Place the Maya figure on the start space with the arrow. Depending on which side you choose (Eternal or Doomed), the rules will change as described below.
Shuffle the calendar tiles face down and place them as a stack next to the Maya calendar board.
After you place 2 randomly drawn chamber tiles next to the starting tile, shuffle the calendar chamber with the rest of the chambers.
Changes during sequence of play
Every time a player discovers a gem chamber (chamber where players can activate gems), draw the top calendar tile from the stack and place it face up on the discovered chamber. The tile shows one of three symbols: sun, moon or gear.
Players can only activate gems in a chamber that holds the same symbol as shown on the next space of the eternal calendar. When a gem is activated in the correct chamber advance the Maya figure to the next space and remove the calendar tile from the game.
The Maya figure can only move one space at a time, meaning you have to do 9 gem chambers in the correct sequence.
Once you run out of calendar tiles you do not place a tile on a discovered gem chamber any more. The gems inside these chambers can be activated after you have reached the final space on the eternal calendar.
Eternal calendar
You do not have to reach the last space on the calendar in order to escape. If you feel you can escape earlier or every gem on the gem depot is already gone, run for the exit.
32
---
Calendar chamber:
Once discovered, a player can activate the chamber by rolling 3 key symbols. When activated, switch two calendar tiles lying in chambers with each other. Every time a player discovers a gem chamber (chamber where players can activate gems), draw the top calendar tile from the stack and place it face up on the discovered chamber. The tile shows one of three symbols: sun, moon, or gear.
When a gem is activated, look at the symbol of the calendar tile in that chamber. If it’s the same symbol as the one on the next space on the calendar board, advance the Maya figure to that space.
If not, the Maya figure is not moved.
In both cases, place the calendar tile face down at the bottom of the calendar tiles stack.
There are three bars on the calendar board, indicating the end of the three countdowns. If the Maya figure is standing in front of the corresponding bar at the end of the countdown, you all have to face the consequences.
At the first two countdowns, all players have to place one die on the calendar chamber. If it is not yet discovered, put the dice to the side and place them on the chamber when discovered.
The three spaces before the last bar show 1, 2, or 3 keys. This is the amount of extra key symbols you have to roll when you want to exit the temple. Only on the last space of the calendar do you have no penalty for trying to exit the temple. If you are standing on any other space before the last 4 spaces, you also have to roll 3 extra key symbols to escape.
If you run out of gems on the gem depot but you still need or want to advance on the calendar, you could roll the required symbols to activate a gem in a chamber where there is still a calendar tile lying and just advance the Maya figure and not activate a gem.
Doomed calendar
Calendar chamber:
Once discovered, a player can activate the chamber by rolling 3 key symbols. When activated, switch two calendar tiles lying in chambers with each other. If dice are lying on the calendar tile, you can retrieve your die by entering this chamber.
Example: Peter has activated the calendar chamber and switches two calendar tiles with each other. He also retrieves his lost die.
Note: Even though you don’t have to activate the gem chambers in a specific order, it is highly recommended that you do, in order to avoid the consequences and the penalties at the exit.
33
---
Queenie: Exchange Chamber & Teleport Chamber
Only playable with the basic game. The rules of the basic game remain unchanged.
Game components and changes during set-up
After placing 2 chambers next to the starting chamber, shuffle the teleporter and exchange chambers with the rest of the
chambers before adding the exit tile. Place the teleporter token within easy reach next to the chamber stack.
Exchange Chamber:
Once discovered, players can enter the chamber and exchange a curse they
currently have for a treasure. They discard the curse and draw one treasure from
the supply. Players can use the exchange chamber multiple times, but after using
it, they must leave, then re-enter to use it again.
Teleporter Chamber:
Once discovered, place the teleporter token in the middle of the chamber.
A player can enter the chamber, take the teleporter token, and place it in front
of themself. Later, they can drop the token in any other chamber they currently
occupy, placing it in the chamber.
Players can now teleport freely between the teleporter chamber and the
teleporter token.
To do so, they pick up their figure from one chamber and place it in the other;
no dice are used to do this. Players can also pick up the teleporter token again
and place it in a different chamber.
• 1 Exchange Chamber
Works only if played with module 1 and 2 of the basic game.
• 1 Teleporter Chamber and
1 Teleporter token
New Chambers
34
---
Changes during sequence of play
Shuffle the cursed gem tiles and randomly give each player one tile to place in front of them face up.
Shuffle the gem location tiles face down and stack them next to the draw pile.
Players may not escape the temple as long as they have the cursed gem tile in front of them.
Each time a chamber where you can activate only one gem is discovered, players draw the top gem location tile and place it face down in the middle of the chamber.
When a player enters a chamber with a gem location tile, they may roll 2 key symbols and look at the tile:
If this tile matches their cursed gem tile, they have found the location of their cursed gem. They place the cursed gem and gem location tiles back in the box and can now try to escape the temple.
If the tiles don’t match, the player can describe the location tile (without showing it) to give a hint to other players. They then place the location tile face down in the same chamber.
• 6 Cursed gem tiles • 6 Gem location tiles
Back Back
Once discovered, players can enter to try to activate up to 2 magic gems. To do so, they must stack their dice in the middle of the chamber. A die can be stacked only if it shows either a golden or black mask.
Dice that fall must be rerolled.
If they stack 5 dice, they activate 1 gem; if they stack 10 dice, they activate 2 gems. Players can activate gems only once in the totem chamber, so they better have a steady hand.
The new “Totem Chamber”
• 1 Totem Chamber
After placing 2 chambers next to the starting chamber, shuffle the totem chamber with the rest of the chambers.
Game components and changes during set-up
Queenie: Totem Chamber
Only playable with the basic game. The rules of the basic game remain unchanged.
Game components and changes during set-up
Queenie: The Cursed Gems
Only playable with the basic game. The rules of the basic game remain unchanged.
You should not have taken that gem! It is cursed and now you better return it, or you will not escape the temple. If only you could remember from which chamber you took it…
35
---
Why ask BoardGamesBot
Instead of flipping through the whole manual- Accurate answers Based exactly on this manual, with the source page.
- Save time Find the rule in seconds, without flipping 35 pages.
- Anytime Settle rules mid-game, straight from your phone.
- 100% free Create your free account and start using it now.
How it works
Three steps to the answer- 1 Ask your question Type your question about this game's rules.
- 2 Create your free account Takes 20 seconds — it only saves your history.
- 3 Get the answer The AI finds the exact rule and cites the manual page.
Other Games You'll Like
Based on mechanics and theme

Manual published by the publisher · for rules reference only. More about the game on BoardGameGeek and Ludopedia .
