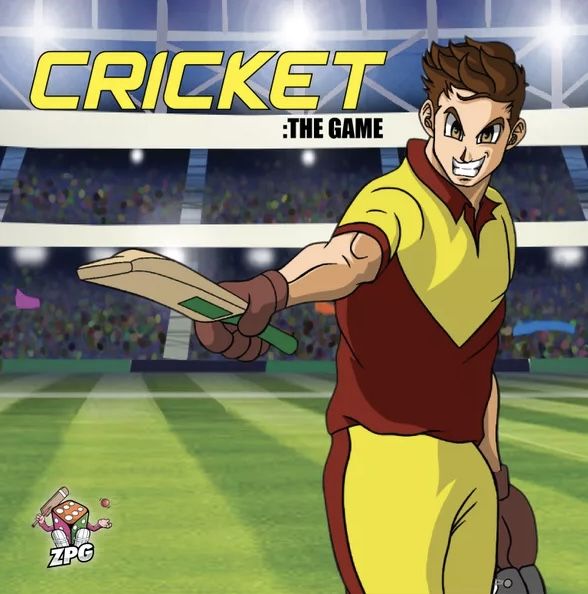
How to Play Cricket: The Game
Zero Point Games · Board game · 2021What do you want to do now
Ask anything about Cricket: The Game: rules, setup, components, complexity, price, or whether it fits your group.
Video: How to Play
Start here, then follow the written guide
Step by step
Objective of the Game
Cricket: The Game (CTG) is a board game based on the physical sport, designed to capture the tension and excitement of cricket in a shorter playtime. A match consists of two Innings, with each team taking a turn at Batting and then Fielding. The team batting first aims to score as many Runs as possible within the allocated Overs or until 10 Wickets are taken. In the second Innings, the teams swap roles: the team that batted first will now field, trying to prevent the second batting team from exceeding their total score. The team batting second wins if they score more Runs than the first team and loses if they fail to do so. The game can be played as a 10 Over game (T10) or a 20 Over game (T20).
Preparation (Setup)
- Preparing the Team: Each player selects a team of 12 players. Then, both players choose to drop either 1 Spin Bowler or 1 Pace Bowler, resulting in a team of 11 players. Each team will have either 1 Pace and 2 Spin specialist Bowlers, or 1 Spin and 2 Pace specialist Bowlers.
- Checking the Pitch: Shuffle the Pitch Condition cards and draw one to determine the pitch conditions for the game.
- Coin Toss: Flip the Coin Toss token. The winner chooses whether to Bat or Bowl first.
- Setting the Field: Place the Pitch tile on the game board, ensuring the Batting team colors are in the Batting positions. The Fielding team then places their 9 Fielder tokens on the field according to any fielding restrictions. The Bowler and Wicket Keeper are placed on the Pitch tile and do not count as Fielders for game rules. The Fielding team selects a Bowler and places their player card in the designated Bowler slot.
- Opening Batsmen: The Batting team selects 2 Batters and places their player cards in the two Batting slots. Place the Facing token next to one of the Batter cards to indicate the facing Batter.
- Batter Attitude: The Batting team places the Batter Attitude tokens on each Batter in their preferred style: "A" for Aggressive and "D" for Defensive.
- Let's Play: The game then proceeds to Gameplay.
Game Flow
The game is played in two Innings, with each team taking one turn at Batting and one turn at Bowling. Each Innings consists of a maximum number of Overs, and each Over involves 6 Balls (plus any extras).
Set-up at Start of each Over
- The Fielding team selects a new Bowler from their team deck to replace the current Bowler. Place the new Bowler in the Bowler slot (a Bowler cannot be used in successive Overs). Use Over tokens on Bowler cards to track how many Overs each Bowler has completed.
- The Fielding team draws the corresponding Bowling deck to their hand and places the Bowling Deck Rule card face up in the allocated delivery slots (numbered 1-6 along the bottom of the board).
- The Fielding team shuffles the Over Deck for the relevant Bowler (Pace, Spin, or Medium) and places 6 Over Deck cards face-down in the Delivery slots (numbered 1-6 along the bottom of the board).
Resolve Express Play
- Turn over the first face-down Over Deck card and resolve the outcome based on its Express Play value. Change the Facing Token as required. Repeat this process until all Express Play cards have been resolved.
Sequence of each Ball in Over
- Set the ADVANTAGE meter to match the facing Batter's current Confidence.
- The Fielding team returns the last played Bowl card to their hand (not required for the first ball after Express Play).
- The Bowler adjusts the Fielder positions as desired.
- The Bowler selects a Bowling card from their hand and places it face-down in the 'CHOSEN BOWL' slot.
- The Batter may change the facing Batter Attitude token (Aggressive to Defensive or vice versa).
- The Batter selects the Zone they will attempt to hit the ball by placing the ball on the Stroke Selection circle. If the ball is hit, it will be hit into this selected Zone.
- Reveal the Bowling Card in the 'CHOSEN BOWL' slot and adjust the Advantage meter if required.
- Turn over the next face-down Over Deck card in 'DELIVERY SLOTS' to reveal any changes, actions, or conditions for this bowl (Over Deck cards are revealed from left to right as the Over progresses).
- Unless the Over Deck card advises otherwise, the Bowler will now roll their respective D6 or D8 die, followed by the Batter, to resolve the outcome of the bowl.
End of each Over
- To indicate the Fielding team bowling from alternating ends of the pitch each Over, at the end of each Over, move the FACING Token to the other Batter.
- Remove used Over Deck cards and shuffle them back into the relevant Over Deck.
- Place the Bowling card to the side of the play area, with the appropriate Over token for the number of Overs completed by that Bowler.
- Check the Over count; if the maximum number of Overs are completed for the Innings, switch the Batting/Bowling teams for the second Innings.
Actions and How to Play
Bowling
- Bowler selects bowl: The Bowler chooses a Bowling card from their hand and places it face-down.
- Reveal bowl card: The Bowler reveals their chosen Bowling card.
- Roll Dice: The Bowler rolls their respective D6 or D8 die to resolve the outcome of the bowl, unless an Over Deck card advises otherwise.
Batting
- Batter chooses shot: The Batter selects the Zone they will attempt to hit the ball by placing the ball token on the Stroke Selection circle.
- Change Batter Attitude: The Batter may change their facing Batter Attitude token (Aggressive to Defensive or vice versa) before dice are rolled for a bowl.
- Roll Dice: The Batter rolls their die to resolve the outcome of the bowl, unless an Over Deck card advises otherwise.
Advantage Meter
- The Advantage meter adjusts the value of dice rolls.
- Setting the Meter: At the start of every Ball, set the Advantage meter to the Batter's current Confidence value.
- Adjusting for Shot Choice: Once the Batter's shot is chosen and the 'Chosen Bowl' card is revealed:
- If the Batter's Shot chosen is in a Zone that matches a shot on the Bowl card, the Batter gains full Advantage (3) on the Advantage meter.
- If a different Zone is selected, the Advantage meter reduces 1 advantage point per full Zone away from the chosen Stroke. Count how many Zone lines are crossed until the first shot on the Bowler's card is reached, and move the Advantage meter 1 step closer to the Bowler. The BYE zone is not counted through.
- Effect on Dice Rolls:
- If Advantage is neutral, both teams use the face value of their roll unmodified.
- If the Advantage meter is on the Batters' side, add the value shown on the meter to the Batters' Roll.
- If the Advantage meter is on the Bowlers' side, add the value shown on the meter to the Bowlers' Roll.
- The meter cannot go above 3 for the Batter or 1 for the Bowler.
Outcomes of Bowls
- Block: An equal result (by dice face-value OR Advantage-adjusted result) means the Batter has Blocked the ball, resulting in a 'dot ball' (no runs scored).
- Strike (Batter hit the ball): The Batter requires a higher roll (including adjustment for Advantage) than the Bowling roll to Strike the ball.
- Miss: If the Batter has a lower result (including adjustment for Advantage), the ball is missed. If a ball is missed by 4 or more (including adjustment for Advantage), the Bowler can roll a D8 to attempt to bowl the Batter out on a roll of 7 or 8.
- Bowled: A roll of 6 (or 8 with D8) from the Bowler and a roll of 1 from the Batter results in the Batter being Clean Bowled and OUT! No effect, card ability, or re-roll can alter this result. If a Strike attempt is missed by 3 or more, the Bowler rolls dice to determine if the Batter was Bowled Out. If the Batter was playing Defensive, a D8 is rolled with a 7+ being Bowled. If the Batter was playing Aggressive, a D6 is rolled with a 6 being Bowled.
- Four-run boundary: A roll of 1 from the Bowler and a roll of 6 or higher from the Batter (on D6 or D8 dice) results in a FOUR! No adjustment can be made for the Advantage Meter or any effect from the Over Deck.
- Six-run boundary: A roll of 1 from the Bowler and a roll of 8 from the Batter results in a SIX! No adjustment can be made for the Advantage Meter or any effect from the Over Deck.
Struck Ball
On a successful Strike, the Batter has hit the ball into the selected Zone. The distance and bounce are then determined.
- Distance Die: The Batter rolls the D6 or D8 distance die (depending on game format) to determine the Area the ball has been hit to, based on the numbering on the edge of the Areas. T10 format uses a D6 (infield on 1-4, outfield on 5-6). T20 format uses a D8 (infield on 1-4, outfield on 5-8).
- Bounce Dice: The Batter rolls one of the two Bounce dice (red for Aggressive, green for Defensive) to determine how far the ball will continue to travel after the initial distance. Numbers represent additional Areas traveled, with 0 meaning it stays in the initial Area.
- A red number indicates the ball is in the air and has a chance for a catch if a Fielder is in the Area where the ball lands from the Distance Die.
- A green number indicates the ball is hit in a way that cannot be caught.
- Boundaries:
- A Four-run Boundary is scored if the combined value of the Distance and Bounce dice moves the ball beyond the highest value of the Outfield (different values for T10 and T20), as long as it is not caught or fielded.
- A Six-run Boundary is scored if the outermost Area is reached with the distance dice, and a Green 2 is rolled on the bounce dice.
- Any time a Batter hits a Boundary, their Confidence increases by 1.
- Strike against a Pace Bowler: When a Strike against a Pace Bowler is by 3 or more (combined dice and Advantage), the Batter may add 1 to the Distance die roll (maximum distance of 6).
- Strike against a Spin Bowler: When a Strike against a Spin Bowler is by less than 3 (combined dice and Advantage), 1 must be deducted from the Distance die roll (minimum distance of 1).
- Catch: If the Distance roll from a Strike (not including Bounce roll) causes the ball to enter an Area with a Fielder AND the bounce die is red, the Fielder may attempt a catch. For a successful catch, the Fielder must roll a D6 to get a result equal to or higher than the required value for the Area (orange Catch values), except for areas with a Red outline, which require one less. If the catch fails, the ball continues to bounce the additional distance from the Bounce die. If the additional distance was 0, the ball remains in the current Area, and the Batters score the runs for that Area.
Fielded / Run-Out
When a ball has not been caught:
- If a ball stops in an empty Zone, the Batting team scores 1 Run if in the Infield, and 2 Runs if in the Outfield.
- If a ball stops anywhere with a Fielder (who did not attempt a catch), the ball is considered Fielded.
- Infield:
- If the Bounce die result is Red, the Batter can decide to take no Run and stay safe, or attempt 1 Run with a chance for a Run-Out.
- If the Bounce die is Green, the Batter takes 1 Run, unless they decide to attempt an Extra Run.
- Outfield:
- If the Bounce die result is Red, the Batter can decide to take 1 Run and stay safe, or attempt 2 Runs with a chance for a Run-Out.
- If the Bounce die is Green, the Batter takes 2 Runs, unless they decide to attempt an Extra Run.
- Run-
Rules manual
Official PDF file
Frequently Asked Questions
Quick answers about the rules
What is the objective of Cricket: The Game?
How do you set up Cricket: The Game?
How do you play Cricket: The Game?
Other Games You'll Like
Based on mechanics and theme