How to Play Middara: Unintentional Malum – Act 1
Succubus Publishing, Hobby World · Board game · 2019- Players
- 1–4 · best 4
- Players
- Solo
- Play Time
- 60 min
- Weight
- Weight 4.1/5
- Year
- Year 2019
- Minimum age
- Minimum age 15+
What do you want to do now
Ask anything about Middara: Unintentional Malum – Act 1: rules, setup, components, complexity, price, or whether it fits your group.
Video: How to Play
Start here, then follow the written guide
Step by step
Game Objective
In Middara: Unintentional Malum Act 1, players take on the role of Adventurers in an elaborate, story-driven game. The primary objective is to complete Encounters, which are segments that separate the narrative. Winning or losing these Encounters can change the outcome of the Adventure and the direction players can take. Additionally, players will be called upon to make Decisions that alter the unfolding of the Adventure.
In Adventure Mode, the game is not meant to be played in a single session, but rather in 1-4 hour sessions over a long period. Players win an Encounter when they achieve a Victory Condition and lose if they achieve a Defeat Condition first. All Victory and Defeat Conditions are listed in the Encounter Setup section of each Encounter. If players win or lose an Encounter, they read the Hidden Text under the corresponding Condition to learn how to proceed.
In Crawl Mode, the objective is to complete a chosen Scenario. Players win a Scenario when they reach the final scene, usually by successfully completing multiple Encounters. If players lose an Encounter, they lose the Scenario, and all Gold, Items, Disciplines, and XP gained during the Scenario are lost.
Setup
How Middara is set up and played changes depending on the chosen Game Mode. Regardless of the mode, the game is, at its core, about completing Encounters.
Crawl Mode Setup
- Create Adventurers: Players must build 4 Adventurers using the XP and Gold listed in the chosen Scenario. Adventurers can spend as much of this XP and Gold as they wish on Disciplines and Items. Unless otherwise stated, players can choose from all Disciplines in the game, but can only purchase Items listed in the Shop and Train section of the Setup.
- Prepare Encounter: Each Scenario will have different Encounters that are played in order to complete it. The Scenario will direct players to an Encounter Setup Diagram with instructions on how to begin.
- Start Playing: Begin playing the first Encounter in the Scenario. As you progress through each Encounter, you will gain Gold, Items, and XP by defeating opponents, looting treasures, completing Achievements, and through other Special Encounter Rules.
Adventure Mode Setup
Players begin on Page 1 of the Adventure Book. It is important that players do not read ahead unless specifically instructed. The Adventure Book will guide players as they progress through the Adventure.
To begin playing Adventure Mode, players choose an Adventure to play. This game contains only one Adventure, Unintentional Malum: Act 1.
Players have access to an entire group of Adventurers. At the beginning of most Adventures, players will have enough Adventurers in their group to play with the minimum number of supported players (usually 4). However, as the Adventure progresses, new Adventurers may join the group, while others may leave.
Whenever instructed, players must choose 4 Adventurers from their group who form the Active Party. The Active Party is the set of Adventurers that players are actively using during Encounters. The Active Party can only be changed when instructed by Adventure Mechanics or Special Encounter Rules, usually in the Story Round.
Encounter Setup (Common to both modes)
When setting up an Encounter, read the Encounter's Special Rules and then go through the 4 Setup Phases in the following order:
- REFRESH PHASE: Each Adventurer removes their Used tokens from their Per Encounter Abilities and deactivates all cards. All Defeated Adventurers or Adventurers with more Damage tokens than half their maximum HP remove Damage tokens until they have Damage tokens equal to half their maximum HP. All Effect tokens are removed, and each Adventurer sets their Stamina Points (SP) to their Stamina Point Recovery Value (usually 3).
- IMPORTANT: Adventurers do not gain SP during the Refresh Phase of their 1st turn of an Encounter.
- IMPORTANT: Ability tokens are not removed during this Phase.
- PLACEMENT PHASE: Set up the Tiles according to the Encounter Setup Diagram. Then, place all Encounter tokens, Terrain tokens, and figures as shown in the Encounter Setup Diagram. Adventurers can choose to place their figures in any of the spaces marked as a Starting Zone in the Encounter Setup Diagram.
- DEALING PHASE: Deal Combatant Cards to the Combatants listed in the Encounter Setup. This can be done in any order; however, it is recommended to deal Combatant Cards so that each player has a responsibility when it is not their turn.
- INITIATIVE PHASE: Players take the corresponding Initiative Cards for each Adventurer and Combatant in the Encounter and shuffle them. Players then deal the Initiative Cards to form the Initiative Track.
You are now ready to play! Read the Encounter Intro aloud. After reading, starting with the first Initiative Card, the figures take their turns. At the end of each round, shuffle the Initiative Track before moving to the next round. Continue through the rounds until an End Condition is met.
Game Flow
The game progresses through Encounters, which can take from 30 minutes to 3 hours to play. The turn structure is defined by the Initiative Track.
Adventurer's Turn
An Adventurer's turn consists of the following Phases:
- Start of Turn Phase: Resolve Abilities and Effects that occur at the start of a turn.
- Status Phase: Any Abilities or Effects that have the STATUS Condition Tag occur now.
- Refresh Phase: The Adventurer goes through the following steps during this Phase:
- Recover Stamina Points.
- Deactivate cards.
- Action Phase: The Adventurer can spend as many Stamina Points (SP) as they wish to use Actions and Abilities. When they decide they no longer want to spend SP, take Actions, or use Abilities, the Adventurer proceeds to the End Phase.
- End of Turn Phase: Resolve Abilities and Effects that occur at the end of a turn.
Adventure Mode Flow
Adventure Mode is guided by the Adventure Book. Players progress through the story using the Adventure Book. Scenes are narrative sections read by players between Encounters. Occasionally, while reading a Scene, players will be asked to perform various tasks, called Adventure Mechanics. These can be Skill Checks, gaining new party members, adding Story Flags to the Adventure Sheet, or instructing players to continue to the next Scene or Encounter.
Story Rounds are a special Adventure Mechanic that usually occurs when Adventurers have some free time. During a Story Round, players will be able to purchase new Items, Item Upgrades, learn new Disciplines for their Adventurers, and embark on Side Quests. Once players decide, they can continue to the next part of their Adventure. Each time players arrive at or return to a Story Round, they will go through 3 Phases in the following order:
- SHOP AND TRAIN: During this Phase, players will create a Shop and spend their acquired Gold to purchase Items and Item Upgrades. Additionally, Adventurers can spend XP to learn new Disciplines. Players can also sell Items (except Story Items) for Gold. Once Adventurers have spent all the Gold and XP they wish to spend, they proceed to the next Phase.
- EXPLORE (SIDE QUESTS): During this Phase, players can select from a list of optional Side Quests. Each Side Quest can only be attempted once. When completed, most Side Quests will return players to the Story Round and allow them to go through all Phases again. Once players have attempted all Side Quests, or if they choose not to attempt a Side Quest, they proceed to the next Phase.
- Note: A Bounty is a special type of Side Quest that can be attempted once in each named Story Round it appears in.
- VENTURE FORTH: During this Phase, players continue the Adventure. Once players Venture Forth, they will no longer be able to return to the current Story Round.
Actions and How to Play
Adventurers can spend Stamina Points (SP) to perform Standard Actions and use Standard Abilities during the Action Phase of their turn.
Standard Actions
- Move (1 SP): Move up to your Maximum Movement Value. For each additional SP spent, add 2 to your Movement Value.
- Important: Adventurers are limited to 1 Move Action per turn.
- Attack (1 SP): Make an Attack against a figure using the Combat Dice of your equipped Weapon(s).
- Encounter Action (1 SP): Encounter Actions are Encounter-specific Actions that an Adventurer can perform, such as activating Loot tokens.
- Re-equip (1 SP): Equip or unequip any Items in your Backpack or on your Adventurer. Items in your Backpack remain Flipped or Exhausted until they are normally Unexhausted or Unflipped. You can also take Items and Companions from an adjacent Adventurer, but you can never give Items or Companions to other Adventurers. Any amount of equipping/unequipping/taking is allowed for 1 SP.
Standard Abilities
- Dodge (1 SP): During the Dodge Step of an Attack, roll the BLACK die. Add 1 to Defense for each shield symbol rolled. If the fail symbol is rolled, no Defense is added.
- Strengthen (1 SP): When building your Combat Dice Pool during an Attack or when determining the Strength of a Spell, you can spend 1 additional SP to add the BLACK die.
- Counterattack (1 SP): When an Attack deals no Final Damage, Counterattack the Attack. If this Attack was successfully Dodged, reduce the cost of the Counterattack by 1 SP.
Other Important Rules
- Skill Checks: Refer to the manual for details on this section.
- Being Defeated: A figure that has suffered Damage equal to its Maximum HP is Defeated.
- Scaling Icons: Refer to the manual for details on this section.
- Special Assemblage Disciplines: Refer to the manual for details on this section.
- Special Martial Disciplines: Refer to the manual for details on this section.
- Alternate, Variations, and Loot LVL: Refer to the manual for details on this section.
- Abraxis Battle Dice Variants: Refer to the manual for details on this section.
Card and Component Types
- Adventurer Cards: Represent the Adventurers that players control.
- Combatant Cards: Contain the rules for all figures that are not Adventurers. Each card is double-sided.
- Discipline Cards: Represent various Abilities that Adventurers can learn. There are 5 different Discipline Trees: Assemblage, Cruor, Martial, Sanctus, and Subterfuge.
- Familiar Cards: A special type of Discipline Card, acquired by learning the Familiar Discipline from the Assemblage Discipline Tree.
- Item Cards: Represent all the equipment that Adventurers can earn or purchase. Separated by Tier (Mundane, Common, Uncommon, Rare) and 6 types (Weapon, Armor, Core, Relic, Accessory, Consumable).
- Combatant Loot Cards: Represent the Items and Gold that Combatants drop when
More videos
More rules explanations from the community
In English
-
 Middara How To Play 2 - Getting Started
-
 Middara How To Play 3A - Adventure Mode
-
 Middara How To Play 4 - Encounters and Loot
-
 Middara How To Play 3B - Crawl Mode
-
 Middara Preview And Schedule
-
 Middara How To Play 5 - Adventurers, Disciplines, and Items
-
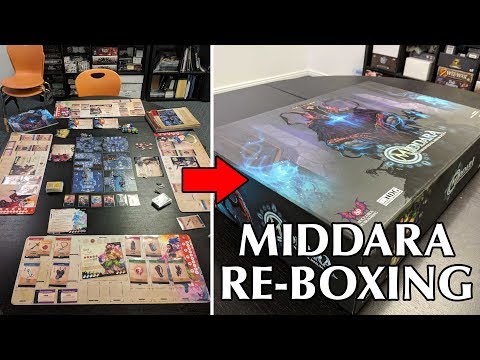 Middara - Re-Boxing
-
 Middara | Unintentional Malum: Act 1 | The Mast | Solo Setup & Narrative
-
 1. Overview - How To Play Middara
-
 Middara How To Play 6 - Abilities, Important Tags, and Upgrades
-
 Middara Lore Video
Rules manual
Official PDF file
Frequently Asked Questions
Quick answers about the rules
What is the objective of Middara: Unintentional Malum – Act 1?
How do you set up Middara: Unintentional Malum – Act 1?
How do you play Middara: Unintentional Malum – Act 1?
Other Games You'll Like
Based on mechanics and theme