
/pic4745548.jpg)
What is your question about Snowdonia: Deluxe Master Set?
Ask before downloading the manual: the assistant was trained on this file and answers instantly, citing the exact page.
Ask questions about the game
Ask anything about Snowdonia: Deluxe Master Set: rules, setup, components, complexity, price, or whether it fits your group.
Write your question first. You will create your free account to see the answer — it takes 20 seconds.
Full rulebook
Browse the manual or download the original PDFFull manual text available to read Open text
About the Game
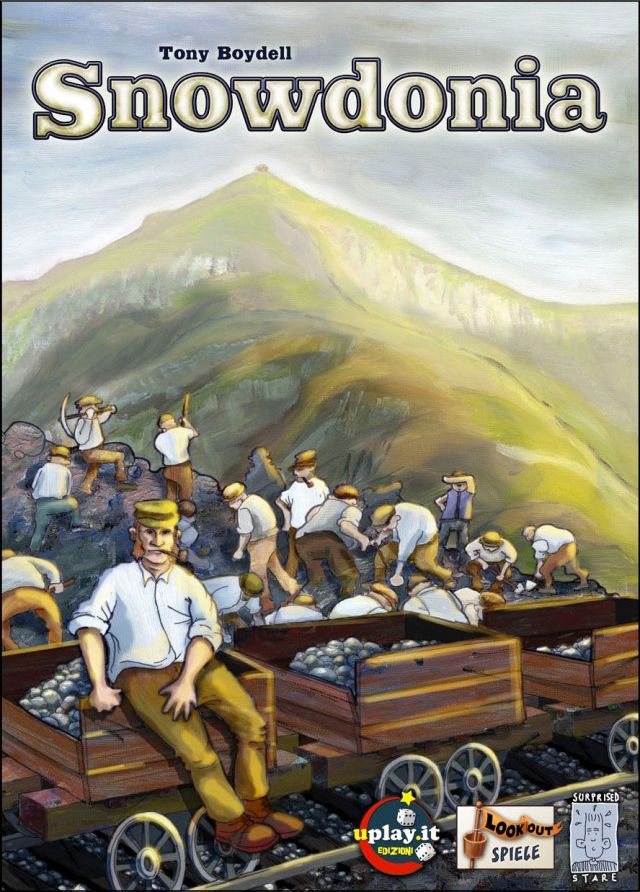
The peaks of Snowdonia rise before you encased in mist, their summits barely visible. The highest is Snowdon (Wyddfa) herself, at 1,085 metres. The year is 1894, and the Snowdon Mountain Tramroad and Hotels Company Limited has been formed to build a branch line from Llanberis to the summit. You can scarcely believe it is possible!
In Snowdonia, players represent companies providing labour for the construction of the Snowdon Mountain Railway. Unlike in other train games, you will have to excavate your way up the mountain-side, as well as make and lay track and construct viaducts and stations; all this, in competition with the weather of the Welsh mountains and your fellow players. You will be assisted by a train and can collect essential materials from the Stock Yard. You will obtain special work contracts that give you bonus points at the end of the game.
Each turn, a player allocates labourers to specific tasks, such as getting supplies, excavating the mountain, making or laying track, building parts of stations, or obtaining lucrative contracts. A player uses supplies to construct sections of the railway that will yield victory points once the route has been completed. Players can also buy trains to ship in extra labourers and to improve their work rate. A player who completes contracts for specific work will gain bonuses at the end of the game.
Can you contribute more than the other players to the magnificence of the Snowdon Mountain Railway?
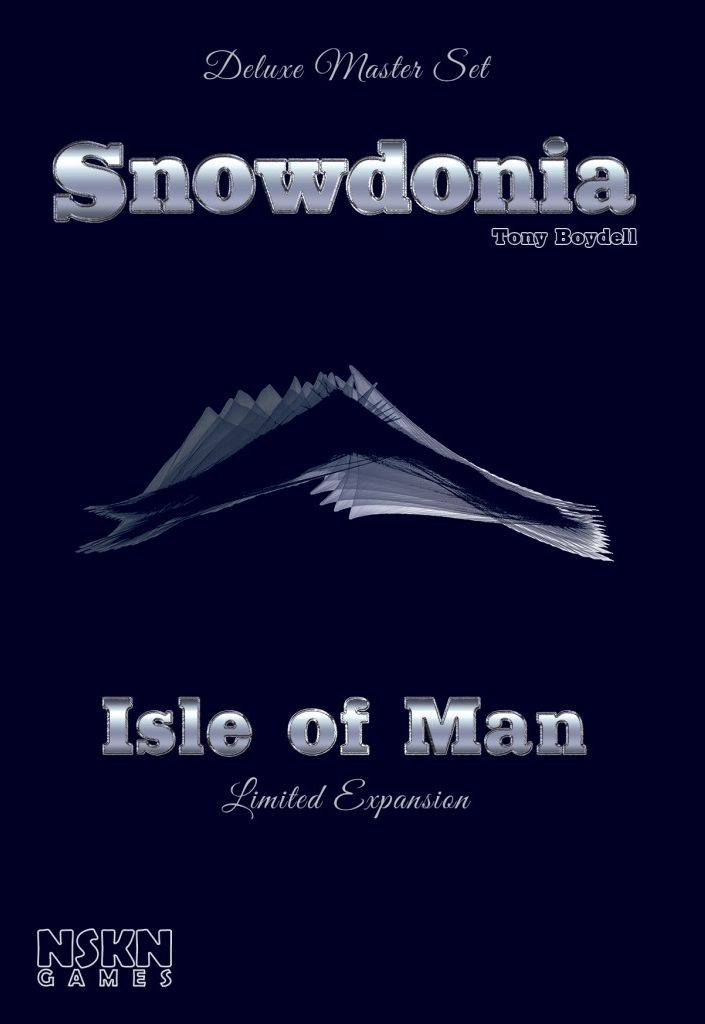
About the Deluxe Master Set
The words of introduction you have just read come from the original Snowdonia rulebook. First published in 2012, Snowdonia featured only two scenarios: the original Mount Snowdon scenario, which the game takes its name from, and Blaenau Ffestiniog, a more advanced scenario for those ready to spice up the game.
Over the course of seven years, Snowdonia has grown with new scenarios, expansions, and promotional cards, all of which have been meticulously catalogued and placed in this Deluxe Master Set. If you are ready to see trains climb Welsh mountains, cut through the plains of Australia, or travel underwater — proceed into what is much more than a game now!
If you are a new fan of Snowdonia, please take a moment to read the First Steps section below, and get ready for a gaming journey of a lifetime!
First Steps
The default mode of play for Snowdonia has always been the original Mount Snowdon scenario. If you have never played Snowdonia before, it is strongly recommended that you play your first few games using the base game rules outlined below.
Base Game Rules
Snowdonia Deluxe Master Set comes with 18 different scenarios, 2 mini-expansions, and fully developed rules for Solo play (Botdell). These rules are written for the default Mount Snowdon scenario. Each other scenario and mini-expansion will specifically point out any changes in setup or game play where they differ from Mount Snowdon.
If you are new to Snowdonia, we strongly recommend that you first learn the rules of the Mount Snowdon scenario and play it a few times before taking on – and learning – a more complex or different mode of play.
Game Setup
Any components not mentioned in the Game Setup for the base game (i.e. the Mount Snowdon scenario) should be left in the game box. Each other scenario uses all base game components unless it instructs you to remove specific components. Each scenario will also list any additional tokens or cards that should be added to the game or that are used to replace some of the base game components.
Tony Boydell
---
SD055
SD041
+2
=
comes with
N°1 L.A.D.A.S.
SD031
=
=
comes with
no coal
N°2 Enid
SD032
+
=
N°3 Wyddfa
comes with
SD033
SD041
SD041
SD041 SD041
SD047
2
4
7
9 4
1 1
Two Viaducts
2 4
3 4
1 2
1
2
SD066
3
4
7
3 – 5
2
Waterfall
Station
2
2 1
2
1
SD067
3
7
7
6
5
4
2
33
11
326m 32
Hebron
Station
SD068
2 3
6 7
5
1
6
22
11
33
500m 42
Halfway
Station
SD069
SD040
SD040
SD056 SD057 SD064 SD065
1 GAME BOARD
Unfold the game board and choose which side to
use: either the classic look, or the new board.
Please note that both sides are functionally identi-
cal. Your choice is purely aesthetical.
4 RUBBLE
Place a number of Rubble cubes onto each Track card as indicated by the number next to the shovel. In this same manner, place Rubble cubes on the Station cards in any boxes marked with a shovel.
5 START PLAYER
Randomly determine the first player using a method of your choosing and give that player the Start Player token.
6 PLAYER PIECES
Each player should take all pieces of their chosen colour. The 16 Ownership Markers per player are a fixed limit. Should these run out, the player can-
not take ownership of any more Track cards or Building spaces.
7 LABOURERS
Each player keeps two of their Labour-
ers in their personal supply, for use in the first turn, placing the remaining Labourer at the Pub. The Labourer at the Pub is referred to as the Temporary Labourer in the rules.
8 SURVEYORS
Each player places their Surveyor on any empty space of the Llanberis Station.
2 RAILWAY ROUTE —
STATION CARDS
Take all Station cards with the Snowdonia icon
+2
=
comes with
N°1 L.A.D.A.S.
SD031
and order them by the number in the top-right corner of the card.
Note: Waterfall Station (2) is not used in a 2-player
game. Similarly, Passing Loop (4½) is only used in a
5-player game.
Starting from Llanberis (which is printed on the
game board), and going clockwise around the
board, lay out the Station cards in numerical order
— from Two Viaducts (1) to Yr Wyddfa (7) — in the
Station and Track area of the board, leaving some
space between them.
3 RAILWAY ROUTE —
TRACK CARDS
Each Station card will indicate (in the top-left corner of the card) how many Track cards should be leading up to this Station from the previous one (i.e. how many Track cards should be placed to the left of the Station).
The Track card deck contains three option-
al-use cards (depicting the numbers 0, 6, and 7 next to the shovel). You may choose to keep those included with the rest of the Track cards, for added variety, or you may re-
turn these to the game box before shuffling the rest of the Track cards.
Thoroughly shuffle the regular Track cards (brown backed, depicting a shovel symbol and brown Rubble cubes) before placing the indicated number of Track cards, shovel side up.
You may need to adjust the spacing between the
Station and Track cards so that they are evenly
spaced around the board.
1
2
3
4
7
9
14
8
7
15
3
4 7
3 – 5
2
Waterfall
Station
2
21
21
SD067
3
4 7
3 – 5
2
Waterfall
Station
2
21
21
SD067
6
---
=
N°2 Enid comes with SD 032 +
=
N°3 Wyddfa comes with SD 033 + 9
=
N°4 Snowdon comes with SD034 +
=
N°6 Padarn comes with SD036 +1
Take 1 Build action after all other Build actions (min: 1) have been resolved.
=
N°7 Ralph comes with S D 0 37
SD046 SD046 9 7 6 6 15 7 6 33 11 779m 6 3
Clogwyn Station SD 072 3 5 7 14 5 21 7 33 1065m 7 2
Yr Wyddfa (The Summit) SD 073 SD050 SD050 2 3 6 7 5 1 6 22 11 33 500m 42
Halfway Station SD 0 69 5 6 8 5 5 9 4 11 2 41/21
Passing Loop SD 070 5 9 11 4 4 51
Rocky Valley Halt SD 071 SD040 SD040 SD06 4 SD065
9 ACTION AREA OVERLAY CARDS
The game board has pre-printed Action Areas for a 3-player game, marked A to G.
If you are playing with 2, 4, or 5 players, take the applicable alternative Action Area overlay cards and place them over the pre-printed Action Areas so that the number at the top of each Action Area includes the number of players.
Note: Set aside the special EXCAVA- TION Action Area overlay card. It will not be used until later in the game.
10 GAME MARKERS
Place the shovel-shaped Excavation Work Rate Marker on the space marked with a dot on the top Work Rate track. Similarly, place the track-shaped Lay Track Work Rate Marker on the space marked with a dot on the bottom Work Rate track.
11 CONTRACT CARDS
If you are setting up a 2-player game, remove the two Contract cards marked “3–5” from the deck (cards 28 and 29).
Thoroughly shuffle the Contract cards and place them as a face-down deck on the indicated space.
12 WEATHER FORECAST
Take the top three Contract cards and place them face-down, one at a time, on the numbered spaces next to the Contract deck. These three spaces are referred to as the Site Office in the rules.
On the back of each Contract card you will find a weather icon. Take a Weather disc matching the weather icon on the back of the middle (space “2”) Contract card and put it on the middle space of the Weather Track. Repeat for the right-most (space “3”) Contract card. Then, flip these three Contract cards face up.
Note: The Snow discs are not used in the Mount Snowdon scenario and should be left in the game box.
14 STOCK YARD AND SUPPLY BAG
Place the following resources onto their spaces in the Stock Yard on the board: 7 Iron Ore, 4 Stone, and 1 Coal.
Separate a number of resources (Iron Ore, Stone, or Coal) and Event cubes as indicated by the Supply Table (see next page), returning additional resources and Event cubes to the game box as they will not be used this game.
Place wooden markers (typically just Coal, but can also be other wooden markers) onto the Trains in the Engine Shed as indicated on each card.
Place the remaining resources and Event cubes into the Supply Bag.
15 GENERAL SUPPLY
Place all other pieces next to the board to form the general supply.
13 TRAINS
Thoroughly shuffle the Train cards and place six Train cards face up next to the game board. These Trains form what is referred to as the Engine Shed in the rules.
Note: For your first game, we recommend that you only shuffle the following Train cards during setup:
No. 1 L.A.D.A.S.
No. 2 Enid
No. 3 Wyddfa
No. 4 Snowdon
No. 5 Moel Siabod
No. 6 Padarn
No. 7 Ralph
These Trains are all marked with +2 = comes with N°1 L.A.D.A.S. SD031 in the bottom-right corner of the card.
+2
=
comes with
N°1 L.A.D.A.S.
SD031
10
11
12
12
13
+2
=
comes with
N°1 L.A.D.A.S.
SD031
---
Supply Table
During setup (Step 14), separate the following types and quantities of resources and Event cubes:
20 20 27 33
11 11 16 20
All All All All
5 5 5 5
Remove Waterfall Station (2)
Remove Passing Loop (4 ½)
Remove “3–5” Contract cards (28 & 29)
Remove Passing Loop (4 ½)
Remove Passing Loop (4 ½)
Game Sequence
Each round consists of the following phases:
1 Assign Labourers
2 Resolve Actions
A Stock Yard Action Area
B Excavation Action Area
C Works Action Area
D Lay Track Action Area
E Build Action Area
F Site Office Action Area
G Move the Surveyor Action Area
3 Restock Contract Cards
4 Check the Weather
5 Restock the Stock Yard
Rounds are repeated until the End of Game is triggered.
Game Round 1
Assign Labourers
Players take turns placing one Labourer at a time into empty Action Spaces.
In clockwise order, beginning with the Start Player, each player places one of their Labourers from their personal supply onto any empty numbered Action Space in any of the Action Areas ( to ) on the game board. Players continue to place Labourers, one Labourer per player at a time, until every player has placed all Labourers from their personal supply.
Owning a Train often provides you with a way to gain an extra Labourer for the round.
Typically, Train cards will allow the owner to gain a Temporary Labourer by paying 1 or 2 Coal, though some Trains may specify different costs or special requirements as well. Before placing your first Labourer, if you own such a Train, you may pay the indicated cost to gain your Temporary Labourer for the round. For more information about each Train, see the Train Master List Appendix.
When gaining your Temporary Labourer, take the Labourer in your colour from the Pub and add it to your personal supply. This Temporary Labourer can be assigned to Action Spaces like any other Labourer.
Contract Cards
Each Contract card is divided into two sections. The upper section of the card depicts an end-game scoring option while the lower section details an effect which, once per game, modifies the action you are taking or changes the rules in your favour.
For each of the Action Areas, before the first action is resolved for that Action Area, players may activate Contract cards. In clockwise order, beginning with the Start Player, each player may activate any number of Contract cards that reference the current Action Area in the bottom-left corner of the card.
After a Contract card has been activated, turn it sideways to show that its effect has been used, but leave the card in your player area. The card effect lasts until the end of the current round.
Swap the Weather disc in the middle position on the Weather Track with one of your choice from the general supply. This weather will be used at the start of the next round.
SD004
After all other Excavation actions have been resolved, you may completely excavate the next space with Rubble on it (Track card or Station Excavation space).
SD003
Immediately convert 2 Iron Ore from your personal supply into 1 Steel Bar, up to 2 times. Return the Iron Ore to the Supply Bag.
SD 012
Whenever you take the Lay Track action this round, you lay track at 1 above the current Work Rate.
SD 0 01
---
5
Resolve Actions
Actions are resolved in a fixed order, from STOCK
YARD through MOVE THE SURVEYOR.
All Action Areas are resolved in order, from to . Within
each Action Area, resolve the Action Spaces one by one
in numerical order. If you have a Labourer assigned to an
Action Space, you must take that action. If you have two or
more Labourers assigned to the same Action Area, then you
must take the action once for each Labourer.
After completing an action, return the Labourer to your
personal supply.
Note: Temporary Labourers are returned to the Pub instead.
3
Restock Contract Cards
If any Contract card remains in the last spot (space “1”) in the
Site Office, place it face down onto the Contract card discard
pile. Then, shift any Contract cards still left in the Site Office
in the direction of the discard pile and refill any empty spaces
with cards from the top of the Contract card deck so that the
Site Office again contains three face-up Contract cards.
4
Check the Weather
By keeping an eye on the upcoming weather, you can calculate Work Rates and decide whether you need to Excavate or Lay Track first!
If there is a Weather disc on the left-most space of the Weather Track (marked with “!”), return the disc to the general supply.
Future weather is determined by the Contract card deck.
Shift all Weather discs one space to the left on the Weather Track. Take a Weather disc matching the weather icon on the top (unrevealed) card of the Contract card deck and place that disc on the right-most space of the Weather Track.
Adjust the Excavation and Lay Track Work Rate according to
the current weather (indicated by the space marked with
“!”). The Work Rate Markers cannot move beyond either
end of the tracks!
Sun improves the Work Rate.
= Excavate +2 spaces, Lay Track +1 space
Rain decreases the Work Rate.
= Excavate -1 space, Lay Track -1 space
Fog prevents certain actions from being performed by the players (does not affect Events).
= Excavation and Lay Track actions cannot be
performed this round. Do not adjust the Work Rate Markers. Instead, place a
Weather disc on both
the EXCAVATION and LAY TRACK Action Areas
to show that Labourers cannot be placed there.
Thinner Fog Variant
For your first few games you may use the following variant Fog rule.
During the Check the Weather phase, if the current
weather is Fog, place a
Weather disc on only the
last space of the EXCAVATION and LAY TRACK
Action Areas.
This way, Excavating and Laying Track will be possible
during each round of the game, albeit for fewer Labourers.
5
Restock the Stock Yard
Be aware of the Event Track and how empty the Supply Bag is. The emptier the bag, the greater the chance of an Event cube being drawn and messing up your plans!
Each round, more raw materials arrive at the Stock Yard.
Randomly draw a number of cubes from the Supply Bag and place them on the Stock Yard spaces according to type: Iron Ore, Stone, or Coal.
The number of cubes you should draw depends on the
number of players, as shown on the board to the left of the
Event Track. If there are not enough cubes in the Supply
Bag, simply draw all remaining cubes.
If any Event cubes are drawn, place these, one cube per
space, from left to right, onto the Event Track, beginning
with the space immediately to the right of the last occupied
space. As you place each Event cube, immediately resolve
the Event associated with that space (before placing the
next Event cube, if any). For more information about the
individual Events and their effects, see RESOLVING EVENTS
on page 9.
15=5
x
Whenever you take the
Lay Track action this round,
you lay track at 1 above the
current Work Rate.
1/30
+1
SD 0 01
---
6
Action Areas
Paying Resources or Other Pieces
Whenever the game or these rules instruct you to pay a
resource, it is important to ensure that these resources
and other pieces are returned to the correct supply. Unless
stated otherwise:
Every “resource” (Iron Ore, Stone, or Coal) should be re-
turned to the Supply Bag.
Every other piece (such as Rubble or Steel Bars, among
others) should be returned to the general supply.
A STOCK YARD
Hoarding resources will result in keeping the Supply Bag emptier, thereby increasing the likelihood of Events occurring! This may, of course, be precisely your plan, or else it may be your undoing!
Take up to 3 resources (max 1 Coal) and add them to your personal supply.
From the resources available in the Stock Yard, take any combination of 3 Iron Ore and Stone and add them to your personal supply. Alternatively, you may take 1 Coal and any combination of 2 Iron Ore and Stone.
If your Labourer is in the last Action Space of the Stock
Yard, you also become the new Start Player. Take the Start
Player token and place it in front of you. If no Labourer was
assigned to this Action Space, then the current Start Player
simply keeps the Start Player token.
B EXCAVATION
The Excavation Work Rate depends on the current weather.
The current Excavation Work Rate is indicated by the position of the shovel-shaped Excavation Work Rate Marker. Take from Track and Station cards a number of Rubble cubes equal to the current Excavation Work Rate, plus any bonuses from a Train you own or Contract cards you have activated, and add them to your personal supply.
You may not choose to take fewer Rubble cubes than this
total (Excavation Work Rate plus bonuses), unless there is
no Rubble left to excavate. If you need to take more Rubble
cubes than what is left on the whole route, simply take all
remaining Rubble cubes.
Rubble is excavated in a strict order “up the mountain.”
Rubble must always be taken from the first Track or Station card (with remaining Rubble) you encounter when moving “up the mountain” from Llanberis.
You may not take Rubble cubes from a Station card until all
Rubble has been removed from all Track cards leading up to
that Station card. When taking Rubble cubes from a Station
card, always take from the top-left-most Excavation space
on the Station card first (left to right, top to bottom).
If you take the last Rubble cube from an Excavation space
on a Station card, place one of your remaining Ownership
Markers on that space. At the end of the game you will
score a number of victory points as indicated for that space.
When all Rubble has been excavated, an extra Build Action Area becomes available.
If, at the end of a round, there is no more Rubble available to Excavate — take the special
EXCAVATION Action Area
overlay card set aside during setup and place it over the
EXCAVATION Action Area. For the rest of the game, an
additional Build Action Space is now available in this Action Area.
C WORKS
The ability to convert Iron Ore into Steel Bars is im-
portant and of limited availability each round. Do not be afraid to assign your Labourer to this action first!
Iron Ore can be converted into Steel Bars.
Convert 3 Iron Ore into 1 Steel Bar or convert 2 Rubble into 1 Stone. Perform this conversion at least once and up to three times per Action Space. You may freely mix these conversions as you choose. For example: gain 2 Steel Bars and 1 Stone, or 2 Stone and 1 Steel Bar, and so on.
Rubble can be converted into Stone.
Put the Iron Ore into the Supply Bag and take Steel Bars from the general supply. Return the Rubble to the general supply and take Stone from the Supply Bag. If the Supply Bag runs out of Stone, you cannot make more Stone until some has been returned to the bag.
Note: You are allowed to look in the Supply Bag prior to
converting Rubble to Stone.
---
7
D LAY TRACK
The Lay Track Work Rate
depends on the current
weather.
The current Lay Track Work Rate is indicated by the position of the track-shaped Lay Track Work Rate Marker. Return to the general supply a number of Steel Bars equal to the current Lay Track Work Rate, plus any bonuses from a Train you own or Contract cards you have activated, and, for each Steel Bar, turn over the first fully excavated Track card you encounter when moving “up the mountain” from Llanberis and place one of your remaining Ownership Markers on that card.
The game will end when all track has been laid. See END OF GAME on page 8.
You may not choose to lay fewer track than this total (Lay Track Work Rate plus bonuses), unless you have an insufficient number of Steel Bars. If you need to lay more track than there are excavated Track cards left on the whole route, simply lay all remaining track.
Completing the last Track card of the route will trigger the
end of the game. (See END OF GAME on page 8.)
E BUILD
Choose whether to Build a Station or Acquire a Train.
Using Stone and Steel Bars, build parts of a Station to earn victory points at the end of the game.
3
7
7
6
5
4
2
33
11
326m 32
Hebron
Station
SD068
Build Station
Build any one non-Excavation space on any Station card, provided that all Track cards leading up to that Station have been excavated. To build the space, pay the resources specified and place one of your remaining Ownership Markers on that space.
Note: Even though you cannot build any spaces on a
Station card until all Track cards leading up to that Station
have been excavated, the Excavation spaces on the
Station card itself do not need to be cleared first. They
represent the track continuing past the Station up the
mountain. For more information about Excavation spaces,
see the EXCAVATION Action Area section on page 6.
Acquiring a Train will provide you with powerful abilities.
+
=
N°3 Wyddfa
comes with
SD 033
Acquire Train
Note: You may not choose this option until the “Trains may now be acquired” Event has occurred! (See Resolving Events on page 9.)
Choose one of the Train cards remaining in the Engine Shed
and pay its cost (typically just 1 or 2 Steel Bars, but can
also be free or have other costs or specific requirements).
Place the Train in your player area, along with any wooden
markers that come with your chosen Train.
Note: If your Train “comes with” specific benefits not
represented by wooden markers on the card, take those
now.
From now on, and for as long as you own this Train,
apply its benefits whenever applicable. For more
information about each Train, see the Train Master List
Appendix.
You may not own more than 1 Train. If you already own
a Train, as part of this action, you may return a Train card
to the Engine Shed and acquire a different Train instead
(paying any associated costs of the new Train as normal).
Whenever a Train is returned to the Engine Shed,
place wooden markers (typically just Coal, but can also
be other wooden markers) onto that Train card (and
only that Train card) as was done during setup, and as
indicated on the card. If there is not enough wooden
markers (in the Supply Bag or general supply), place as
many as possible.
F SITE OFFICE
Take a Contract card of your choice.
Choose one of the three face-up Contract cards in the Site Office and place it, still face-up, in your player area. The upper section of the card depicts an end-game scoring option while the lower section details an effect which, once per game, modifies the action you are taking or changes the rules in your favour. (See CONTRACT CARDS box on page 4.)
G MOVE THE SURVEYOR
Moving the Surveyor is much more than just a default “pass” action!
Send your Surveyor further up the mountain to score
victory points at the end of the game.
Move your Surveyor onto the next Station card you encounter when moving “up the mountain” from Llanberis.
Note: When moving your Surveyor, it is irrelevant whether
Rubble has been excavated or track laid.
---
8
End of Game
Laying the last track triggers the end of the game!
The end of the game is triggered when the last track has been
laid (every Track card on the whole route has been completed).
If the last track is laid as the result of an Event, finish the
current round, then play one more round and proceed to
Scoring thereafter.
If a player laid the last track, finish the current round and
proceed to Scoring.
Additionally, in a 2-player game, as long as the last track has
not yet been laid, the game ends immediately if neither player
has any Ownership Markers left.
Scoring
Each player scores victory points as follows.
Note: As you score the Station and Track cards, do not
remove your Ownership Markers! These are used when
scoring your Contract card bonuses.
Track cards
For each of your Ownership Markers on Track cards, score a number of victory points as indicated on the card.
Station cards
For each of your Ownership Markers on Station cards, score a number of victory points as indicated by the space.
2 4
7 9
4 1
1
Two Viaducts
24
34
12
12
SD066
Contract cards
Contract cards — you simply cannot win the game
without them!
You score bonus points for each Contract card in your playing area, whether the card has been activated for its effect or not.
When counting scoring objects (resources, Ownership
Markers, etc.), keep in mind that you cannot score
more than one Contract card with the given objects. For
example, if you have laid a total of 4 tracks and have
both a “4 track” and a “3 track” Contract card, you can
only score one or the other, not both. In order to score
both cards you must have laid 7 or more track.
Excavation bonuses: In order to
score the stated number of victory points — move the indicated number of Rubble cubes from your personal supply and place onto this card. If you cannot move enough Rubble cubes, leave them where they are — the card scores nothing.
Whenever you take a Stock
Yard Action this Round, you
may take two additional
cubes (the one Coal per
Labourer limit still applies).
Track bonuses: In order to score the stated number of victory points — move the indicated number of your Ownership Markers from completed Track cards and place onto this card. If you cannot move enough Ownership Markers, leave them where they are — the card scores nothing.
Immediately take
any 2 cubes from
the Stock Yard
(one Coal maximum).
Building bonuses: In order to score
the stated number of victory points — move the indicated number of your Ownership Markers from Station cards and place onto this card. If you cannot move enough Ownership Markers, leave them where they are — the card scores nothing.
10=4x
Whenever you take the
Lay Track action this round,
you lay track at 1 above the
current Work Rate.
2/30
+1
SD002
Excavation and Track bonuses: In
order to score the stated number of victory points — move the indicated number of Rubble cubes from your personal supply and place onto this card AND move the indicated number of your Ownership Markers from completed Track cards and place onto this card. If you cannot complete all the requirements, leave the Rubble cubes and Ownership Markers where they are — the card scores nothing.
Whenever you take a
Build Action this Round,
you may use 3 Iron Ore
as if it was a Steel Bar.
Building, Track, and Excavation bonuses: In order to score the stated number of victory points — move the indicated number of your Ownership Markers from Station cards and place onto this card AND move the indicated number of your Ownership Markers from completed Track cards and place onto this card AND move the indicated number of Rubble cubes from your personal supply and place onto this card. If you cannot complete all the requirements, leave the Ownership Markers and Rubble cubes where they are — the card scores nothing.
Draw the top two cards from
the Contract Card Deck. You
may keep this card or one of
the cards you have drawn.
Discard the other two cards.
---
9
Surveyor bonuses: If your Surveyor has
reached at least as far up the mountain
as the indicated Station, score the
stated number of victory points.
Otherwise, the card scores nothing.
You may ignore the limit
on taking Coal from the
Stock Yard this Round.
*Extra points for how far your
Surveyor has gone up the mountain
Coal bonuses: Score the stated
number of victory points for each Coal in your personal supply.
Immediately move
your Surveyor 1 Station
further along.
Train No. 4, Snowdon
If you own the No. 4 Snowdon Train card, score an
additional 9 victory points.
Note: When playing the game
with promotional Train cards,
keep in mind that some of
those Trains may provide bonus
victory points at the end of the
game, just like No. 4 Snowdon.
Surveyor
Score a number of victory points as
indicated in the top-right corner of
the Station card reached by your
Surveyor.
Winning
The player with the most victory points is the winner! In
case of a tie, the tied player who was last in turn order
during the final round wins.
Resolving Events
During the Restock the Stock Yard phase, if any Event cubes are drawn, place these, one cube per space, from left to right, onto the Event Track, beginning with the space immediately to the right of the last occupied space. As you place each Event cube, immediately resolve the Event associated with that space (before placing the next Event cube, if any).
Excavate Rubble
Immediately remove all Rubble cubes from
a number of spaces (Track cards or Station
Excavation spaces) equal to the current Excavation Work Rate.
Rubble must always be taken from the
first Track or Station card (with remaining
Rubble) you encounter when moving “up
the mountain” from Llanberis. When taking
Rubble cubes from a Station card, always
take from the top-left-most Excavation space
on the Station card first (left to right, top to
bottom).
Place the removed Rubble cubes in the
general supply.
Trains may now be acquired
Trains cannot be acquired by any player until this Event has occurred. From now on, when taking an action in the
BUILD Action Area,
you may choose the Build Station option OR the Acquire Train option, but not both.
Lay Track
Immediately turn over a number of Track cards equal to the current Lay Track Work Rate.
For each track laid by this Event, always turn
over the first Track card you encounter when
moving “up the mountain” from Llanberis. If
any Rubble cubes remain on the Track card,
return those to the general supply.
No player scores for track laid this way.
This Event has no effect on any Rubble cubes
on Station cards.
+ 9
=
comes with
N°4 Snowdon
SD034
9
7 6
6
15
7
6
33
11
779m 63
Clogwyn
Station
SD 072
---
10
Complete Station
Immediately complete a Station by placing a
black No Entry marker on the first incomplete
Station you encounter when moving “up the
mountain” from Llanberis.
A Station is considered incomplete if any
Rubble remains on any of its Excavation
spaces or if any of its non-Excavation
spaces remain open (i.e. are not covered by
Ownership Markers).
For the rest of the game, whenever you take
the Excavate or Build actions, you may no
longer do so at this Station, though existing
Ownership Markers remain on the card to be
scored at the end of the game.
Train Maintenance
In alphabetical order of the name on the Train card, each player who owns a Train must immediately pay 1 Steel Bar OR discard a Train Maintenance Contract card. If you cannot pay, or choose not to, the Train must be returned to the Engine Shed.
Whenever a Train is returned to the Engine
Shed, place wooden markers (typically just
Coal, but can also be other wooden markers)
onto that Train card (and only that Train card)
as was done during setup, and as indicated
on the card. If there is not enough wooden
markers (in the Supply Bag or general supply),
place as many as possible.
Return Event cubes to the
Supply Bag
In addition to resolving the Event of the Event
space itself, return the Event cubes from the
indicated Event spaces to the Supply Bag.
Note: When placing Event cubes, they are
always placed on the Event Track beginning
with the space immediately to the right of the
last occupied space, not simply on the first
unoccupied space.
This means that, when the “10” space is
reached, the “7” space will again become the last
occupied space, causing future Events to loop
through 8, 9, 10 until the end of the game.
Trains
You do not need to own a Train to win the game, but it
often helps!
Trains cannot be acquired by any player until the “Trains may now be acquired” Event has occurred. Once this Event has occurred, a new option — Acquire Train — becomes available for any Labourer taking the Build action. (See
BUILD on page 7.)
N°1 L.A.D.A.S.
Cost: 2 Steel Bars
Comes with 1 Coal
You may pay 1 Coal at the start of a
round to gain 1 Temporary Labourer
for the round.
Whenever you take the Excavation
action, you excavate at 2 above the
current Work Rate. The total can
exceed the maximum rate printed on
the board.
No. 1 L.A.D.A.S.
SD 031
+2
=
comes with
N°2 Enid
Cost: 2 Steel Bars
Comes with no resources
You may pay 1 Coal at the start of a
round to gain 1 Temporary Labourer
for the round.
Whenever you take the Works
action, you can convert 2 Iron Ore
into 1 Steel Bar. Normally, this would
cost 3 Iron Ore.
No. 2 Enid
SD 032
=
=
comes with
no coal
N°3 Wyddfa
Cost: 2 Steel Bars
Comes with 1 Coal
You may pay 1 Coal at the start of a
round to gain 1 Temporary Labourer
for the round.
Whenever you take the Stock Yard
action, you may take 1 additional
cube. You may still not take more
than 1 Coal per action.
No. 3 Wyddfa
SD033
+
=
comes with
N°4 Snowdon
Cost: 1 Steel Bar
Comes with 1 Coal
You may pay 1 Coal at the start of a
round to gain 1 Temporary Labourer
for the round.
At the end of the game, you score an
additional 9 victory points.
No. 4 Snowdon
SD034
+ 9
=
comes with
---
comes with
N°5 Moel Siabod
SD035
No. 5 Moel Siabod
Cost: 1 Steel Bar
Comes with 2 Coal
You may pay 1 Coal at the start of a
round to gain 1 Temporary Labourer
for the round.
+
=
N°6 Padarn
comes with
Take 1 Build action after all other Build actions (min: 1) have been resolved.
SD036
No. 6 Padarn
Cost: 2 Steel Bars
Comes with 1 Coal
You may pay 2 Coal at the start of a
round to gain 1 Temporary Labourer
for the round.
At the end of resolving the Build
Action Area, if at least 1 Build action
was taken this round, by any player,
you may take an additional Build
action.
+1
=
=
comes with
N°7 Ralph
SD 037
No. 7 Ralph
Cost: 2 Steel Bars
Comes with 1 Coal
You may pay 1 Coal at the start of a
round to gain 1 Temporary Labourer
for the round.
Whenever you take the Lay Track
action, you lay track at 1 above the
current Work Rate. The total can
exceed the maximum rate printed on
the board.
Solo Training Mode
Snowdonia Deluxe Master Set offers two options for solitaire play: the Solo Training Mode (below) and the more demanding Botdell option found at the end of the Scenario Book.
Solo Training Mode is played in the same way as the normal
game, with the following changes.
Game Setup Changes
2 RAILWAY ROUTE — STATION CARDS
Waterfall Station (2) is not used in the Solo Training Mode.
9 ACTION AREA OVERLAY CARDS
Take the applicable alternative Action Area overlay cards and place them over the pre-printed Action Areas so that the number at the top of each Action Area includes “1”.
11 CONTRACT CARDS
Remove the two Contract cards marked “3–5” from the deck (cards 28 and 29).
13 TRAINS
Only a single Train card is available in Solo Training Mode. It is recommended that you play a series of 7 games, each with a different starting Train card. Choose your Train card from the following list:
No. 1 L.A.D.A.S.
No. 2 Enid
No. 3 Wyddfa
No. 4 Snowdon
No. 5 Moel Siabod
No. 6 Padarn
No. 7 Ralph
You will begin the game with your chosen Train already in your player area, along with any Coal that comes with the Train.
14 STOCK YARD AND SUPPLY BAG
When setting up the Stock Yard, do not populate it normally. Instead, add a number of resources to the Supply Bag using the following Supply Table:
1
16
10
6
(minus any Coal that came with your chosen Train)
4
!
Remove
Waterfall Station (2)
Passing Loop (4 ½)
“3–5” Contract cards (28 & 29)
To finish setting up the Stock Yard, randomly draw 6 cubes from the Supply Bag and place them on the Stock Yard spaces according to type: Iron Ore, Stone, or Coal. Return any Event cubes drawn this way, drawing a new cube as replacement.
Game Round
4 Check the Weather
Discard all face up Contract cards and refill with three
new cards. If the Contract card deck runs out, reshuffle the discard pile to form a new deck.
Resolving Events
Train Maintenance
If you cannot pay, or choose not to, remove the Train from the game. You cannot buy another one.
End of Game
As long as the last track has not yet been laid, the game ends immediately if you have no Ownership Markers left.
---
Credits
A game designed by: Tony Boydell
Art and graphic design by: Tony Boydell, Klemens Franz, Charlie Paull, Magdalena Klepacz, Agnieszka Kopera, Paweł Niziołek, Paulina Wach, Diana Lisiecka, Mateusz Stanisławski
Additional design by: Matthew Dunstan, Hisashi Hayashi, Sebastian Bleasdale, Błażej Kubacki, David J. Mortimer, David Brain, Alan Paull
Special promos design by: Dávid Turczi, Nigle Buckle, Dennis Kirps, Matthew Dunstan, Jean-Claude Pellin, Adam Kwapiński, Jonathan Gilmour, David Mortimer, Nick Case, Rainer Åhlfors, David Chircop, Jakub Polkowski
Botdell automa solo mode by: Dávid Turczi
Game Development: Rainer Åhlfors, Błażej Kubacki, Jakub Polkowski
Art direction: Jakub Polkowski
Rules editing: Rainer Åhlfors
Special thanks: The NSKN Games team would like to extend special thanks to all people who made Snowdonia Deluxe Master Set possible. Besides Tony and Alan, there were a lot of play-testers, advisors and gamers whose contribution has not gone unnoticed. Among them, Giles Bennett who runs Snowdonia Central has a special place in our hearts for making our job a lot easier. Everyone in our team who spent sleepless nights making this project possible also deserves a word of praise.
Tony Boydell would also like to extend his special thanks to Jakub Polkowski and Błażej Kubacki and the rest of NSKN Games team and all the guests and designers who contributed to the Kickstarter campaign. He’d also like to thank Mount Snowdon for being so bloody awesome!
Extra special thanks to:
Giles Bennett, Asthma UK, for Puffing Billy
Andrew Smith, for The Battlepuppy Express
Dave Moser, for The Candance Camille
Richard Dewsberry, for Card 32
Ben Parkinson, Uganda Village Board Game Convention, for Tsavo Lions
Chooi Oh, for Baby Train
5G4D podcast, for A Remote Cabin In The Woods
Peter D, for Katie, who would also like to share a few words:
“The Fairbourne Railway is one of The Great Little Trains of Wales. Back in the 1970s this delightful 15” gauge railway was at its peak, carrying over 100,000 passengers a year. Katie was a beautiful engine, and one of the line’s most-loved. In the Snowdonia promo card she is driven by Dave Black, who all the kids of the 70s thought was the coolest driver on the line. She is still alive and well, and now runs on the Kirklees Light Railway.”
Snowdonia Deluxe Master Set is a board game published by NSKN Games. For more information about this product, please visit www.nskn.net. For missing or damaged components, please follow the customer support link.
---
Why ask BoardGamesBot
Instead of flipping through the whole manual- Accurate answers Based exactly on this manual, with the source page.
- Save time Find the rule in seconds, without flipping 12 pages.
- Anytime Settle rules mid-game, straight from your phone.
- 100% free Create your free account and start using it now.
How it works
Three steps to the answer- 1 Ask your question Type your question about this game's rules.
- 2 Create your free account Takes 20 seconds — it only saves your history.
- 3 Get the answer The AI finds the exact rule and cites the manual page.
Other Games You'll Like
Based on mechanics and theme





Manual published by the publisher · for rules reference only. More about the game on BoardGameGeek and Ludopedia .
