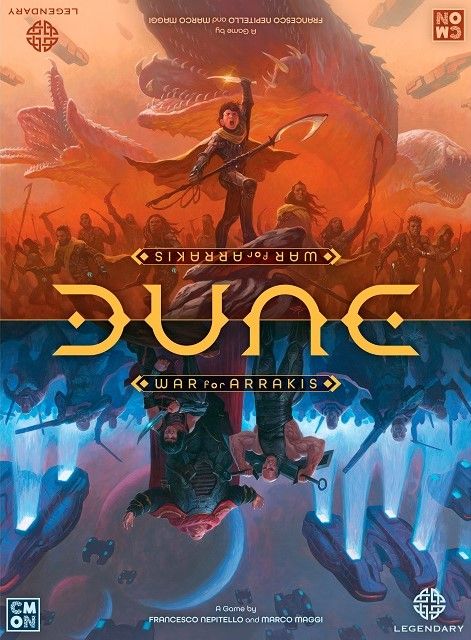
How to Play Dune: War for Arrakis
CMON Global Limited, ADC Blackfire Entertainment, Gale Force Nine, LLC · Board game · 2024- Players
- 1–4 · best 2
- Players
- Solo
- Play Time
- 120 min
- Weight
- Weight 3.6/5
- Year
- Year 2024
- Minimum age
- Minimum age 14+
What do you want to do now
Ask anything about Dune: War for Arrakis: rules, setup, components, complexity, price, or whether it fits your group.
Video: How to Play
Start here, then follow the written guide
Step by step
Game Objective
In Dune: War for Arrakis, you dive into the epic struggle for control of the planet Arrakis, the only source of the valuable spice melange. The game recreates the Desert War, a conflict that unfolds one year after the attack that stripped control of the planet from House Atreides and returned it to the Harkonnens.
For the Harkonnens, the objective is to accumulate 10 Supremacy Points. They must manage the spice harvest, maintain good relations with the powers of the Imperium, and launch search-and-destroy missions against the Fremen rebels.
For the Atreides, victory is achieved by reaching or exceeding a specific score in each of the three types of Prescience Points, as determined by a Secret Objective Card drawn at the start of the game. They fight Harkonnen aggression with guerrilla warfare and an alliance with the Fremen, utilizing knowledge of Arrakis' natural forces.
Setup
The setup for Dune: War for Arrakis involves assembling the board and distributing the starting components for each faction. Follow these steps:
- Align the two sections of the board in the center of the playing area.
- Shuffle the 8 Sietch tokens and place them randomly, face down, in the indicated Areas on the board, 1 token per Area. Only the Atreides player may inspect the hidden side of these tokens at any time.
- Shuffle the Atreides Starting Detachment tokens, face down, and place 1 token and 1 Naib Leader miniature in each Area containing a Sietch.
- Shuffle the standard Atreides Detachment tokens and keep them face down near the Atreides player.
- Place the 6 Harkonnen Settlement tokens (4 Peon Villages, the city of Carthage, and the planetary capital Arrakina) in the indicated Areas on the board. Their ratings are public.
- Shuffle the 2 sets of Harkonnen Starting Detachment tokens and, randomly, place 1 token of each type, face down, in each Area containing a Harkonnen Settlement. Flip them face up and replace them with the corresponding Harkonnen miniatures.
- Shuffle the 6 Experimental Ecological Station tokens and place them randomly, face down, in the indicated Areas on the board, 1 token per Area. The hidden side remains secret until an Atreides Legion enters the Area.
- Place the 3 Prescience markers on space 0 of the Prescience Track. Place the Supremacy marker on space 0 of the Supremacy Track.
- Shuffle all Prescience cards into a face-down deck and place it beside the board.
- Shuffle the 16 Worm Sign tokens face down to form the Worm Sign token reserve.
- Take your faction's player board. Place all Named Leader cards marked as ‘in play at the start of the game’ face up in the corresponding Action spaces. Separate the miniatures for these Leaders. Keep the Generic Leader cards and miniatures (Naib and Bashar) and the remaining Named Leader cards and miniatures (face down) nearby.
- The Harkonnen player takes the The Spice Must Flow Board and places it beside their board, aligning the 3 Imperium markers at the highest space.
- Shuffle the Planning cards into 4 separate decks according to their backs. The Harkonnen player places the House Harkonnen and Corrino Allies decks within reach. The Atreides player does the same with the House Atreides and Fremen Allies decks.
- The Atreides player shuffles the 6 Secret Objective cards and draws 1 (the remaining 5 are set aside). This card is kept hidden.
- Players keep the miniatures, Action dice and Combat dice sets, additional tokens, and Reference cards of their respective factions within reach.
- The Atreides player starts with 1 Bene Gesserit token. The remaining 4 tokens form the Bene Gesserit token reserve.
Game Flow
Dune: War for Arrakis is played in a series of rounds, each divided into phases, until one faction reaches its victory condition.
Start of Round
- Each player draws 2 Planning cards (1 from each of their decks) into their hand.
- Draw 3 Prescience cards and place them face up, in a row, beside the deck.
Phase 1. Vehicle Placement (Harkonnen Only)
The Harkonnen player checks the The Spice Must Flow Board to determine how many Action dice cannot be used and how many Vehicles are available. Then, they place all Vehicles on the board: Harvesters in Desert Areas, Ornithopters and Carriages in Air Zones.
Phase 2. Action Resolution
This is the main phase where players execute their actions.
- Both players roll their Action dice and place them on their player boards in the spaces corresponding to the results.
- Starting with the Harkonnens, each player may place 1 Bene Gesserit token (if they have any) on their player board.
- Starting with the Atreides, players take turns executing Actions. When both have executed all available Actions, the phase ends.
Phase 3. Desert Threats (Atreides Only)
- The Atreides player places 1 Worm Sign token face down in each Desert Area containing a Harkonnen Legion or a Harvester.
- Then, they flip all Worm Sign tokens on the board and resolve their effects.
- If there are Harkonnen Legions in Plateau, Lesser Erg, or Desert Areas, the Atreides player rolls the consequences of Coriolis Storms for each Area.
Phase 4. Spice Harvest (Harkonnen Only)
- The Harkonnen player removes Harvesters from the board to collect spice. The amount collected depends on the Area.
- The Harkonnen player immediately spends the collected spice points to maintain or move the Imperium markers on the The Spice Must Flow Board. Markers that are not maintained or moved up drop 1 space, activating Imperium Prohibitions.
- If the Supremacy marker is on space 5 or below, the Harkonnen player may spend 3 spice points to gain 1 Supremacy point (once per phase).
End of Round
- The Atreides player checks if the End of Round requirements of any revealed Prescience card have been met and advances the Prescience markers. If all requirements of the Secret Objective Card are met, the Atreides player wins.
- Remove all Ornithopters and Carriages from the board.
- If there are Named Leaders on the board, both players may replace any Named Leader with a Generic Leader.
- Flip face up and return all ‘spent’ Leader cards to their corresponding Action spaces.
- Both players check their Planning card hands and discard down to 6 cards, if necessary.
- The Atreides player chooses whether to remove from the game or reshuffle any revealed but unclaimed Prescience card.
- Both players recover their used Action dice and a new round begins.
Actions and How to Play
During the Action Resolution phase, players use their Action dice to execute various actions. Each die result corresponds to a specific action, and players alternate executing one action at a time.
Action Dice Results and Corresponding Actions
- Strategy Action: Allows moving 2 different Legions OR attacking with 1 Legion.
- Leadership Action: Allows moving 2 different Legions that contain a Leader OR executing a Surprise Attack with a Legion that has a Leader.
- Detachment Action (Atreides): Allows deploying 1 Detachment token and 1 Leader (Naib or Named) on the same Sietch token.
- Detachment Action (Harkonnen): Allows deploying 3 Regular Units and 1 Leader (Bashar or Named) among 1 or more Settlement tokens.
- Mentat Action: Allows drawing 2 Planning cards from their decks into their hand.
- House Action (Atreides): Allows using this Action as any die result of the player's choice.
- House Action (Harkonnen): Allows replacing 2 Regular Units with 2 Elite Units OR placing 2 Vehicles of the player's choice on the board.
- Desert Power Action (Atreides Only): This action does not require spending an Action die. It allows placing 2 Worm Sign tokens in Desert Areas, OR moving 2 different Sandworms, OR attacking with 1 Sandworm.
Named Leader Special Actions
Each Named Leader Card is associated with a specific Action die result. When a Named Leader enters the game, their card is placed on the player's board. Leaders provide additional or enhanced options when executing an action. Once used, the Leader's card is flipped face down and considered ‘spent’ until the start of the next round.
Free Actions
Free Actions can be executed multiple times in the same turn without spending an Action die.
- Guerrilla Training (Atreides Only): The Atreides player may reveal any number of Detachment tokens on the board.
- Reconnaissance (Harkonnen Only): The Harkonnen player may remove 1 Ornithopter from the board to reveal a Sietch and/or all Detachment tokens in an Area in a connected Sector.
Playing Planning Cards
Playing Planning cards allows the execution of special Actions. They are played during the Action Resolution phase by spending any 1 Action die. Players may also discard Planning cards during a battle to boost their forces. There are 4 Planning card decks: House Harkonnen, Corrino Allies (for the Harkonnen player), House Atreides, and Fremen Allies (for the Atreides player).
End Game and Scoring
The game ends when one of the factions reaches its victory condition.
Victory Conditions
- Harkonnen: Win immediately upon reaching 10 Supremacy Points on the Supremacy Track.
- Atreides: Win at the end of a round if the 3 Prescience markers have reached the scores indicated on the Secret Objective Card.
End Game and Battles
Battles occur during the Action Resolution phase. Once a battle is initiated, it proceeds in combat rounds.
- Battle Round Sequence: Players may discard Planning cards to add Combat dice. Both players roll Combat dice. The defender in a Settlement rolls additional dice.
- Combat Roll: Each die can result in a Hit, Shield, or Special.
- Leader Combat Abilities: Leaders can modify Combat die results.
- Sardaukar and Fedaykin Units: Each cancels 1 Hit result from the opponent.
- Removing Casualties: Players remove Units or Leaders based on the Hits suffered. Wounded Named Leaders go to the Regeneration Tank.
- The Battle Continues: If the defending Legion is not in a Settlement, the battle continues unless the attacker ceases the attack. The defender may retreat.
- Cease Attack: The attacker decides to end the battle.
- Retreat: The defender moves their Legion to an adjacent Area chosen by the attacker.
- End of Battle: The battle ends if the attacker ceases the attack, the defender retreats, or one or both Legions are destroyed. If the defending Legion retreats or is eliminated (and the attacker is not destroyed), the battle ends.
Tips for Winning
- Manage your Action dice: The choice of which dice to use and in what order is crucial. Think carefully about how to maximize the use of each result to advance your objectives.
- Utilize Free Actions: Free Actions, such as Guerrilla Training for the Atreides and Reconnaissance for the Harkonnens, can offer significant advantages without a die cost.
- Leverage Planning Cards: These cards can turn the tide of the game, offering unique and strategic abilities. Use them at opportune moments, especially during battles.
More videos
More rules explanations from the community
In English
-
 Dune War For Arrakis - How To Play
-
 How to setup and play Dune: War for Arrakis
-
 Playthrough (with explanations)
-
 Dune: War for Arrakis - How to Play - CMON Kickstarter rule preview!
-
 Painting the Harkonnens: The Painted Mini, Dune War for Arrakis
-
 Dune: War for Arrakis Rules Challenge
-
 Dune: War for Arrakis: Does the Mahdi Solo Mode Work for You?
-
 The Painted Mini: Dune War for Arrakis, Let's Paint the Vehicles!
-
 Painting the Atreides
-
 Painting the Sandworms Dune: War for Arrakis
-
 Dune War for Arrakis: 3 & 4 Player Rules
Rules manual
Official PDF file
Frequently Asked Questions
Quick answers about the rules
What is the objective of Dune: War for Arrakis?
How do you set up Dune: War for Arrakis?
How do you play Dune: War for Arrakis?
How does Dune: War for Arrakis end, and how do you score?
What are some tips for winning Dune: War for Arrakis?
Expansions
Published additional content

Other Games You'll Like
Based on mechanics and theme