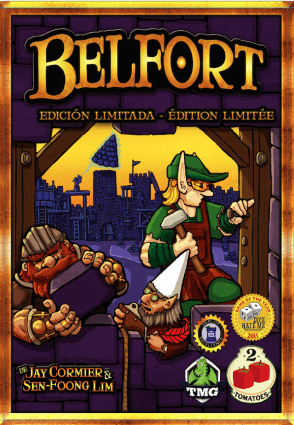
How to Play Belfort: Edición Limitada
2Tomatoes Games, Kronos Games (Krogam) · Board game · 2018What do you want to do now
Ask anything about Belfort: Edición Limitada: rules, setup, components, complexity, price, or whether it fits your group.
Step by step
Game Objective
In Belfort, players take on the role of Master Architects, assigning their teams of loyal Elves and Dwarves to perform various tasks. The main objective is to collect money and raw materials to construct buildings in the city's five districts. Each constructed property offers unique abilities, and hiring Gnomes can unlock additional bonuses. The use of the city's five powerful Guilds is also crucial for victory.
A player's influence in each district grows with each new building constructed. Players must decide not only what type of building to construct, but also the most effective time and location to do so. Points are distributed three times during the game, based on players' influence in each of the five districts and among Elves, Dwarves, and Gnomes.
At the end of seven rounds, the player with the most points wins and receives the Key to the City, becoming the Master Castellan of Belfort!
Preparation (Setup)
- District Boards: Position the five districts together to form a pentagon, representing the castle and surrounded by a Scoring Track. Ensure the districts are in the correct order, using the numbers on the Scoring Track.
- Collection Board: Position the Collection Board next to the game board. Make piles of all resources (Wood, Stone, Metal, Gold) next to their respective Resource Areas on the Collection Board.
- Calendar Board: Place the Calendar Board next to the game board.
- Player Components: Each player chooses a color and takes the following components:
- 1 Player Board
- 12 Property Markers (keep them next to your Player Board)
- 1 Scoring Marker (stacked near the start of the Scoring Track)
- 3 Elves and 3 Dwarves of your color (place them next to your Player Board with the Master side face down). The remaining Elves and Dwarves of all players are gathered into a worker supply next to the game board.
- Starting Resources: Each player receives 1 Wood, 1 Stone, 1 Metal, and 5 Gold. Keep them next to your Player Board.
- Turn Order Crests: Take a number of crests equal to the number of players in the game. Randomly distribute one crest to each player. Each player keeps their crest face up on their Player Board.
- Guilds: Choose 5 Guilds (see options below for different game types) and place them face up on the board, in the designated spot for Guilds. The order does not matter.
- Beginner Game: Randomly select 3 Resource Guilds and 2 Basic Guilds.
- Normal Game: Randomly select 1 Resource Guild, 2 Basic Guilds, and 2 Interactive Guilds.
- Advanced Game: Choose all Guilds randomly or players can decide by mutual agreement.
- Property Cards: Place the Property card deck on the Calendar Board, face down, in the indicated spot. Draw 3 cards from the deck and place them face up, next to the Calendar Board, forming a column of available properties.
- Starting Hand: Shuffle the Property card deck. Each player is dealt a hand of 5 cards from the Property deck. Each player looks at their cards and chooses 3 to keep, discarding the other 2 face up into a collective discard pile.
- Gnomes: Take the appropriate number of Gnomes for the number of players (9 for 2 players, 14 for 3, 18 for 4, 22 for 5) and place them in the “Gnomes for Hire” area.
- Calendar Marker: Place it next to the first month of Spring.
Note: For a 2-player game, there are some differences in setup and other rules. Check the 2-Player Game Appendix for more details.
Game Flow
Each game of Belfort lasts 7 Rounds (represented by the months on the Calendar). Each round consists of the following 5 Phases:
- Calendar: The Calendar marker is moved to the next month on the Calendar. (If this is the first round of the game, move it to the first month of Spring.) Then proceed to the Allocation phase.
- Allocation: Players take turns assigning their Workers (Elves and Dwarves) to various tasks.
- One at a time, starting with the player who has the first Turn Order Crest and continuing in order, players either allocate a Worker or pass their turn.
- Workers can be allocated to spaces on the Collection Board, in the Guilds, or on their own constructed Property cards.
- Workers can never be allocated to occupied spaces.
- If a player passes, they immediately distribute all their remaining Workers to the Resource Areas on the Collection Board.
- The phase ends when all players have passed.
- Collection: Players gather resources and other goods. The Collection Board is resolved one area at a time, from left to right (first the top row, then the bottom). As each area is resolved, the Workers allocated there are returned to their respective owners.
- Resource Area: Forest: Each allocated Elf collects 1 Wood. The player with the most Elves in the Forest collects 1 bonus Wood (ties do not receive a bonus).
- Recruiter's Counter: For each Worker allocated, the owner takes their Worker back and collects an extra Worker of the same type (Elf or Dwarf) from the worker supply. (Cost of 2 Gold to allocate a Worker here).
- Royal Camp: In order of allocation, each player with a Worker in the Royal Camp can exchange Turn Order Crests with another player and take their Worker back. The exchanged crest is flipped face down.
- Resource Area: Quarry: Each allocated Dwarf collects 1 Stone. The player with the most Dwarves in the Quarry collects 1 bonus Stone (ties do not receive a bonus).
- Resource Area: Mine: Each allocated Elf and Dwarf pair collects 1 Metal. The player with the most Workers in the Mine collects 1 bonus Metal (ties do not receive a bonus).
- Resource Area: Gold Mine: Each allocated Worker collects 1 Gold. The player with the most Workers in the Gold Mine collects 1 bonus Gold (ties do not receive a bonus).
- Income & Taxes: Each player collects 1 Gold from the supply for each Income Coin shown on their constructed Property cards. Then, each player pays taxes according to the location of their Scoring Marker on the Scoring Track. If a player cannot pay the Gold, they move their Scoring Marker 1 space back on the track for each unpaid Gold.
- Actions: Players perform actions using their designated resources and Workers. Players act according to turn order (Crest 1, Crest 2, etc.). Players can perform as many actions as they wish, as many times as they wish (unless specified otherwise) and in any order.
- Scoring: Players calculate their scores (only in certain rounds). If the Calendar marker is on an X, it's time to score. There are three scoring rounds in the game, one at the end of each season on the calendar.
Actions and How to Play
During the Action Phase, players can perform the following actions:
- Construct Properties:
- A player can construct any Property card in their hand.
- Pay the resources listed on the card to the supply.
- Flip the card face up, in front of you.
- Place one of your Property markers on one of the still vacant Property symbols on the board.
- The property will then generate income during the Collection phase (if it has an Income Coin) and its spaces (if any) will be open to receive Workers during the Allocation phase, and can be occupied by Gnomes (if it has a Gnome Lock) capable of unlocking other abilities.
- Construct Walls:
- Walls are not Properties and do not require a card.
- The cost of a Wall is 3 Wood and 3 Stone.
- Pay the cost to the supply and place one of your Property markers on any vacant Wall symbol on the board.
- A player can construct as many Walls as they can afford on their turn.
- Construct Guilds:
- Like Walls, Guilds are not Properties and do not require a card.
- To construct a vacant Guild, a player pays the cost shown at the base of the Guild to the supply and places one of their Property markers on the Guild symbol.
- The player then becomes the owner of the Guild.
- A player can construct as many Guilds as they can afford on their turn.
- Activate Previously Allocated Workers:
- A player must activate and return each of their allocated Workers at some point during their turn.
- Activating a Worker means performing the action of the space where it was allocated (on a Property card or in a Guild) during the Allocation phase of this round.
- All Workers are returned when activated.
- Visit the Trading Post (once per turn):
- Each visit consists of up to 1 Buy action and up to 1 Sell action, in any order.
- Prices are listed in the Trading Post section of the Calendar Board.
- All transactions are conducted between the player and the resource supply.
- Hire a Gnome (once per turn):
- Pay 3 Gold to the supply.
- Take a Gnome from the stock and allocate it to an unoccupied Gnome Lock on one of your constructed Property cards.
- The blocked action/space is immediately unlocked, becoming available for use.
- A player can only hire a Gnome if they have an unoccupied Gnome Lock in which to allocate it.
- There is a limited number of Gnomes available. When they run out, it is no longer possible to hire them.
- Buy a Property Card (once per turn, after all other actions):
- As the last action of a player's turn, they can pay 1 Gold to the supply.
- Buy a Property card from the top of the Property deck or one of the 3 in the column of available Properties.
- The purchased card is added to your hand.
- If buying one of the 3 in the column of available Properties, they immediately reveal the next card from the deck to replenish it.
- At the end of their own turn, any player with more than 5 Property cards in their hand must discard any excess above 5.
Guildonomy: You can separate or combine actions at will. For example, you don't need to construct all your properties or activate all your workers at the same time. Sometimes, wisely separating your actions allows you to make more advantageous combinations.
Property Types (Examples)
- WORKSHOP:
- Cost: 1 Metal, 1 Stone, 1 Wood
- Income: zero
- Space Action: Collect 1 Metal from the supply.
- Gnome Lock Action: Once per turn during the Action phase, you can buy 1 Metal from the supply at the cost of 1 Gold.
- BANK:
- Cost: 2 Gold, 1 Metal
- Income: 1 Gold
- Space Action: Collect 2 Gold from the supply.
- First Gnome Lock Action: Every round you can make a second visit to the Trading Post (consisting of up to one buy and up to one sell) during your turn in the Action phase.
- Second Gnome Lock Action: Every round you can make a third visit to the Trading Post (consisting of up to one buy and up to one sell) during your turn in the Action phase.
Rules manual
Official PDF file
Frequently Asked Questions
Quick answers about the rules
What is the objective of Belfort: Edición Limitada?
How do you set up Belfort: Edición Limitada?
How do you play Belfort: Edición Limitada?
Other Games You'll Like
Based on mechanics and theme