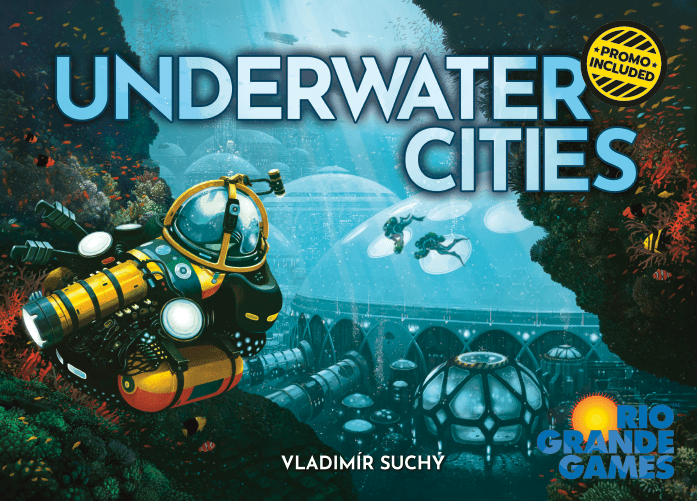
How to Play Underwater Cities
Delicious Games, Arrakis Games, Atalia · Board game · 2018
1–4 · best 2
Solo
80–150 min
Weight 3.6/5
8.5
rating
Ludopedia
8.0
rating
BGG
What do you want to do now
Ask questions about the game
Ask anything about Underwater Cities: rules, setup, components, complexity, price, or whether it fits your group.
Example questions
Continue this chat in the Assistant
Game page
Prices, ratings and our review
Rules manual
Official PDF file
Video: How to Play
Start here, then follow the written guide
JonGetsGames - Underwater Cities Tutorial & Playthrough
Step by step
Objective of the Game
Welcome, future underwater architects! In *Underwater Cities*, the Earth is bursting at the seams, and Mars is still a distant dream. Your mission, should you choose to accept it, is to dive deep and build the most thriving, self-sustaining underwater nation. You'll be constructing an archipelago of cities, connecting them with vital transportation tunnels, and setting up essential facilities like kelp farms, desalination plants, and laboratories. Your ultimate goal? To score the most points by the end of the game, proving your nation is the beacon of hope for humanity beneath the waves!Preparation (Setup)
Alright, let's get this underwater empire started! Here's how to set up your game:- Main Game Board: Place the double-sided main game board in the center of your table. Use the side for 3 or 4 players, or the other side for a 2-player game.
- Components Supply: Keep all the lovely city domes (white for nonsymbiotic, purple for symbiotic), tunnel tiles, building tokens (farms, desalination plants, laboratories), and resource tokens (credits, kelp, biomatter, science, steelplast) in a common, easily accessible supply. Don't worry about running out of resource tokens; you can use higher denominations and multiplier tiles if needed!
- Era Decks: Separate the cards with divers on the back into three decks: Era I, Era II, and Era III. Shuffle the Era I deck thoroughly and place it face down on its designated spot on the main board. Set aside the Era II and Era III decks for now. Remember, a good shuffle prevents same-colored cards from clumping!
- Special Cards:
- Separate the Special cards into two groups: those costing one or two credits, and those costing three credits.
- Shuffle the one-or-two-credit Special cards deck and place it on the main board, turning the top card face up.
- Shuffle the three-credit Special cards and deal 6 face up to their spaces in the center of the board. Return the rest to the box – these 6 are all you'll see this game!
- Era and Scoring Markers: Place the era marker on the first space of the era track. Each player places one score marker on the zero space of the scoring track.
- Player Components: Each player chooses a color and takes:
- 3 action tiles
- 1 Personal Assistant card (already claimed and in play!)
- 1 final scoring card
- 1 player info card
- 1 player board (chosen randomly, use the one-star side for your first game).
- Starting City: Each player places a white nonsymbiotic city dome on the starting city site in the lower right corner of their player board.
- Metropolis Tiles: Separate the brown and blue metropolis tiles. Mix the brown ones and give one randomly to each player. Mix the blue ones and give two randomly to each player. Place your brown metropolis on the hexagonal space in the upper left corner of your player board, and randomly assign the two blue metropolises to the remaining two spaces.
- Starting Resources: Each player starts with 1 kelp, 1 steelplast, 1 science, and 2 credits.
- Player Order and Federation Track:
- Randomly place play-order markers on the play-order track for the first round.
- Then, place Federation track markers in the *opposite* order on the Federation track. The player playing third gets 1 extra credit, and the player playing last gets 1 extra credit and 1 extra steelplast.
- Initial Hand: Each player draws 6 cards from the Era I deck, chooses 3 to keep, and discards the other 3. (Pro-tip for new players: try to keep one card of each color!)
- 4-Player Game Specifics: In a 4-player game, use the action-cloning tile and all 13 symbiotic city domes. For 2 or 3 players, leave the action-cloning tile in the box and use 7 (2 players) or 10 (3 players) symbiotic cities.
The Turn of Play
A round in *Underwater Cities* is all about smart choices and strategic card play. Here's how it flows:Playing a Turn
Players take turns in the order shown on the play-order track. This order is fixed for the round.- Start with 3 Cards: You always begin your turn with exactly 3 cards in hand.
- Choose an Action Slot & Play a Card: On your turn, you'll simultaneously do two things:
- Choose an Action Slot: Pick an available action slot on the main board. "Available" means no other player has placed their action tile there this round. (There's also an always-available slot, more on that below!) Place one of your action tiles on the chosen slot to mark it as occupied.
- Play a Card: Play one card from your hand.
- Resolve Action & Card Effect:
- Color Match! If the color of the card you played matches the color of the action slot you chose, you get to perform the card's effect *before or after* performing the action slot's effect. Green cards are strongest with green slots (weakest slots), red cards are moderate, and yellow cards are weakest but pair with the strongest yellow slots.
- No Match: If the colors don't match, you simply perform the action from the chosen action slot and discard the card without its effect. Think of it as sending personnel to a job outside their expertise – they get it done, but no extra perks!
- Always-Available Slot: This slot has no color, so playing a card here means you *always* ignore the card's effect and just gain 2 cards and 2 credits.
- Partial Actions: You can choose to use only part of an action or card effect, but you *must* use at least part of it. For example, if an action lets you build a city and a tunnel, you can just build the tunnel. But if you can't afford *any* part of an action (like building 2 tunnels when you can only afford 1), you can't choose that slot. Card effects are always optional.
- Triggered Effects: If a new effect triggers (like gaining a bonus from building on a specific site), resolve it immediately, even if you're in the middle of another effect. However, you must resolve a card effect and the action of the chosen action slot *separately and completely* before resolving the other. No mixing and matching!
- End of Turn:
- Draw 1 Card: You always draw 1 card at the end of your turn.
- Discard to 3: If you have more than 3 cards in your hand, you must discard down to 3. You can ponder this decision while others play, but officially, it happens at the start of your next turn.
Types of Cards
Cards are your personnel and special projects. They come in several flavors:- Instant Effect Cards: These have a lightning bolt symbol. If their color matches the action slot, you resolve their effect immediately (before or after the action) and then discard them.
- Claiming Cards: Four types of cards don't have instant effects. If their color matches, you *claim* them by placing them near your player board, making them a permanent part of your nation. If the colors don't match, they go to the discard pile.
- Permanent Effect Cards: Marked with a continuous loop symbol, these provide ongoing benefits, discounts, or special abilities once claimed.
- Action Cards: These have a gear symbol. Claimed action cards offer additional actions you can take, but only when an action slot or card effect explicitly allows you to "use 1 of your action cards." Each action card can only be used once per era. After use, rotate it 90 degrees. They reset at the end of each era. You are limited to 4 action cards (your Personal Assistant card counts as one). If you claim a fifth, you must discard one first.
- Production Cards: Marked with a factory symbol, these come into play during Production phases, either directly producing resources or modifying your network's production.
- Final Scoring Cards: These have a trophy symbol. Claimed final scoring cards give you points at the end of the game based on your network's composition or resource conversions.
- Special Cards: These are the face-up cards on the main board. You can only get them by using a specific action slot. Once in your hand, they act like other cards, but if their color matches the slot, you must pay their cost (near the upper left corner) to get their benefit. If not paid or matched, one-or-two-credit Special cards return to the bottom of their deck, while three-credit Special cards are removed from the game.
Building Your Network
This is the core of your underwater expansion!- Cities: Your habitat for people.
- Nonsymbiotic City (White Dome): Costs 2 steelplast, 1 kelp, 1 credit. Easier to build, but no Production points.
- Symbiotic City (Purple Dome): Costs 1 steelplast, 1 kelp, 1 biomatter, 2 credits. More expensive, but produces points during Production.
- Place on an empty city site adjacent to an existing city. All connected cities score points at the end of the game and consume 1 kelp during Production.
- Buildings: Special facilities for self-sufficiency.
- Farm: Costs 1 kelp.
- Desalination Plant: Costs 1 credit.
- Laboratory: Costs 1 steelplast.
- Place on an empty building site adjacent to an existing city or a site where you *could* build a new city. Buildings only provide benefits if connected to your network.
- Expansion Sites: Each city has an extra building site, only usable if a card effect specifically allows it.
- Tunnels: Connect your cities and structures.
- Costs 1 steelplast, 1 credit.
- Place on a tunnel site, non-upgraded side up. It must be connected to your starting city. A path of tunnels (through cities or empty city sites) back to your starting city counts as connected.
- Upgrading Structures: Buildings and tunnels can be upgraded.
- Usually costs 1 science. Card effects can offer special costs.
- For buildings, stack an upgraded token on top. For tunnels, flip the tile.
- Upgraded structures produce more during Production and can trigger card benefits. You can't upgrade an already upgraded structure.
- Your Network: Your starting city is always connected. Tunnels are always connected. A city is connected if there's a tunnel chain to your starting city. A building is connected if it's adjacent to a connected city. Disconnected structures and cities don't produce, consume kelp, or score points.
- Biomatter: This rare resource can substitute for kelp or steelplast when building a tunnel, building, or city.
- Metropolises: Connect your network to these coastal hubs by building tunnels to their adjacent sites. They offer various benefits, either instant or during Production, and brown metropolises can score points at game end.
- Bonuses from Building: Your player board has sites that grant immediate bonuses (resources, advancing on the Federation track, drawing cards) when you build a structure or city on them. These are *triggered effects* and resolve instantly!
The Federation Track
Build your reputation with the world government!- Advance your marker on the Federation track by choosing actions or playing cards with the corresponding symbol.
- If you land on a bonus space, immediately gain the depicted resource. If you move multiple spaces, gain all bonuses.
- If your marker ends on an occupied space, place it on top – this means you'll play earlier in the next round.
- If you advance when already on space 1, score 1 point for each space you *would have* advanced.
- At the end of each round, play order for the next round is determined by positions on the Federation track (farthest ahead goes first). Then, all markers reset to the colored spaces below space 4.
The Action-Cloning Tile (4-Player Game Only)
In a 4-player game, this tile offers a second chance at an occupied slot.- Instead of choosing an available slot, pay 1 credit, take the action-cloning tile, and choose an action slot occupied by another player (not by you!).
- Place your action tile on top of theirs, play a card as usual, and gain the card's benefit if colors match.
- The action-cloning tile is a one-time use per round. The player who used it keeps it as a reminder, returning it to the main board at the end of the round.
End of Game and Scoring
The game unfolds over 10 rounds, punctuated by three crucial Production phases.Production Phases
The era marker advances one space at the end of each round. When it hits a Production space (after rounds 4, 7, and 10), it's Production phase time!- Network Production: All players simultaneously produce resources.
- Every tunnel adjacent to a connected city, and every building in your network, produces something.
- Upgraded structures produce more.
- Symbiotic cities produce 2 points each! Nonsymbiotic cities don't produce on their own but are vital for connecting buildings.
- Buildings and cities *not* connected to your network do not produce.
- Card and Metropolis Production: Apply effects from any claimed production cards or connected metropolises with production effects. Again, ignore disconnected cities and buildings when evaluating these effects.
- Feeding Cities: At the end of Production, each connected city in your network consumes 1 kelp.
- Return spent kelp to the supply.
- If you can't feed all cities with kelp, for each unfed city, you must pay 1 biomatter.
- If any cities are *still* unfed, you pay 3 points per unfed city.
End of the Round
After everyone has taken 3 turns:- Return all action tiles to their owners (and the action-cloning tile to the board if used).
- Reorder play-order markers based on the Federation track positions (farthest ahead plays first).
- Reset all Federation track markers to the colored spaces below space 4.
- Advance the era marker. If it hits a Production space, resolve the Production phase before the next round.
End of the Era
Each Production phase marks the end of an era. After Production and feeding cities:- Rotate your action cards back to their usual orientation, making them available again for the new era.
- New cards come into play (details not provided in context, but generally involves refreshing the current era deck).
Final Scoring
The game ends after the Era III Production phase. Players score points for:- Points accumulated throughout the game from cards and Production.
- Connected metropolises (especially brown ones).
- Specific final scoring cards you've claimed.
- The overall composition of your network and your remaining resources (details not provided in context, but check your final scoring card!).
Tips for Winning
Ready to dive into strategy? Here are a couple of pointers to get you started:- Match Those Colors! Don't underestimate the power of matching your card color to
More videos
More rules explanations from the community
In English
-
 Pit Stop: Underwater Cities
-
 How to Play Underwater Cities
-
 Underwater Cities Board Game - How to Play, our BEST one? Index in description.
-
 Learn to Play Underwater Cities
-
 Underwater Cities - Solo Playthrough
-
 Underwater Cities - In Focus
-
 How to play Underwater Cities boardgame - Full teach + Visuals - Peaky Boardgamer
-
 Ten Minute Teach - Underwater Cities
-
 Learn to Play Underwater Cities AND New Discoveries
-
 Underwater Cities Gamesplained - Part 1
-
 Essen 2018 - Underwater Cities - Delicious Games
Rules manual
Official PDF file
Prefer the Official PDF?
Download the official Underwater Cities rulebook or browse it online with our AI rules assistant.
View Rulebook PDF
Frequently Asked Questions
Quick answers about the rules
What is the objective of Underwater Cities?
Welcome, future underwater architects! In *Underwater Cities*, the Earth is bursting at the seams, and Mars is still a distant dream. Your mission, should you choose to accept it, is to dive deep and build the most thriving, self-sustaining underwater nation. You'll be constructing an archipelago of cities, connecting them with vital transportation tunnels, and setting up essential facilities like kelp farms, desalination plants, and laboratories. Your ultimate goal? To score the most points…
How do you set up Underwater Cities?
Alright, let's get this underwater empire started! Here's how to set up your game: Main Game Board: Place the double-sided main game board in the center of your table. Use the side for 3 or 4 players, or the other side for a 2-player game. Components Supply: Keep all the lovely city domes (white for nonsymbiotic, purple for symbiotic), tunnel tiles, building tokens (farms, desalination plants, laboratories), and resource tokens (credits, kelp, biomatter, science, steelplast) in a common…
How do you play Underwater Cities?
A round in *Underwater Cities* is all about smart choices and strategic card play. Here's how it flows: Playing a Turn Players take turns in the order shown on the play-order track. This order is fixed for the round. Start with 3 Cards: You always begin your turn with exactly 3 cards in hand. Choose an Action Slot & Play a Card: On your turn, you'll simultaneously do two things: Choose an Action Slot: Pick an available action slot on the main board. "Available" means no other player has placed…
How does Underwater Cities end, and how do you score?
The game unfolds over 10 rounds, punctuated by three crucial Production phases. Production Phases The era marker advances one space at the end of each round. When it hits a Production space (after rounds 4, 7, and 10), it's Production phase time! Network Production: All players simultaneously produce resources. Every tunnel adjacent to a connected city, and every building in your network, produces something. Upgraded structures produce more. Symbiotic cities produce 2 points each! Nonsymbiotic…
What are some tips for winning Underwater Cities?
Ready to dive into strategy? Here are a couple of pointers to get you started: Match Those Colors! Don't underestimate the power of matching your card color to
Want to compare prices and check reviews?
Find where to buy at the lowest price, price history, and our full game review.
View Underwater Cities
Expansions
Published additional content


Other Games You'll Like
Based on mechanics and theme