How to Play Darkest Dungeon: The Board Game
Mythic Games, Lucrum Games · Board game · 2022What do you want to do now
Ask anything about Darkest Dungeon: The Board Game: rules, setup, components, complexity, price, or whether it fits your group.
Video: How to Play
Start here, then follow the written guide
Step by step
Game Objective
In Darkest Dungeon: The Board Game, players take on the role of adventurers, each with their unique skills and characteristics. They will participate in a Campaign of eleven Quests, divided into four Acts, clearing the various Locations of Monsters and facing their Bosses. Between adventures, they will spend their accumulated riches to upgrade the Hamlet and themselves until they are ready to face the Darkest Dungeon itself.
The Campaign consists of four Acts. The first three Acts are composed of two general Quests and one Boss Quest each. By defeating a Boss, the Heroes end its Imminent Threat and advance the Campaign to the next Act (and Difficulty Level). When the first three Acts are completed, the gate to the Darkest Dungeon will open and the 4th and final Act will occur. If they defeat the final Boss, the Heroes are victorious and the players win the game!
The Heroes can die permanently. If there are not enough Heroes available in the Stagecoach to form a party of four, the Campaign ends and the players have failed the mission. The Campaign also fails if the Heroes are defeated during a Boss Quest.
Setup
Steps 1 through 9 are general setup steps, common to each game:
- Prepare the Stance Trackers and Initiative Deck: Place the Hero and Monster Stance Trackers in the center of the table, facing each other. Leave space near them to place Room Tiles as needed. Choose the orientation that best suits you (vertical or horizontal). Take the 8 Initiative Cards and shuffle them into a single deck; place it near one of the Stance Trackers.
- Prepare the Room Tiles: Find all the Ruins Room Tiles and place them in a pile to the side, within reach.
- Separate the Decks: Separate the Positive Quirks, Negative Quirks, Diseases, Virtues, Afflictions, Ruins Curios, and Level 1 Trinkets Cards and shuffle them into their respective decks. Place them side by side and near the Hero Stance Tracker.
- Build the Monster Deck: The game comes with three groups of Monsters: Common, Ruins, and Darkest Dungeon. Leave all Darkest Dungeon Monsters out of the game until you reach the 10th Quest. Find all Common and Ruins Level 1 Monsters and shuffle them together into a single deck. This is the Monster Deck. The rest will not be needed before you defeat the first Boss, unless a Quest specifies otherwise. Place the Monster Deck near the Monster Stance Tracker.
- Build the Room Deck: Find all the Ruins Room Cards and shuffle them together to form a single deck. Place it near the pile of Rooms.
- Build the Loot Pile: Find the 10 Loot Chest Tokens and shuffle them into a single pile. Place them near the Room Deck and the pile of Rooms.
- Prepare the Tokens: Separate all Wound Tokens and Condition Counters (Bleed, Blight, etc.) by type and place them within reach.
- Prepare the Provisions: Take the 16 Provision Dice and place them within reach. Place the Firewood Token next to the Provision Dice. Gain 10 Gold and place it in a common pool next to your Provisions.
- Prepare the Hero Areas: Give each player two Exploration Dice, a standard ten-sided die, and a Death's Door Die (the red one with skulls). Give each player a Hero Dashboard and a Stress Counter. Place the Stress Counter on the Stress Tracker with the white side up, at 0.
When starting the game and preparing for your first Quest, you will not do anything in the Hamlet beforehand. You can skip the next setup step for now, unless you want to have it ready for when you finish the Quest.
- Prepare the Hamlet: Place the Hamlet Board next to the table. Find the Hamlet Event Cards and shuffle them into a single deck; place it next to the Hamlet Board. Find the Caretaker Token/Miniature and place it next to the Hamlet Board as well. Place two Hero on Standby Tokens in the Stagecoach building on the Hamlet Board.
Now, let's prepare your first Quest!
- Determine the First Imminent Threat: Find the four Ruins Level 1 Boss Cards and shuffle them (there are also Darkest Dungeon Boss Cards, but leave them out of the game for now), then draw one randomly and read its flavor text aloud; this is the first Imminent Threat. Find its Level 1 Threat Card and place it somewhere in the middle of the table, Dungeon side up, for easy access to its rules.
- Choose Heroes: Each player chooses a Hero and takes their miniature. Take their Level 1 Hero Card and place it next to their dashboard. Find their list of seven Level 1 Skills and choose three of them to equip in the Skill Slots of their Hero Dashboard. Set the rest aside. Your Level 2 and 3 Hero and Skill Cards will not be used until you train them to level up, so leave them in the box for now.
- Choose a Quest: Shuffle the Level 1 Quest Cards and form the Quest Deck. Draw two and choose one to play. The other is permanently discarded from the Campaign. Quests grant Experience Points (Xp) when their objectives are completed (allowing Heroes to Level up) and also define the Rooms you will explore in the Dungeon. The Quest also indicates if you are taking Firewood supplies to rest and how many Rest Points it provides (in the upper left corner of the card). If so, take the Firewood Token and place it along with the rest of your Provisions.
- Place your Heroes on the Stance Tracker: Each player must now place their Hero Stance Token on the Hero Stance Tracker. Stances can change throughout the game, but these will be their starting positions. This positioning usually has to do with the Skills players have chosen for their Heroes.
- Set up the Dungeon Layout: Find the Dungeon Tiles, shuffle them, and draw one randomly; place it next to the Hero Stance Tracker or any other convenient location. At the bottom of your Quest Card, you can see which Rooms and how many of each you will encounter in your Quest. Take the Room Tokens indicated on the Quest Card, shuffle them, and place them face down randomly in the Room Slots. Find the Party Miniature and place it on the starting location of the Dungeon Map.
- Light the Light: Place the Light Counter on 5 of the Light Tracker.
- Roll for Provisions: Roll two Provision Dice for each Hero. After rolling, each player who rolled a wild (DD) turns the die to any side they wish. Place all Provision Dice aside in a common pool. This pool can never exceed a maximum of 16 dice.
You are ready to begin!
Game Flow
Refer to the manual for details on this section.
Actions and How to Play
Navigating the Dungeons
In the Dungeon, Heroes can choose to Scout and then must Explore, Backtrack, or Exit the Dungeon.
- Scout (Optional): When Scouting, players can reveal the Rooms adjacent to the one they are in. To Scout, Heroes must suffer 1 Stress each. Then, reveal all adjacent Rooms. Additionally, during their next Exploration and only then, Heroes will roll only one Exploration Die instead of two. This is a group decision, so Heroes will only Scout if all players agree.
- Exploration: During the Exploration Phase, players can discuss tactics and strategies, plan their path, change their Heroes' Stances, and consume any Provisions they wish. When moving from one Room to another, Heroes must explore the Corridor. Heroes move together as a group and cannot separate. Heroes roll two Exploration Dice each and then must take turns resolving them. The turn order is decided by Stance priority: the Hero in the Aggressive Stance goes first, then the Hero in the Defensive Stance, and so on. Players choose which die their Hero resolves first. If Heroes previously Scouted, each will roll only one Exploration Die during this Exploration instead of two.
- Rubble: Rubble blocks your path and must be removed with your hands or a Tool. Spend 1 Tool or suffer 1 Wound per Dungeon Level and suffer 1 Stress.
- Hunger: Hunger overwhelms you and you must eat. Spend 1 Food or suffer 2 Wounds per Hero Level.
- Stressful Darkness: This Corridor is so dark you can barely see what's around you. The Hero who resolves Stressful Darkness must spend 1 Torch or reduce the Light by 1 point or suffer 2 Stress.
- Curio: An object of interest stands before you, calling you to search it. Draw a Curio Card and see what you found. Curios can have positive and negative effects. Usually both at the same time. You can spend 1 Torch before drawing the card to ignore all negative effects of the Curio.
- Trap: An ancient protective mechanism is triggered when you activate it! Spend a Tool or roll an Acc 8/Dungeon Level, Crit 2/Dungeon Level attack against yourself.
- Long Corridors: Some Corridors extend further than others. They are indicated by a gray dot. When moving through a Long Corridor, you must stop at the dot before exploring further. If you Scouted before entering a Long Corridor, the dot will prevent you from Scouting beyond that point (it acts as an adjacent Room).
- Backtracking: When you move from a Room back to one you have already passed, you are considered Backtracking. When the group Backtracks, each Hero suffers 1 Stress for each Corridor the group Backtracks through. No Exploration Dice are rolled.
- Exiting the Dungeon: Heroes can Exit the Dungeon and return to the Hamlet
More videos
More rules explanations from the community
In English
-
 Darkest Dungeon: The Board Game | How To Setup
-
 Darkest Dungeon: The Board Game | Kickstarter Preview | Setup
-
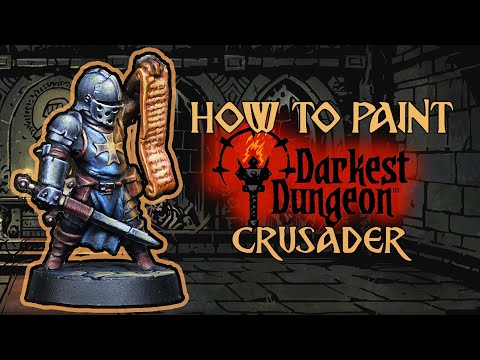 How To Paint Darkest Dungeon - Crusader
-
 Darkest Dungeon | Should You Back It? - Kickstarter Opinion
-
 Hellion Painting Guide - Darkest Dungeon
-
 How To Paint Plague Doctor - Darkest Dungeon
-
 How to paint the Jester - Darkest Dungeon Boardgame
-
 Painting Darkest Dungeon - Highwayman
Rules manual
Official PDF file
Frequently Asked Questions
Quick answers about the rules
What is the objective of Darkest Dungeon: The Board Game?
How do you set up Darkest Dungeon: The Board Game?
How do you play Darkest Dungeon: The Board Game?
Expansions
Published additional content

Other Games You'll Like
Based on mechanics and theme